Pioneer 79AVi Owner's Manual - Page 32
Getting Started, Let's Get Started, Using the on-screen displays
 |
UPC - 012562768335
View all Pioneer 79AVi manuals
Add to My Manuals
Save this manual to your list of manuals |
Page 32 highlights
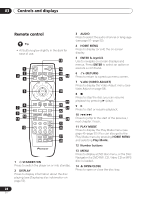
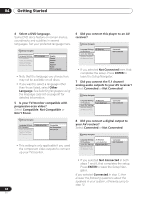
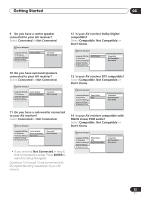
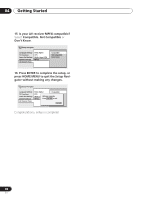
04 Getting Started Let's Get Started When you switch on the player for the first time, you should see a welcome screen displayed on your TV. From here you can let the player know what kind of TV you have, then either use the Setup Navigator to make more settings, or jump right in and start playing some discs. Before continuing, make sure that you've loaded the batteries in the remote control. 2 Use the Joystick (left/right) to select either 'Wide screen (16:9)' or 'Standard size screen (4:3)' according to the kind of TV you have, then press ENTER. Let's Get Started Menu What kind of TV do you have? Use the / cursor buttons to choose, then press ENTER Wide screen (16:9) Standard size screen (4:3) • If you have connected an HDMI-compatible device, the HDMI settings screen will appear instead of the setup screens below. See HDMI Settings on page 71 to make the necessary settings. SETUP MENU TOP MENU - MULTI SPEED + 3 Press ENTER again to finish setting up. Let's Get Started Menu Setup complete If you're finished setting up, choose [Complete], to start again choose [Back] ENTER VIDEO RETURN ADJUST DIMMER JOG MODE V.ADJ FL JOG 7 3 8 4¢ E/ E/ 1¡ PLAY MODE SURROUND 1 Press ENTER to move on to the next screen. Welcome to Pioneer DVD! Thank you for purchasing this Pioneer DVD player. Before using, please take a little time to setup your DVD player Put the batteries into the remote control Next, press the ENTER button on the remote control and start the Let's Get Started Menu Next Complete Back • Select Back then press ENTER if you want to go back and change the setting you just made. Using the on-screen displays For ease of use, this player makes extensive use of graphical on-screen displays (OSDs). You should get used to the way these work as you'll need to use them when setting up the player, using some of the playback features, such as program play, and when making more advanced settings for audio and video. All the screens are navigated in basically the same way, using the joystick to change the highlighted item and pressing ENTER to select it. 32 En
-
 1
1 -
2
-
3
-
4
-
5
-
6
-
7
-
8
-
9
-
10
-
11
-
12
-
13
-
14
-
15
-
16
-
17
-
18
-
19
-
20
-
21
-
22
-
23
-
24
-
25
-
26
-
 27
27 -
 28
28 -
 29
29 -
 30
30 -
 31
31 -
 32
32 -
 33
33 -
 34
34 -
 35
35 -
 36
36 -
 37
37 -
38
-
39
-
40
-
41
-
42
-
43
-
44
-
45
-
46
-
47
-
48
-
49
-
50
-
51
-
52
-
53
-
54
-
55
-
56
-
57
-
58
-
59
-
60
-
61
-
62
-
63
-
64
-
65
-
66
-
67
-
68
-
69
-
70
-
71
-
72
-
73
-
74
-
75
-
76
-
77
-
78
-
79
-
80
-
81
-
82
-
83
-
84
-
85
-
86
-
87
-
88
-
89
-
90
-
91
-
92
-
93
-
94
-
95
-
96
-
97
-
98
-
99
 |
 |
