Pioneer 79AVi Owner's Manual - Page 95
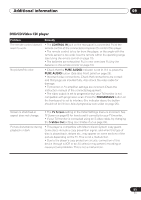
Problem, Remedy
 |
UPC - 012562768335
View all Pioneer 79AVi manuals
Add to My Manuals
Save this manual to your list of manuals |
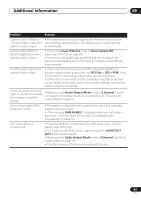
Page 95 highlights
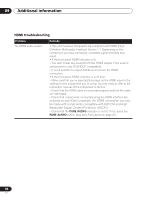
Additional information 09 Problem Remedy No HDMI video output • Make sure that you've selected this player as the HDMI input in the settings for the component you're using. You may need to refer to the instruction manual of the component to do this. • It is not possible to output SACD sources from the HDMI connection. • Check that the HDMI cable is connected properly and that the cable isn't damaged. • Check that components connected using the HDMI interface are switched on and HDMI compatible. (An HDMI connection can only be made with components compatible with both DVI and High Bandwidth Digital Content Protection (HDCP).) • This unit has been designed to be compliant with HDMI (High Definition Multimedia Interface) Version 1.1. Depending on the component you have connected, unreliable signal transfers may result. • Check that the PURE AUDIO indicator is not lit. If it is, press the PURE AUDIO button (See also Front panel on page 25). • Make sure the resolution on this player matches that of the component you have connected using HDMI. See HDMI Settings on page 71 to change the HDMI resolution. No multichannel HDMI audio. • Make sure the Audio setting in the HDMI menu is set to Auto (see HDMI Settings on page 71 to do this). A connected HDMI component doesn't work with this player. • This unit has been designed to be compliant with HDMI (High Definition Multimedia Interface) Version 1.1. Depending on the component you have connected, using a DVI connection may result in unreliable signal transfers. Color problems occur with • You can correct this by choosing an input setting on your monitor your monitor after changing according to the setting you've selected (see the table in the note the Video Adjust (page 58), following Video Memory on page 73). Video Memory (page 73). 95 En
-
 1
1 -
2
-
3
-
4
-
5
-
6
-
7
-
8
-
9
-
10
-
11
-
12
-
13
-
14
-
15
-
16
-
17
-
18
-
19
-
20
-
21
-
22
-
23
-
24
-
25
-
26
-
27
-
28
-
29
-
30
-
31
-
32
-
33
-
34
-
35
-
36
-
37
-
38
-
39
-
40
-
41
-
42
-
43
-
44
-
45
-
46
-
47
-
48
-
49
-
50
-
51
-
52
-
53
-
54
-
55
-
56
-
57
-
58
-
59
-
60
-
61
-
62
-
63
-
64
-
65
-
66
-
67
-
68
-
69
-
70
-
71
-
72
-
73
-
74
-
75
-
76
-
77
-
78
-
79
-
80
-
81
-
82
-
83
-
84
-
85
-
86
-
87
-
88
-
89
-
 90
90 -
 91
91 -
 92
92 -
 93
93 -
 94
94 -
 95
95 -
 96
96 -
 97
97 -
 98
98 -
 99
99
 |
 |