Pioneer SVM 1000 SVM-1000 Operating Instructions - Page 13
Basic Operations - audio
 |
UPC - 012562870540
View all Pioneer SVM 1000 manuals
Add to My Manuals
Save this manual to your list of manuals |
Page 13 highlights
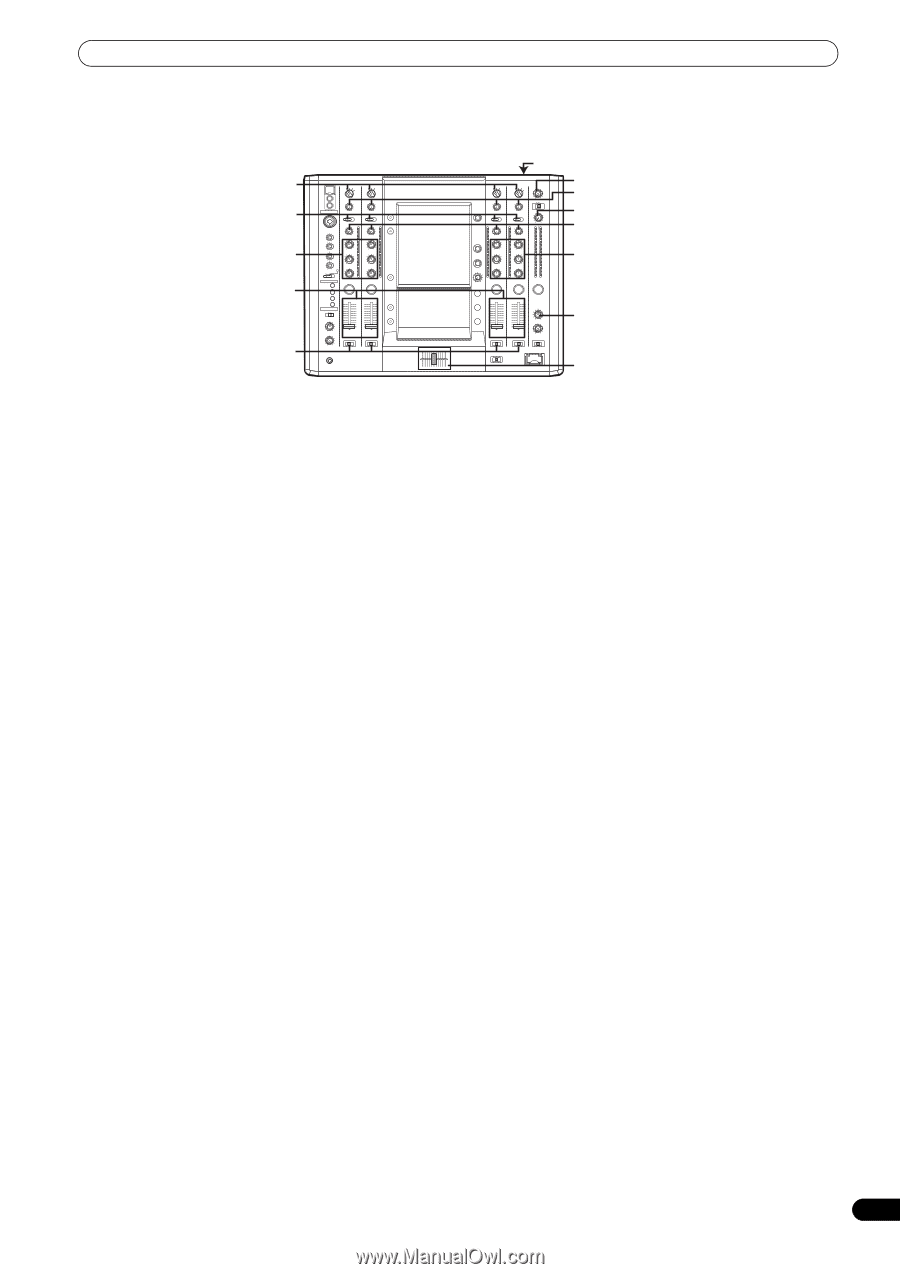
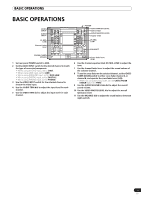
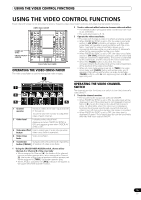
BASIC OPERATIONS BASIC OPERATIONS VIDEO INPUT AUDIO INPUT HI HI, MID, LOW Channel fader lever CROSS FADER ASSIGN 1 Set rear panel POWER switch to [ON]. 2 Set the AUDIO INPUT switch for the desired channel to match the type of connected component. • When using the DVD input, set to [DVD]. • When using LINE input, set to [LINE]. • When using DVD/LINE input, set to [DVD/LINE]. • When using DIGITAL input, set to [DIGITAL]. • When using PHONO input, set to [PHONO]. 3 Use the VIDEO INPUT switch for the selected channel to choose the video input. 4 Use the AUDIO TRIM dial to adjust the input level for each channel. 5 Use the VIDEO TRIM dial to adjust the input level for each channel. POWER VIDEO MASTER LEVEL VIDEO TRIM AUDIO MASTER LEVEL AUDIO TRIM HI, MID, LOW 10 10 9 9 8 8 7 7 6 6 5 5 4 4 3 3 2 2 1 1 0 0 BALANCE Cross fader lever (A/B) 6 Use the channel equalizer dials (HI, MID, LOW) to adjust the tone. 7 Use the channel fader lever to adjust the sound volume of the selected channel. 8 To use the cross fader on the selected channel, set the CROSS FADER ASSIGN switch to either cross fader channel A or channel B, and operate the cross fader lever (A/B). • When not using the cross fader, set the CROSS FADER ASSIGN switch to [THRU]. 9 Use the AUDIO MASTER LEVEL dial to adjust the overall sound volume. 10 Use the VIDEO MASTER LEVEL dial to adjust the overall luminance level. 11 Use the BALANCE dial to adjust the sound balance between right and left. 13 En
-
 1
1 -
2
-
3
-
4
-
5
-
6
-
7
-
 8
8 -
 9
9 -
 10
10 -
 11
11 -
 12
12 -
 13
13 -
 14
14 -
 15
15 -
 16
16 -
 17
17 -
 18
18 -
19
-
20
-
21
-
22
-
23
-
24
-
25
-
26
-
27
-
28
-
29
-
30
-
31
-
32
-
33
-
34
-
35
-
36
-
37
-
38
-
39
-
40
-
41
-
42
-
43
-
44
-
45
-
46
-
47
-
48
 |
 |