Ricoh 2045 Basics Guide
Ricoh 2045 - Type Print Server Manual
 |
UPC - 026649003776
View all Ricoh 2045 manuals
Add to My Manuals
Save this manual to your list of manuals |
Ricoh 2045 manual content summary:
- Ricoh 2045 | Basics Guide - Page 1
FAX Option Type 2045 Operating Instructions Facsimile Reference 1 Getting Started 2 Faxing 3 Registering 4 Troubleshooting For safe and correct use of this machine, please be sure to read the Safety Information in the General Settings Guide before you use it. - Ricoh 2045 | Basics Guide - Page 2
FAX Option Type 2045 Operating Instructions Facsimile Reference Printed in the Netherlands GB GB B547-8600 - Ricoh 2045 | Basics Guide - Page 3
and notes about the use of this machine. To get maximum versatility from this machine all operators are requested to read this manual carefully and follow the instructions. Please keep this manual in a handy place near the machine. Notes Some illustrations in this manual might be slightly different - Ricoh 2045 | Basics Guide - Page 4
. Local PSTN compatibility is dependent on software switch settings. Please contact your service representative if relocating this product to another country. In the event of problems, please contact your service representative in the first instance. The CE Declaration of Conformity is available on - Ricoh 2045 | Basics Guide - Page 5
Instructions for Printer/Scanner" • CD-ROM 2"Scanner Driver & Document Management Utilities" ❖ General Settings Guide Provides an overview of the machine. It also describes System Settings (such as paper trays and user codes settings), Document Server functions, and troubleshooting. ❖ Network Guide - Ricoh 2045 | Basics Guide - Page 6
for DeskTopBinder V2 Lite DeskTopBinder V2 Lite is a utility included on the CD-ROM labeled "Scanner Driver & Document Management Utilities". • DeskTopBinder V2 Lite Setup Guide (PDF file - CD-ROM2) Describes installation of, and the operating environment for DeskTopBinder V2 Lite in detail. This - Ricoh 2045 | Basics Guide - Page 7
Manual 1 Symbols ...1 1. Getting Started Control Panel...3 Reading the Display 5 Reading the Display Panel and Using Keys 5 Standby Display...6 Communication Display 7 User Code Key 26 Scan Settings ...27 Resolution ...27 Original Type...28 Image Density (Contrast 29 Mixing Scan Settings for a - Ricoh 2045 | Basics Guide - Page 8
41 Programming...42 Editing ...43 Deleting ...45 Programming Fax Destinations 46 4. Troubleshooting Adjusting the Volume 47 When the {Facsimile} Key Is Lit in Red 48 When Toner Runs Out 49 Error Messages and Their Meanings 50 Solving Problems 52 Finding Operational Solutions 54 INDEX...55 iv - Ricoh 2045 | Basics Guide - Page 9
How to Read This Manual Symbols In this manual, the following symbols are used: R WARNING: This symbol indicates a potentially hazardous situation that might result in death or serious injury when you misuse the machine without following the instructions under this symbol. Be sure to read the - Ricoh 2045 | Basics Guide - Page 10
2 - Ricoh 2045 | Basics Guide - Page 11
} key to : Data In indicator L: Service Call indicator check the settings selected for the fax about to be sent. x: Misfeed indicator 5. {Program} key M: Open Cover indicator Enables you to program frequently used d: Add Staple indicator D: Add Toner indicator B: Paper run-out indicator See - Ricoh 2045 | Basics Guide - Page 12
the ma- display the error message and take ap- Manual Reception. See p.40 "Receiving a Fax in Manual Reception Mode". 15. {On Hook Dial} key Note Press when manual facsimile reception is ❒ The Operation switch does not func- set, or using facsimile information servic scanning, copying, or printing - Ricoh 2045 | Basics Guide - Page 13
of time. You can select the period using the Fax Reset Timer. See "Timer Settings", General Settings Guide. Reading the Display Panel and Using Keys Display contents will differ depending on installed optional units. ❖ Initial Display 1. Displays the scanning conditions and sizes you can select - Ricoh 2045 | Basics Guide - Page 14
Getting Started ❖ Destination List 1 1. Appears on Quick Dial keys pro- grammed with a group of destinations. 2. Appears on Quick Dial keys pro- grammed as a transfer station. Standby Display While the machine is in standby mode (immediately after the {Facsimile} key is pressed or after the { - Ricoh 2045 | Basics Guide - Page 15
to fax a message or receive a mes- sage, you can still scan another original into memory. See p.73 "Dual Access", Facsimile Reference . ❒ Even when the machine is being used as a copier, printer, or scanner, the sender name or number will appear for received faxes. ❖ Immediate - Ricoh 2045 | Basics Guide - Page 16
user or department. Note ❒ You can specify a user code with "System Settings". See the General Settings Guide. ❒ Even when User Code Management is on, you can still receive and print fax messages as normal. A Enter a user code of up to eight digits using the number keys. B Press [#]. Note ❒ If an - Ricoh 2045 | Basics Guide - Page 17
quickly or when you want to check the destination you are sending to. When using this type of transmission, the original is not stored in memory. You can the machine is switched on again, a Power Failure Report will be printed. On this report, you can see which files were deleted. See p.175 "Power - Ricoh 2045 | Basics Guide - Page 18
]. See p.130 "General Settings/Adjustment", Facsimile Reference . ❒ You can have the machine return to default mode after each transmission using [Scan End Reset] under [Gen. Settings/Adjust]. See p.130 "General Settings/Adjustment", Facsimile Reference . 10 - Ricoh 2045 | Basics Guide - Page 19
way you place the original de- pends on its size and whether you are using the ADF or the exposure glass. *1 See p.17 "Original sizes difficult to place originals as shown in the above illustration, the fax header will be printed on received faxes at the destination as follows: • *1 On the top - Ricoh 2045 | Basics Guide - Page 20
(i.e. custom) size or part of a large original, you can specify the scan area precisely. See p.14 "Setting a Scan Area". ❒ Custom size documents are scanned as regular size documents, so the receiver may find extra blank margins or edges of images missing. If you specify a scan area, only that area - Ricoh 2045 | Basics Guide - Page 21
bound original, the received image may contain some black areas. To reduce this effect, hold down the original to prevent the bound part from rising. ❒ If glass. Placing Originals in the Optional Auto Document Feeder (ADF) Use the ADF to scan in a stack of originals in one operation. The ADF can - Ricoh 2045 | Basics Guide - Page 22
Scan Area 1. Limit mark 2. Document guide Originals containing staples or clips parts • Sticky originals, such as translucent paper • Thin and soft originals Normally, a placed document is scanned according to the automatically detected size. If a scan area is specified, the document is scanned - Ricoh 2045 | Basics Guide - Page 23
with Image Rotation", Facsimile Reference . B Press the size of the originals to be sent, and then press [OK]. A Place the originals, and then se- lect any scan settings you require. Note ❒ When placing different size originals into the ADF, adjust the document guide to - Ricoh 2045 | Basics Guide - Page 24
B Press [OK]. 2 B Press [OK]. "Mixed original sizes" is shown above the highlighted [Scan Area]. Specifying Auto Detect A Press [Auto Detect]. The selected scan area is shown above the highlighted [Scan Area]. Specifying Mixed Original Sizes A Press [Mixed Original Sizes]. B Press [OK]. "Auto - Ricoh 2045 | Basics Guide - Page 25
kinds of originals. If this happens, the receiving machine may not select print paper of the correct size. • Documents placed on the exposure glass of table below • Originals with index tabs, tags, or protruding parts 2 • Transparent originals, such as OHP transparencies or translucent paper - Ricoh 2045 | Basics Guide - Page 26
fax scanned and sent one by one). function upgrade unit). Memory Transmission is useful because: soon as the main power switch is turned nal images and the scan settings. You can store up to 320 standard when sending important messag- to the default transmission mode es. (Memory Transmission - Ricoh 2045 | Basics Guide - Page 27
sending the same orignal to several destinations (broadcasting), press [Add] to specify the destinations. Reference p.27 "Scan Settings" Note ❒ You do not have to press [Add] when adding a destination using the destination list. ❒ If you do not want to do a broadcast transmission, pro- ceed to - Ricoh 2045 | Basics Guide - Page 28
Sending originals using the exposure glass A Place the first page of your original face down on the exposure glass. B Dial a destination. C Make the scan settings the exposure glass within 60 seconds after the machine has finished scanning the first original. The following display appears. B After - Ricoh 2045 | Basics Guide - Page 29
Canceling a Memory Transmission Before the Original Is Scanned While the Original Is Being Use this procedure to cancel a trans- Transmitted mission before pressing the {Start} key. Note 2 A Press the {Clear Modes} key. ❒ If the transmission finishes while you are carrying out this proce - Ricoh 2045 | Basics Guide - Page 30
shown, press [U Prev.] or [T Next] to find Before the Transmission Is Started it. C Press [Stop Transmission]. Use this procedure to cancel a transmission after the original has been scanned. 2 A Press [Change/Stop TX File]. Note ❒ To cancel another file, repeat steps B and C. D Press [Exit - Ricoh 2045 | Basics Guide - Page 31
Note ❒ To cancel another file, repeat steps B and C. D Press [Exit]. The standby display appears. Canceling a Memory Transmission 2 23 - Ricoh 2045 | Basics Guide - Page 32
scans all pages into memory before dialing the desti- nation. Immediate Transmission is useful can have the machine return to the default transmission mode (Memory Transmission or Immediate pages from the ADF. When you have finished scanning from the exposure glass, place the remainning pages - Ricoh 2045 | Basics Guide - Page 33
scan settings you re- quire. -Sending originals using the exposure glass Reference p.27 "Scan Settings" D Dial a destination. A Place the first page face down on the exposure glass. B Dial a destination. C Make the scan seconds after the machine has finished scanning the first original. F - Ricoh 2045 | Basics Guide - Page 34
the {Clear/Stop} key, and then remove the original. Note ❒ You can also cancel an Immedi- ate Transmission by pressing [Stop Transmission]. ❒ If the transmission finishes while you are carrying out this procedure, it will not be canceled. 26 - Ricoh 2045 | Basics Guide - Page 35
/Photo, Photo ❖ Image Density (Contrast): Auto Image Density, Manual Image Density (seven levels) Resolution Images and text are scanned into the machine by may take place using Detail resolution if the other party's machine does not support this function. ❒ The machine supports Standard, Detail, - Ricoh 2045 | Basics Guide - Page 36
to the resolution default setting af- Original image clarity. ❖ Text Select [Text] to send high-contrast black-and-white image originals. Use Image Density (Contrast)". ❒ You can set the original type that is selected right after the machine is turned on or modes are cleared, with [Scan End Reset - Ricoh 2045 | Basics Guide - Page 37
Scan Settings ❒ You can have the machine return to the original type default setting Image Density ( Manual Image Density Use manual image density to set image density yourself. You can select one of seven image density levels. ❖ Combined Auto and Manual Image Density You can only adjust image - Ricoh 2045 | Basics Guide - Page 38
the machine return to the image density default setting after every transmission, with [Scan End Reset] under [Gen. Settings/Adjust]. See p.130 "General Settings/Adjustment", Facsimile Reference . 2 A Select the type of image density. Auto Image Density A Make sure that [Auto - Ricoh 2045 | Basics Guide - Page 39
page and place the next page. Note ❒ Depending on what time the scan settings are adjusted, the settings may not be reflected in the resulting operation. A Check which pages you want to scan with different settings. B Select the image density, resolu- tion, and original type before the next page is - Ricoh 2045 | Basics Guide - Page 40
: Note ❒ If you make a mistake, press the ❖ Number Keys 2 p.32 "Number Keys" ❖ Quick Dials p.33 "Using Destination Lists" {Clear/Stop} key, and then enter again. ❒ If the optional extra G3 interface unit is installed, select G3 before you proceed to the next step. This section covers these - Ricoh 2045 | Basics Guide - Page 41
dial- ing line). When you press the {Tone} key, the machine dials the number using tonal signals. D Enter the ID number using the number keys. Limitation ❒ Certain services may be unavaila- Using Destination Lists ble when using the {Tone} key. Note ❒ A tone is shown as a "•" on the dis- play - Ricoh 2045 | Basics Guide - Page 42
contents of Quick Dial, print the Destination list. See "Key Operator Tools", General Settings Guide. ❒ A stored name can be printed out on the first Guide. ❒ A total of 500 destinations (per message) can be programmed for Group Dial. A Place the original, and then select the scan settings - Ricoh 2045 | Basics Guide - Page 43
Specifying a group of destinations A Press the Quick Dial key programmed with the desired group. Note ❒ If the desired Quick Dial key is not shown, press [U] and [T] to look through the list. ❒ To cancel the selection, press the selected Quick Dial key again. You can also press the {Clear / Stop} - Ricoh 2045 | Basics Guide - Page 44
magnifier icon. A search-in-progress message appears. When the search is finished, a result appears. Note ❒ A warning appears if the search returns .by Dest. Name]. 36 Note ❒ If the desired destination does not appear, use [U] or [T] to scroll through the list. ❒ If the search returns more than - Ricoh 2045 | Basics Guide - Page 45
icon. 2 B Press [Search by Fax No.]. Note ❒ If the desired destination does not appear, use [U] or [T] to scroll through the list. Limitation ❒ If the search rerurns more than 100 destinations again. A search-in-progress message appears. When the search is finished, a re- sult appears. 37 - Ricoh 2045 | Basics Guide - Page 46
The corresponding destination appears. The registration number entry display appears. B Enter a registration number using the number keys. Note ❒ If the entered registration number has not been programmed, an error message appears. Press [Exit]. The screen returns to that of step A. Note ❒ You - Ricoh 2045 | Basics Guide - Page 47
, you mode when a line other than the can switch reception mode quickly. standard G3 line (G3-2 or G3-3) is used. Note ❒ You can only use this function af- ❖ Manual Reception ter programming a Quick Opera- When a telephone call comes in, tion key as the reception mode the machine rings. If - Ricoh 2045 | Basics Guide - Page 48
placed.) C Replace the handset of the exter- nal telephone. The machine will start receiving. Limitation ❒ When printing documents stored in the Document Server, the {Start Manual RX} key or the {Start} key cannot be used to switch to facsimile mode. Press the {2} key of the external telephone. 40 - Ricoh 2045 | Basics Guide - Page 49
should include your name in the Fax Header. You can program Fax Header1 or Fax Header2. When you send originals using Quick Dial, you can select which Fax Header will be printed on the message received by the other party. Note ❒ You can register up to 32 characters in the Fax Header - Ricoh 2045 | Basics Guide - Page 50
and then press [OK]. B Press [Facsimile Features]. Note ❒ If the key operator code is registered and turned on, enter the key operator code and press the [OK] key. C Press [Program Fax Information]. Reference "Entering Text", General Settings Guide Registering an Own Name A Press [Own Name]. 42 - Ricoh 2045 | Basics Guide - Page 51
and Adjustments Note ❒ The display differs depend- ing on the optional units installed on your machine. C Enter your own facsimile's number using the number keys, and then press [OK]. 3 Reference "Entering Text", General Settings Guide Registering an Own Fax Number A Press [Own Fax Number]. Note - Ricoh 2045 | Basics Guide - Page 52
Registering B Press [Facsimile Features]. F Press [Backspace] or [Delete All], and then reenter the name or number. 3 C Press [Program Fax Information]. Note ❒ Press [Clear] or the {Clear/Stop} key if you want to edit Own Fax Number. G Press [OK]. D Press [Fax Header], [Own Name], or [Own Fax - Ricoh 2045 | Basics Guide - Page 53
Initial Settings and Adjustments Deleting E Press the item you want to delete. Note ❒ The following procedure explains how to delete Own Name, as an example of deleting. A Press the {User tools/Counter} key. F Press [Backspace] or [Delete All], 3 and then press [OK]. B Press [Facsimile - Ricoh 2045 | Basics Guide - Page 54
Registering Programming Fax Destinations You can program fax destinations using Address Book Management in the Key Operator Tools menu under System Settings. You can also 3 been updated. Press [Exit]. The initial display appears. Reference "Key Operator Tools", General Settings Guide 46 - Ricoh 2045 | Basics Guide - Page 55
connects to the destination. ❖ At Printing Heard when a received message is printed. See p.84 "Print Completion Beep", Facsimile Reference - Ricoh 2045 | Basics Guide - Page 56
4 Problem The paper output tray is full. A facsimile error has occurred. out of paper Solutions Remove the paper from the tray. The facsimile has a problem. Contact your service representative. The copier will still function normally. add more paper "Loading Paper", General Settings Guide 48 - Ricoh 2045 | Basics Guide - Page 57
Report, Poll- ing Reserve Report, and Confidential File Report are not printed. Note ❒ If the standby screen is not dis- played, press the the standby screen is displayed. When Toner Runs Out 4 B Press [Exit], and then perform tras- mission operation. The error message disappears. See p.18 "Memory - Ricoh 2045 | Basics Guide - Page 58
{Start} key. L Call Service Functional problems with facsimile. Please call service. There is a problem with the fax. Record the code number shown in the display and contact your service representative. The copy function will still work normally. Memory is full. Cannot scan more. Transmit- If you - Ricoh 2045 | Basics Guide - Page 59
Error Messages and Their Meanings -Out of paper display message If the paper tray runs out of paper, "No paper. Load it, then press [Exit]." appears - Ricoh 2045 | Basics Guide - Page 60
Troubleshooting Solving Problems This table lists some common problems and their solutions. Problem Causes and solutions Reference Image background appears dirty when received at the other end. Adjust scan density. p.29 "Image Density (Contrast)" Printed or sent image contains The ADF or - Ricoh 2045 | Basics Guide - Page 61
Solving Problems Problem Causes Check the setting. When using On Hook Dial or If the machine fails to detect p.14 "Setting a Scan Area" Manual Dial, "Receiving" ap Power Fail- tion, or Auto Document. ure Report is automatically printed when the machine is turned on. If fax messages stored for - Ricoh 2045 | Basics Guide - Page 62
Troubleshooting Finding Operational Solutions This table introduces you to solutions for some operational problems that you may frequently encounter. Problem Solution Refer to You want to cancel a Memory If the original is being p.21 "Canceling a Memory Transmission. scanned, press [Cancel] - Ricoh 2045 | Basics Guide - Page 63
Adjusting The Volume, 47 At Dialing, 47 At Printing, 47 At list, 33 Detail, 27 Display, 5 Display Panel, 3 E Error Messages, 50 F {Facsimile} key, 4, 48 Fax Header, Image Density (Contrast), 27, 29 Immediate Transmission, 9, 24 Canceling, 26 K {#} key (Enter key), 4 M Main power indicator, 3 Manual - Ricoh 2045 | Basics Guide - Page 64
, 41 S Scan Settings, 27 Solving Problems, 52 Standard, 27 {Start} key, 4 {Start Manual RX} key, 4 Super Fine, 27 Switching between Memory Transmission and Immediate Transmission, 10 Switching Reception (RX) modes, 39 T Text, 28 Text / Photo, 28 Tone, 33 {Tone} key, 4 Toner, 49 Troubleshooting, 47
-
 1
1 -
 2
2 -
 3
3 -
 4
4 -
 5
5 -
 6
6 -
 7
7 -
8
-
9
-
10
-
11
-
12
-
13
-
14
-
15
-
16
-
17
-
18
-
19
-
20
-
21
-
22
-
23
-
24
-
25
-
26
-
27
-
28
-
29
-
30
-
31
-
32
-
33
-
34
-
35
-
36
-
37
-
38
-
39
-
40
-
41
-
42
-
43
-
44
-
45
-
46
-
47
-
48
-
49
-
50
-
51
-
52
-
53
-
54
-
55
-
56
-
57
-
58
-
59
-
60
-
61
-
62
-
63
-
64
 |
 |
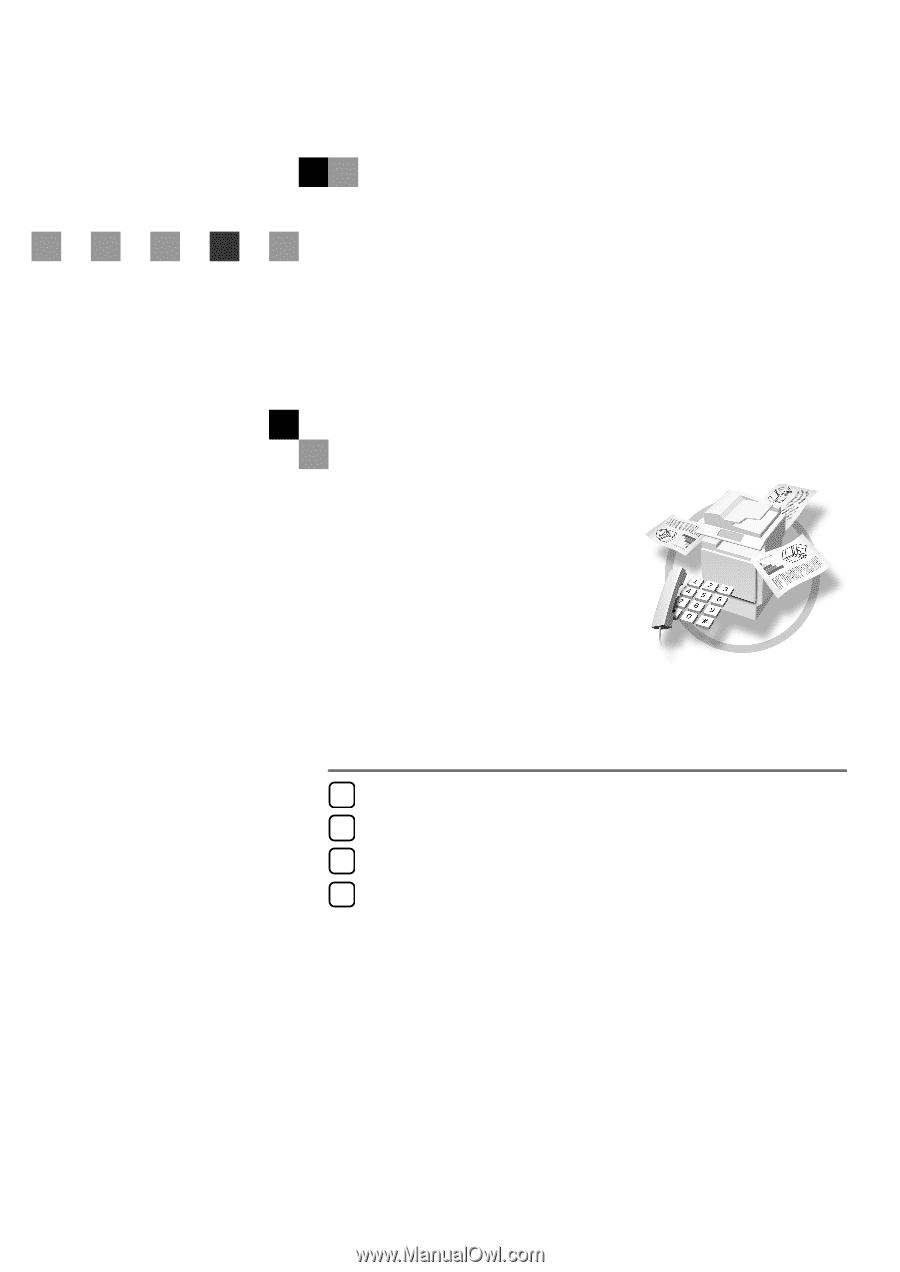
FAX Option Type 2045
Operating Instructions
Facsimile Reference
<Basic Features>
For safe and correct use of this machine, please be sure to read the Safety Information in the
General Settings Guide before you use it.
Getting Started
Faxing
Registering
Troubleshooting
1
2
3
4