Ricoh CL7200 Maintenance Manual - Page 53
Remove the development unit. Hook your finger into the green tab - developer
 |
UPC - 026649024115
View all Ricoh CL7200 manuals
Add to My Manuals
Save this manual to your list of manuals |
Page 53 highlights
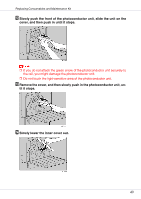
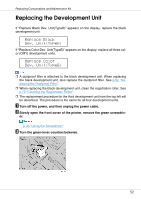
Replacing Consumables and Maintenance Kit D Loosen the two screws fastening the inner cover, using the provided screwdriver. You cannot remove these two screws. E Lift the inner cover until it clicks into place and holds. The development units are installed as shown. Starting from the upper left, the units are attached in the order of black (K), yellow (Y), cyan (C), and magenta (M). F Remove the development unit. Hook your finger into the green tab in front of the development unit you want to replace, and then pull it out halfway. 53
-
 1
1 -
2
-
3
-
4
-
5
-
6
-
7
-
8
-
9
-
10
-
11
-
12
-
13
-
14
-
15
-
16
-
17
-
18
-
19
-
20
-
21
-
22
-
23
-
24
-
25
-
26
-
27
-
28
-
29
-
30
-
31
-
32
-
33
-
34
-
35
-
36
-
37
-
38
-
39
-
40
-
41
-
42
-
43
-
44
-
45
-
46
-
47
-
 48
48 -
 49
49 -
 50
50 -
 51
51 -
 52
52 -
 53
53 -
 54
54 -
 55
55 -
 56
56 -
 57
57 -
 58
58 -
59
-
60
-
61
-
62
-
63
-
64
-
65
-
66
-
67
-
68
-
69
-
70
-
71
-
72
-
73
-
74
-
75
-
76
-
77
-
78
-
79
-
80
-
81
-
82
-
83
-
84
-
85
-
86
-
87
-
88
-
89
-
90
-
91
-
92
-
93
-
94
-
95
-
96
-
97
-
98
-
99
-
100
-
101
-
102
-
103
-
104
-
105
-
106
-
107
-
108
-
109
-
110
-
111
-
112
-
113
-
114
-
115
-
116
-
117
-
118
-
119
-
120
-
121
-
122
-
123
-
124
-
125
-
126
-
127
-
128
-
129
-
130
-
131
-
132
-
133
-
134
-
135
-
136
-
137
-
138
-
139
-
140
-
141
-
142
-
143
-
144
-
145
-
146
-
147
-
148
-
149
-
150
-
151
-
152
-
153
-
154
-
155
-
156
-
157
-
158
-
159
-
160
-
161
-
162
-
163
-
164
-
165
-
166
-
167
-
168
-
169
-
170
-
171
 |
 |
Replacing Consumables and Maintenance Kit
53
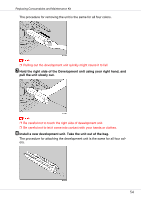
D
Loosen the two screws fastening the inner cover, using the provided
screwdriver.
You cannot remove these two screws.
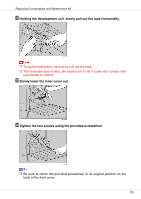
E
Lift the inner cover until it clicks into place and holds.
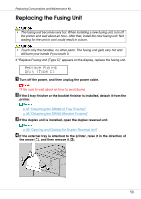
The development units are installed as shown. Starting from the upper left, the
units are attached in the order of black (K), yellow (Y), cyan (C), and magenta
(M).
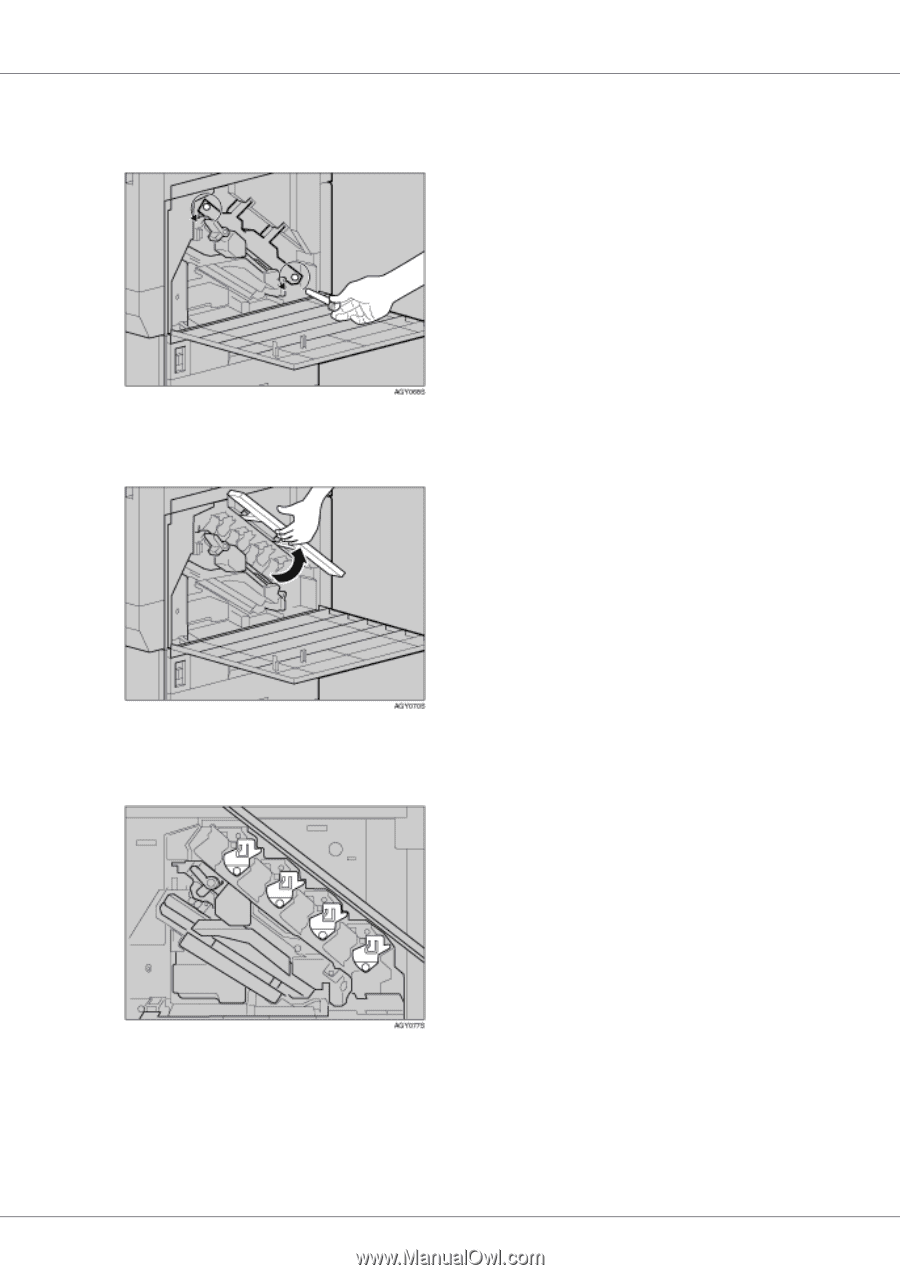
F
Remove the development unit. Hook your finger into the green tab in
front of the development unit you want to replace, and then pull it out
halfway.