Samsung SCX 6555N User Manual (ENGLISH) - Page 19
Control panel overview, Machine Setup, Job Status, Status, Display screen, number keypad, Clear - user guide
 |
UPC - 635753610314
View all Samsung SCX 6555N manuals
Add to My Manuals
Save this manual to your list of manuals |
Page 19 highlights
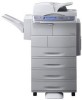
CONTROL PANEL OVERVIEW 1 Machine Setup 2 Job Status 3 Status 4 Display screen 5 number keypad 6 Clear 7 Redial/Pause 8 On Hook Dial 9 Interrupt 10 Clear All 11 Power Saver 12 Stop 13 Start Leads you to the machine setup and advanced settings. (See "Machine Setup" on page 72.) Shows the jobs currently running, queued jobs or completed jobs. Shows the status of your machine. (See "Understanding the Status LED" on page 20.) Displays the current machine status and prompts during an operation. You can set menus easily using the touch screen. Dials fax number, and enters the number value for document copies or other options. Deletes characters in the edit area. In standby mode, redials the last number, or in edit mode, inserts a pause into a fax number. Engages the telephone line. Stops a job in process to do an urgent copy job. Reverts the current settings to the default values. Sends the machine into the power saver mode. (See "Using energy saving feature" on page 28.) Stops an operation at any time. The pop up window appears on the screen showing the current job that the user can stop or resume. Starts a job. • All illustrations on this user's guide may differ from your machine depending on its options or models. • When you use the touch screen, use your finger only. The screen may be damaged with a sharpen pen or else. Introduction_ 18
-
 1
1 -
2
-
3
-
4
-
5
-
6
-
7
-
8
-
9
-
10
-
11
-
12
-
13
-
 14
14 -
 15
15 -
 16
16 -
 17
17 -
 18
18 -
 19
19 -
 20
20 -
 21
21 -
 22
22 -
 23
23 -
 24
24 -
25
-
26
-
27
-
28
-
29
-
30
-
31
-
32
-
33
-
34
-
35
-
36
-
37
-
38
-
39
-
40
-
41
-
42
-
43
-
44
-
45
-
46
-
47
-
48
-
49
-
50
-
51
-
52
-
53
-
54
-
55
-
56
-
57
-
58
-
59
-
60
-
61
-
62
-
63
-
64
-
65
-
66
-
67
-
68
-
69
-
70
-
71
-
72
-
73
-
74
-
75
-
76
-
77
-
78
-
79
-
80
-
81
-
82
-
83
-
84
-
85
-
86
-
87
-
88
-
89
-
90
-
91
-
92
-
93
-
94
-
95
-
96
-
97
-
98
-
99
-
100
-
101
-
102
-
103
-
104
-
105
-
106
-
107
-
108
-
109
-
110
-
111
-
112
-
113
-
114
-
115
-
116
-
117
-
118
-
119
-
120
-
121
-
122
-
123
-
124
-
125
-
126
-
127
-
128
-
129
-
130
-
131
-
132
-
133
-
134
-
135
-
136
-
137
-
138
-
139
-
140
-
141
-
142
-
143
-
144
-
145
-
146
-
147
-
148
-
149
-
150
-
151
-
152
-
153
-
154
-
155
-
156
-
157
-
158
-
159
-
160
-
161
-
162
-
163
-
164
-
165
-
166
-
167
-
168
-
169
-
170
-
171
-
172
-
173
-
174
-
175
 |
 |
