Samsung SCX 6555N User Manual (ENGLISH) - Page 76
Copy Setup, Fax Setup, Machine ID & Fax
 |
UPC - 635753610314
View all Samsung SCX 6555N manuals
Add to My Manuals
Save this manual to your list of manuals |
Page 76 highlights
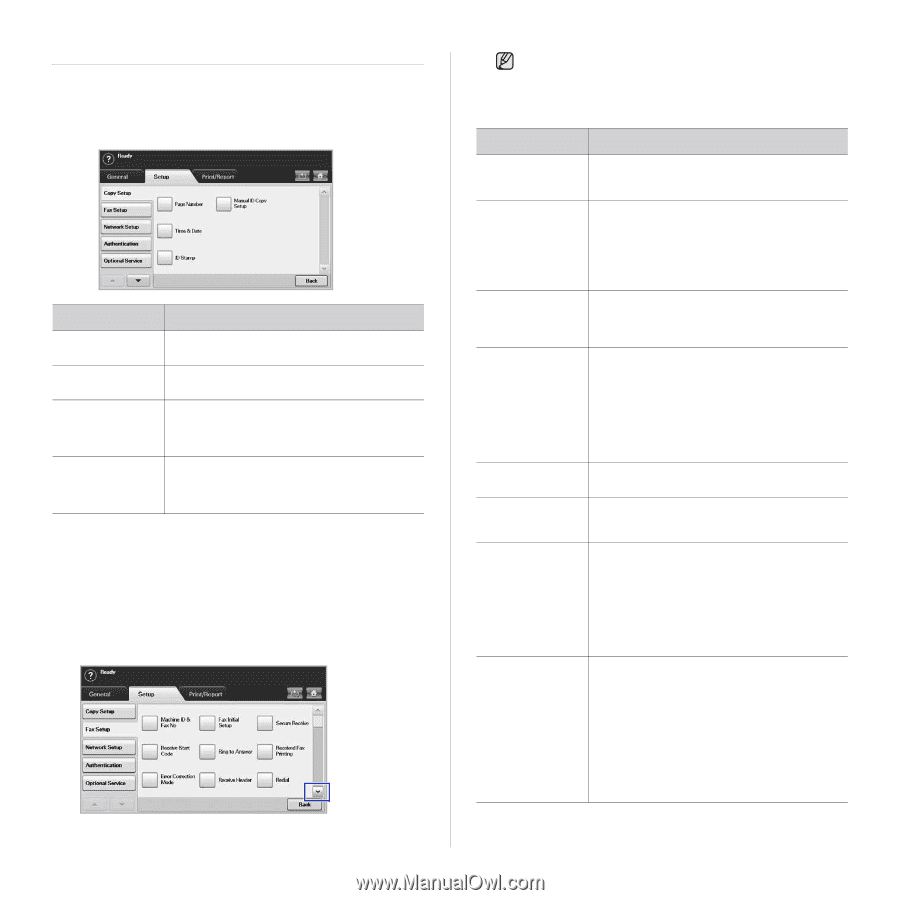
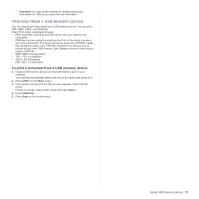
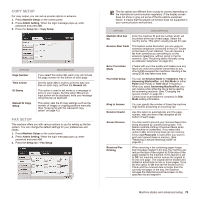
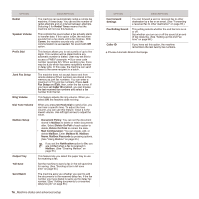
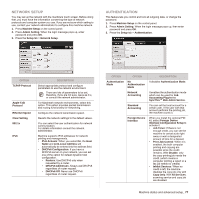
COPY SETUP For copy output, you can set up several options in advance. 1. Press Machine Setup on the control panel. 2. Press Admin Setting. When the login message pops up, enter password and press OK. 3. Press the Setup tab > Copy Setup. OPTION Page Number Time & Date ID Stamp Manual ID Copy Setup DESCRIPTION If you select this option On, each copy will include the page number on the bottom of each page. Set this option On in order to print the date and time on each copy, set from the General tab. This option is used to set words or a message to print on your copies. Set this option On and an input screen will be displayed, write your message using the pop up keyboard. This option sets the ID copy settings such as the number of images or copying positions manually. (See "Copying ID with the manual ID copy option" on page 43.) FAX SETUP This machine offers you with various options to you for setting up the fax system. You can change the default settings for your preferences and needs. 1. Press Machine Setup on the control panel. 2. Press Admin Setting. When the login message pops up, enter password and press OK. 3. Press the Setup tab > Fax Setup. The fax options are different from country to country depending on the international communication regulatory. If the display screen does not show or gray out some of the fax options explained herein, it means that the grayed out function does not supported in your communication environment. OPTION DESCRIPTION Machine ID & Fax No Enter the machine ID and fax number which will be printed at the top of each page. Select the country name. This option usually pre-set for user. Receive Start Code This feature works best when you are using an extension telephone connected to the EXT socket on the back of your machine. You can receive a fax from someone you are talking to on the extension telephone, without going to the fax machine. (See "Receiving faxes manually using an extension telephone" on page 60.) Error Correction Mode It helps with poor line quality and makes sure any faxes you send are properly transmitted to any other ECM-equipped fax machines. Sending a fax using ECM may take more time. Fax Initial Setup You can set Receive Mode for Telephone, Fax or Answering Machine/Fax, and Dial Mode at either Pulse (Dial Pulse) or Tone (Multi Frequency). When you select Answering Machine/Fax, you can receive a fax while the line is being used by the answering machine. (See "Changing the receive modes" on page 60.) Contact your local telephone company for Dial Mode setting information. Ring to Answer You can specify the number of times the machine rings before answering an incoming call. Receive Header Use this option to automatically print the page number, date and time of fax reception at the bottom of each page. Secure Receive You may need to prevent your received faxes from being accessed by unauthorized people. This feature restricts printing of received faxes when the machine is unattended. If you select this option to On, all incoming faxes go into memory. A four-digit Passcode is used when you want to print out received faxes in memory. (See "Receiving in secure receiving mode" on page 60.) Received Fax Printing When receiving a fax containing pages longer than the paper loaded in the tray, the machine can reduce the size of the original to fit the size of the paper loaded in the machine. If this feature is set to Off, the machine cannot reduce the original to fit onto one page. The original will be divided and printed in actual size on two or more pages. If you set this option to On and set the discard size to 10mm and the received data is longer then the currently set paper in the tray, the machine minuses the data that would have been on the specified discard segment. Machine status and advanced setup_ 75
-
 1
1 -
2
-
3
-
4
-
5
-
6
-
7
-
8
-
9
-
10
-
11
-
12
-
13
-
14
-
15
-
16
-
17
-
18
-
19
-
20
-
21
-
22
-
23
-
24
-
25
-
26
-
27
-
28
-
29
-
30
-
31
-
32
-
33
-
34
-
35
-
36
-
37
-
38
-
39
-
40
-
41
-
42
-
43
-
44
-
45
-
46
-
47
-
48
-
49
-
50
-
51
-
52
-
53
-
54
-
55
-
56
-
57
-
58
-
59
-
60
-
61
-
62
-
63
-
64
-
65
-
66
-
67
-
68
-
69
-
70
-
 71
71 -
 72
72 -
 73
73 -
 74
74 -
 75
75 -
 76
76 -
 77
77 -
 78
78 -
 79
79 -
 80
80 -
 81
81 -
82
-
83
-
84
-
85
-
86
-
87
-
88
-
89
-
90
-
91
-
92
-
93
-
94
-
95
-
96
-
97
-
98
-
99
-
100
-
101
-
102
-
103
-
104
-
105
-
106
-
107
-
108
-
109
-
110
-
111
-
112
-
113
-
114
-
115
-
116
-
117
-
118
-
119
-
120
-
121
-
122
-
123
-
124
-
125
-
126
-
127
-
128
-
129
-
130
-
131
-
132
-
133
-
134
-
135
-
136
-
137
-
138
-
139
-
140
-
141
-
142
-
143
-
144
-
145
-
146
-
147
-
148
-
149
-
150
-
151
-
152
-
153
-
154
-
155
-
156
-
157
-
158
-
159
-
160
-
161
-
162
-
163
-
164
-
165
-
166
-
167
-
168
-
169
-
170
-
171
-
172
-
173
-
174
-
175
 |
 |