Samsung SCX 6555N User Manual (ENGLISH) - Page 47
Watermark copying, Overlay copying, Auto crop copying, Multi-Bin, Auto Center - parts list
 |
UPC - 635753610314
View all Samsung SCX 6555N manuals
Add to My Manuals
Save this manual to your list of manuals |
Page 47 highlights
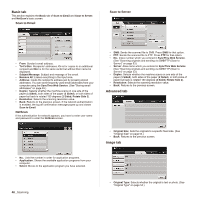
1. Place the originals face up in the DADF. Or place a single original face down on the scanner glass. (See "Loading originals" on page 31.) 2. Press Copy from the Main screen. 3. Press the Image tab > Margin Shift 4. Select Margin Shift option. • Off: Disables this feature. • Auto Center: Adjusts centers of the paper copy automatically. The original must be loaded on the scanner glass to use this feature. This option supports only the original is loaded on the scanner glass. • Custom Margin: Adjusts the margin of the left and right, top and bottom as you want using arrows. This option supports both on the scanner glass or in DADF. 5. Press OK. 6. Press Start on the control panel to begin copying. Watermark copying You can copy the original with a watermark. For example, you can use it when you want to have large gray letters such as Top Secret or Confidential printed diagonally across the first page or all pages of the copy. 1. Place the originals face up in the DADF. Or place a single original face down on the scanner glass. (See "Loading originals and print media" on page 31.) 2. Press Copy from the Main screen. 3. Select the tray in Paper Supply. 4. Press the Advanced tab > Overlay. 5. Press List. 6. Select a file name. 7. Select a overlay option. • New: Makes the new overlay. When the file name pops up, enter the file name. • Detail: Shows information of the selected overlay. • Edit: Modifies the name of the selected overlay. • Delete: Deletes the selected overlay. • Apply: Prints the originals with the selected overlay. • Print: Prints the selected overlay. • Cancel: Cancels overlay options you have selected. 8. Press Start on the control panel to begin copying. If you have selected option New in step 7, the machine starts storing the new overlay by pressing the Start button. Auto crop copying The machine prints only the image of an original after cropping the blank parts like the margin. 1. Place the originals face up in the DADF. Or place a single original face down on the scanner glass. (See "Loading originals and print media" on page 31.) 2. Press Copy from the Main screen. 3. Select the tray in Paper Supply. 4. Press the Advanced tab > WaterMark. 5. Select WaterMark option. • Off: Disables this feature. • Top Secret: Prints the original with Top Secret text. • Confidential: Prints the original with Confidential text. • Urgent: Prints the original with Urgent text. • Draft: Prints the original with Draft text. • Custom: The machine prints the original with the customized text. 6. Select 1st Page only, Size, Position, Darkness of options. 7. Press OK. 8. Press Start on the control panel to begin copying. Overlay copying If you scan and store the data such as format, you can copy the original with the previously stored data. 46 _Copying 1. Place the originals face up in the DADF. Or place a single original face down on the scanner glass. (See "Loading originals and print media" on page 31.) 2. Press Copy from the Main screen. 3. Select the tray in Paper Supply. 4. Press the Advanced tab > Auto Crop. 5. Press On to activate this feature. 6. Press OK. 7. Press Start on the control panel to begin copying. Multi-Bin You can choose the output mode for printouts. You can only use this feature if you have installed optional 2-Bin Finisher or 4-Bin Mailbox. 1. Press Copy from the Main screen. 2. Press the Advanced tab > Multi-Bin. 3. Select the appropriate option. • Mailbox: Printouts are stacked in the bin you have set. If you set the mailbox to Bin3, printouts will be stacked in Bin3. • Job Separator: Printouts are stacked in the sequence of job order in each bin. However, if there is a vacant bin left, the vacant bin has priority, which means prinouts will be stacked there first. • Collator: Printouts are stacked in sets to match the sequence of originals in each bin. • Stacker: Printouts are stacked in bins one-by-one. When Bin1 is full, printouts will be stacked in Bin2. 4. Press OK.
-
 1
1 -
2
-
3
-
4
-
5
-
6
-
7
-
8
-
9
-
10
-
11
-
12
-
13
-
14
-
15
-
16
-
17
-
18
-
19
-
20
-
21
-
22
-
23
-
24
-
25
-
26
-
27
-
28
-
29
-
30
-
31
-
32
-
33
-
34
-
35
-
36
-
37
-
38
-
39
-
40
-
41
-
 42
42 -
 43
43 -
 44
44 -
 45
45 -
 46
46 -
 47
47 -
 48
48 -
 49
49 -
 50
50 -
 51
51 -
 52
52 -
53
-
54
-
55
-
56
-
57
-
58
-
59
-
60
-
61
-
62
-
63
-
64
-
65
-
66
-
67
-
68
-
69
-
70
-
71
-
72
-
73
-
74
-
75
-
76
-
77
-
78
-
79
-
80
-
81
-
82
-
83
-
84
-
85
-
86
-
87
-
88
-
89
-
90
-
91
-
92
-
93
-
94
-
95
-
96
-
97
-
98
-
99
-
100
-
101
-
102
-
103
-
104
-
105
-
106
-
107
-
108
-
109
-
110
-
111
-
112
-
113
-
114
-
115
-
116
-
117
-
118
-
119
-
120
-
121
-
122
-
123
-
124
-
125
-
126
-
127
-
128
-
129
-
130
-
131
-
132
-
133
-
134
-
135
-
136
-
137
-
138
-
139
-
140
-
141
-
142
-
143
-
144
-
145
-
146
-
147
-
148
-
149
-
150
-
151
-
152
-
153
-
154
-
155
-
156
-
157
-
158
-
159
-
160
-
161
-
162
-
163
-
164
-
165
-
166
-
167
-
168
-
169
-
170
-
171
-
172
-
173
-
174
-
175
 |
 |