Samsung SCX 6555N User Manual (ENGLISH) - Page 60
Sending a fax manually (On Hook Dial), Automatic resending, Redialing the last number
 |
UPC - 635753610314
View all Samsung SCX 6555N manuals
Add to My Manuals
Save this manual to your list of manuals |
Page 60 highlights
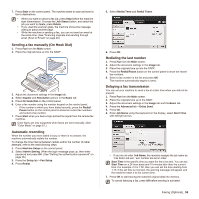
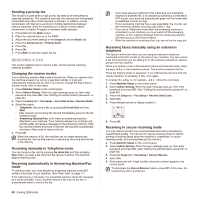
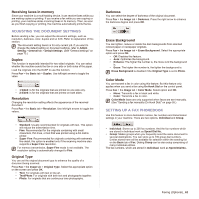
7. Press Start on the control panel. The machine starts to scan and send a fax to destinations. • When you want to cancel a fax job, press Stop before the machine start transmission. Or press the Job Status button, and select the job you want to delete, press Delete. • If you used the scanner glass, the machine shows the message asking to place another page. • While the machine is sending a fax, you can not send an email at the same time. (See "Scanning originals and sending through email (Scan to Email)" on page 49.) Sending a fax manually (On Hook Dial) 1. Press Fax from the Main screen. 2. Place the originals face up into the DADF. 3. Adjust the document settings in the Image tab. 4. Select Duplex and Resolution options in the Basic tab. 5. Press On Hook Dial on the control panel. 6. Enter a fax number using the number keypad on the control panel. • If the number is which you have dialed recently, press the Redial/ Pause button on the control panel to show ten recent fax numbers and select a fax number. 7. Press Start when you hear a high-pitched fax signal from the remote fax machine. Color faxes are only supported when faxes are sent manually. (See "Color Mode" on page 61.) Automatic resending When the number you have dialed is busy or there is no answer, the machine automatically redials the number. To change the time interval between redials and/or the number of redial attempts, refer to the next following steps. 1. Press Machine Setup on the control panel. 2. Select Admin Setting. When the login message pops up, then enter password and press OK. (See "Setting the authentication password" on page 28.) 3. Press the Setup tab > Fax Setup. 4. Press Redial. 5. Select Redial Term and Redial Times. 6. Press OK. Redialing the last number 1. Press Fax from the Main screen. 2. Adjust the document settings in the Image tab. 3. Place the originals face up into the DADF. 4. Press the Redial/Pause button on the control panel to show ten recent fax numbers. 5. Select a fax number in the list and press OK. The machine automatically begins to send. Delaying a fax transmission You can set your machine to send a fax at a later time when you will not be present. 1. Press Fax from the Main screen. 2. Place the originals face up in the DADF. 3. Adjust the document settings in the Image tab and the Basic tab. 4. Press the Advanced tab > Delay Send. 5. Press On. 6. Enter Job Name using the keyboard on the display, select Start Time with left/right arrows. • If you do not enter Job Name, the machine assigns the job name as 'Fax Send Job xxx'. 'xxx' number are set in order. Start Time is the specific time you want the fax to be sent. You can set Start Time on a 24 hour basis and 15 minutes later than the current time. For example, if it is 1:00, then you can set the time starting from 1:15. If the set time is incorrect, the warning message will appear and the machine resets it to the current time. 7. Press OK to start storing the scanned original data into memory. To cancel delaying a fax, press Off before sending is activated. Faxing (Optional)_ 59
-
 1
1 -
2
-
3
-
4
-
5
-
6
-
7
-
8
-
9
-
10
-
11
-
12
-
13
-
14
-
15
-
16
-
17
-
18
-
19
-
20
-
21
-
22
-
23
-
24
-
25
-
26
-
27
-
28
-
29
-
30
-
31
-
32
-
33
-
34
-
35
-
36
-
37
-
38
-
39
-
40
-
41
-
42
-
43
-
44
-
45
-
46
-
47
-
48
-
49
-
50
-
51
-
52
-
53
-
54
-
 55
55 -
 56
56 -
 57
57 -
 58
58 -
 59
59 -
 60
60 -
 61
61 -
 62
62 -
 63
63 -
 64
64 -
 65
65 -
66
-
67
-
68
-
69
-
70
-
71
-
72
-
73
-
74
-
75
-
76
-
77
-
78
-
79
-
80
-
81
-
82
-
83
-
84
-
85
-
86
-
87
-
88
-
89
-
90
-
91
-
92
-
93
-
94
-
95
-
96
-
97
-
98
-
99
-
100
-
101
-
102
-
103
-
104
-
105
-
106
-
107
-
108
-
109
-
110
-
111
-
112
-
113
-
114
-
115
-
116
-
117
-
118
-
119
-
120
-
121
-
122
-
123
-
124
-
125
-
126
-
127
-
128
-
129
-
130
-
131
-
132
-
133
-
134
-
135
-
136
-
137
-
138
-
139
-
140
-
141
-
142
-
143
-
144
-
145
-
146
-
147
-
148
-
149
-
150
-
151
-
152
-
153
-
154
-
155
-
156
-
157
-
158
-
159
-
160
-
161
-
162
-
163
-
164
-
165
-
166
-
167
-
168
-
169
-
170
-
171
-
172
-
173
-
174
-
175
 |
 |
