Samsung SMX-F40LN User Manual (user Manual) (ver.1.0) (English) - Page 123
Adjusting the image during recording, Playback on other devices TV, etc., Playback on your camcorder
 |
View all Samsung SMX-F40LN manuals
Add to My Manuals
Save this manual to your list of manuals |
Page 123 highlights
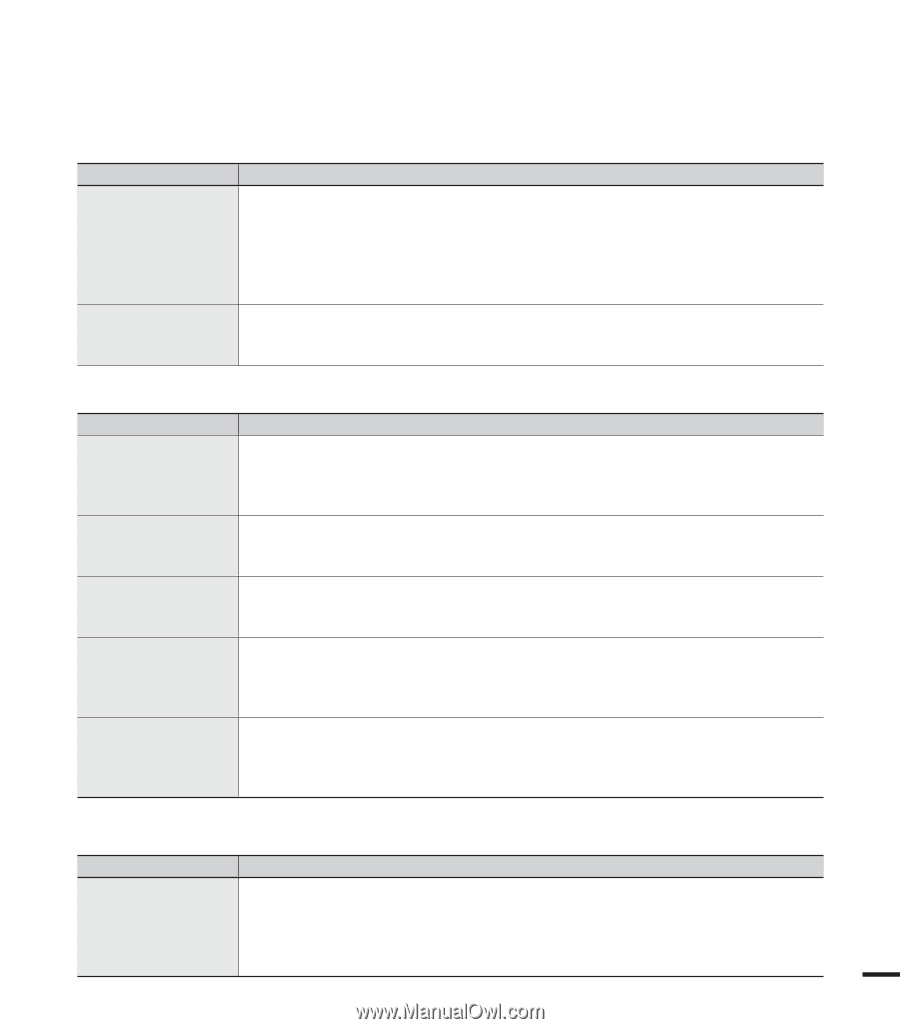
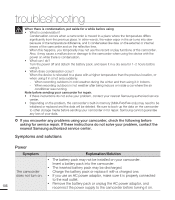
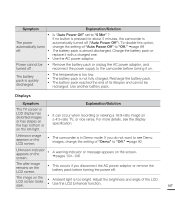
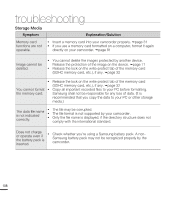
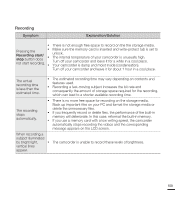
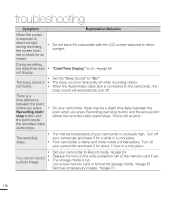
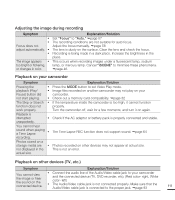
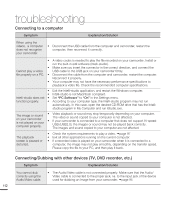
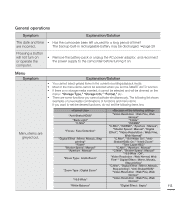
Adjusting the image during recording Symptom • • Focus does not adjust automatically. • • The image appears • too bright or flickering, or changes in color. Explanation/Solution Set "Focus" to "Auto." page 57 The recording conditions are not suitable for auto focus. Adjust the focus manually. page 58 The lens is dusty on the surface. Clear the lens and check the focus. Recording is being made in a dark place. Increase the brightness in the place. This occurs when recording images under a fluorescent lamp, sodium lamp, or mercury lamp. Cancel "iSCENE" to minimise these phenomena. page 46 Playback on your camcorder Symptom Pressing the • playback (Play/ • Pause) button did not start playing. • The Skip or Search • function does not work properly. Playback is interrupted • unexpectedly. You cannot hear sound when playing a Time Lapse • recording. Photos stored on a storage media are • not displayed in the actual size. Explanation/Solution Press the MODE button to set Video Play mode. Image files recorded on another camcorder may not play on your camcorder. Check out a memory card compatibility. page 32 If the temperature inside the camcorder is too high, it cannot function properly. Turn the camcorder off, wait for a few moments, and turn it on again. Check if the AC adaptor or battery pack is properly connected and stable. The Time Lapse REC function does not support sound. page 64 Photos recorded on other devices may not appear at actual size. This is not an error. Playback on other devices (TV, etc.) Symptom Explanation/Solution You cannot view the image or hear the sound on the connected device. • Connect the audio line of the Audio/Video cable jack to your camcorder and the connected device (TV, DVD recorder, etc). (Red color- right, White color- left) • The Audio/Video cable jack is not connected properly. Make sure that the Audio/Video cable jack is connected to the proper jack. page 93 111
-
 1
1 -
2
-
3
-
4
-
5
-
6
-
7
-
8
-
9
-
10
-
11
-
12
-
13
-
14
-
15
-
16
-
17
-
18
-
19
-
20
-
21
-
22
-
23
-
24
-
25
-
26
-
27
-
28
-
29
-
30
-
31
-
32
-
33
-
34
-
35
-
36
-
37
-
38
-
39
-
40
-
41
-
42
-
43
-
44
-
45
-
46
-
47
-
48
-
49
-
50
-
51
-
52
-
53
-
54
-
55
-
56
-
57
-
58
-
59
-
60
-
61
-
62
-
63
-
64
-
65
-
66
-
67
-
68
-
69
-
70
-
71
-
72
-
73
-
74
-
75
-
76
-
77
-
78
-
79
-
80
-
81
-
82
-
83
-
84
-
85
-
86
-
87
-
88
-
89
-
90
-
91
-
92
-
93
-
94
-
95
-
96
-
97
-
98
-
99
-
100
-
101
-
102
-
103
-
104
-
105
-
106
-
107
-
108
-
109
-
110
-
111
-
112
-
113
-
114
-
115
-
116
-
117
-
 118
118 -
 119
119 -
 120
120 -
 121
121 -
 122
122 -
 123
123 -
 124
124 -
 125
125 -
 126
126 -
 127
127 -
 128
128 -
129
-
130
-
131
 |
 |