Samsung SMX-F40LN User Manual (user Manual) (ver.1.0) (English) - Page 63
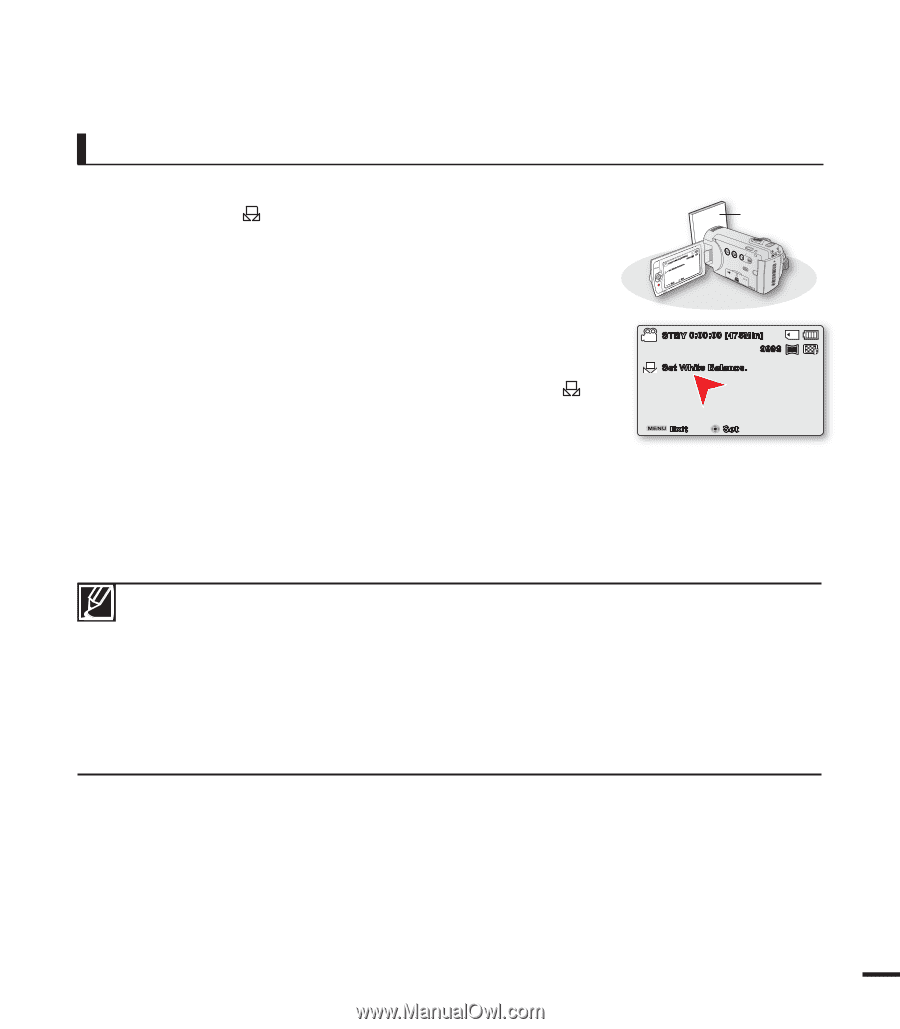
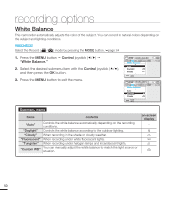
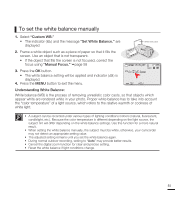
To set the white balance manually, Custom WB., Set White Balance., Manual Focus.
 |
View all Samsung SMX-F40LN manuals
Add to My Manuals
Save this manual to your list of manuals |
Page 63 highlights
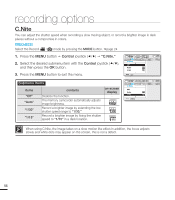
To set the white balance manually 1. Select "Custom WB." • The indicator ( ) and the message "Set White Balance." are displayed. 2. Frame a white object such as a piece of paper so that it fills the screen. Use an object that is not transparent. • If the object that fills the screen is not focused, correct the focus using "Manual Focus." page 58 3. Press the OK button. • The white balance setting will be applied and indicator ( ) is displayed. 4. Press the MENU button to exit the menu. SSTeBt YW0h:i0te0:B00al[a4n7c5eM. in9] 999 1.6M Set Exit W White thick paper T VIEW STBY 0:00:00 [475Min] 9999 1.6M Set White Balance. Exit Set Understanding White Balance: White balance (WB) is the process of removing unrealistic color casts, so that objects which appear white are rendered white in your photo. Proper white balance has to take into account the "color temperature" of a light source, which refers to the relative warmth or coolness of white light. • A subject can be recorded under various types of lighting conditions indoors (natural, fluorescent, candlelight, etc.). Because the color temperature is different depending on the light source, the subject tint will differ depending on the white balance settings. Use this function for a more natural result. • When setting the white balance manually, the subject must be white, otherwise, your camcorder may not detect an appropriate setting value. • The adjusted setting remains until you set the white balance again. • During normal outdoor recording, setting to "Auto" may provide better results. • Cancel the digital zoom function for clear and precise setting. • Reset the white balance if light conditions change. 51
-
 1
1 -
2
-
3
-
4
-
5
-
6
-
7
-
8
-
9
-
10
-
11
-
12
-
13
-
14
-
15
-
16
-
17
-
18
-
19
-
20
-
21
-
22
-
23
-
24
-
25
-
26
-
27
-
28
-
29
-
30
-
31
-
32
-
33
-
34
-
35
-
36
-
37
-
38
-
39
-
40
-
41
-
42
-
43
-
44
-
45
-
46
-
47
-
48
-
49
-
50
-
51
-
52
-
53
-
54
-
55
-
56
-
57
-
 58
58 -
 59
59 -
 60
60 -
 61
61 -
 62
62 -
 63
63 -
 64
64 -
 65
65 -
 66
66 -
 67
67 -
 68
68 -
69
-
70
-
71
-
72
-
73
-
74
-
75
-
76
-
77
-
78
-
79
-
80
-
81
-
82
-
83
-
84
-
85
-
86
-
87
-
88
-
89
-
90
-
91
-
92
-
93
-
94
-
95
-
96
-
97
-
98
-
99
-
100
-
101
-
102
-
103
-
104
-
105
-
106
-
107
-
108
-
109
-
110
-
111
-
112
-
113
-
114
-
115
-
116
-
117
-
118
-
119
-
120
-
121
-
122
-
123
-
124
-
125
-
126
-
127
-
128
-
129
-
130
-
131
 |
 |