Sharp VLAH150U Operation Manual - Page 56
Changing the Preset Titles
 |
UPC - 074000352735
View all Sharp VLAH150U manuals
Add to My Manuals
Save this manual to your list of manuals |
Page 56 highlights
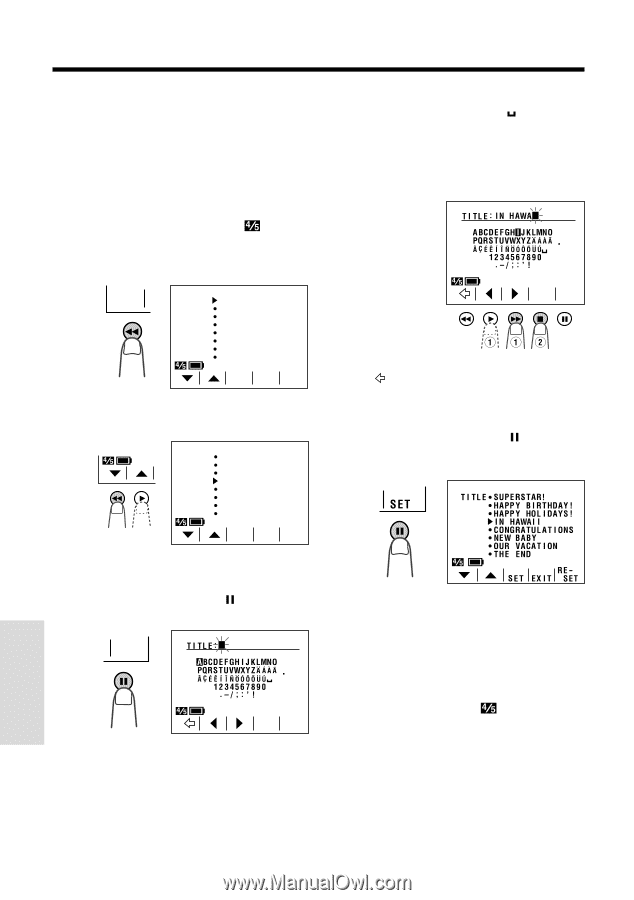
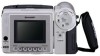
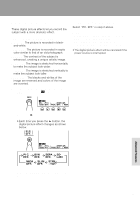
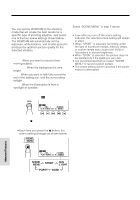
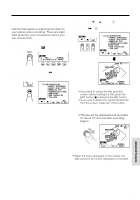
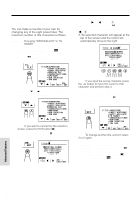
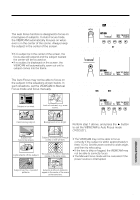
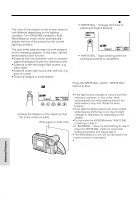
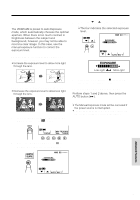
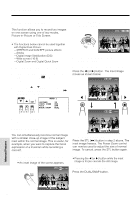
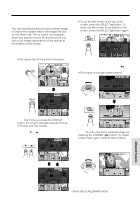
Advanced Features Changing the Preset Titles You can make a new title of your own by changing any of the eight preset titles. The maximum number of title characters is fifteen. Example: Changing "WEDDING DAY" to "IN HAWAII". 1 Press the MENU button until appears, and then press the TITLE button (C) to display the title selection screen. T ITLE T I T L E SUP E RST AR ! HAPPY B I RTHDAY ! HAPPY HOL I DAYS ! WEDD I NG DAY CONGRAT UL A T I ONS NEW BABY OUR VACAT I ON THE END RE SET EX I T SE T 2 Press the ĭ or İ button to select the title that you wish to change. T I T L E SUP E RST AR ! HAPPY B I RTHDAY ! HAPPY HOL I DAYS ! WEDD I NG DAY CONGRAT UL A T I ONS NEW BABY OUR VACAT I ON THE END RE SET EX I T SET Note: If you want to cancel the title selection screen, press the EXIT button (). 3 Press the RESET button ( ) to display the title input screen. RE SET SELECT SET 4 Press the © or ß button (Q) to select the desired character (or " " for space) and press the SELECT button () (W). • The selected character will appear at the top of the screen and the cursor will automatically move to the right. SELECT SET Note: If you input the wrong character, press the button to move the cursor to that character and perform step 4. 5 Repeat step 4 until you finish the title, then press the SET button ( ). The new title will be displayed on the title selection screen. Note: To change another title, perform steps 2 to 5 again. 6 If you wish to record the new title immediately, press the SET button (B). If you wish to record the new title at a later time, press the EXIT button () to go back to the normal screen. Advanced Features 47
-
 1
1 -
2
-
3
-
4
-
5
-
6
-
7
-
8
-
9
-
10
-
11
-
12
-
13
-
14
-
15
-
16
-
17
-
18
-
19
-
20
-
21
-
22
-
23
-
24
-
25
-
26
-
27
-
28
-
29
-
30
-
31
-
32
-
33
-
34
-
35
-
36
-
37
-
38
-
39
-
40
-
41
-
42
-
43
-
44
-
45
-
46
-
47
-
48
-
49
-
50
-
 51
51 -
 52
52 -
 53
53 -
 54
54 -
 55
55 -
 56
56 -
 57
57 -
 58
58 -
 59
59 -
 60
60 -
 61
61 -
62
-
63
-
64
-
65
-
66
-
67
-
68
-
69
-
70
-
71
-
72
-
73
-
74
-
75
-
76
-
77
-
78
-
79
-
80
 |
 |