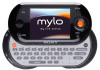
Sony COM1BLACK Operating Instructions - Page 19
Charging the battery using the supplied AC power adaptor
 |
View all Sony COM1BLACK manuals
Add to My Manuals
Save this manual to your list of manuals |
Page 19 highlights
Table of Contents Index 19 Getting Started...Preparing a Power Source Charging the battery using the supplied AC power adaptor Connect the supplied AC power adaptor to the DC IN 6V jack of the unit, and then connect the adaptor to a wall outlet. To DC IN 6V jack AC power adaptor (supplied) To wall outlet The unit automatically turns on. The CHARGE and POWER indicators light up, and the battery indicator sections ( ) appear on the display in succession as charging progresses. A complete charge requires approximately 3 to 7.5 hours*. * Charging may take a long time depending on the operating conditions. The unit is in a standby mode for charging while the unit is performing any of the following: - Playing music without the headset - Playing video - Viewing photos - Viewing Web pages - Wireless LAN is turned on (except for a standby mode for incoming chats and calls) Notes • If "Auto Power Off" is set to "NO," a complete charge may require 7.5 hours or longer. • Charging may take a long time if you operate the unit while it is charging. Continued
-
 1
1 -
2
-
3
-
4
-
5
-
6
-
7
-
8
-
9
-
10
-
11
-
12
-
13
-
 14
14 -
 15
15 -
 16
16 -
 17
17 -
 18
18 -
 19
19 -
 20
20 -
 21
21 -
 22
22 -
 23
23 -
 24
24 -
25
-
26
-
27
-
28
-
29
-
30
-
31
-
32
-
33
-
34
-
35
-
36
-
37
-
38
-
39
-
40
-
41
-
42
-
43
-
44
-
45
-
46
-
47
-
48
-
49
-
50
-
51
-
52
-
53
-
54
-
55
-
56
-
57
-
58
-
59
-
60
-
61
-
62
-
63
-
64
-
65
-
66
-
67
-
68
-
69
-
70
-
71
-
72
-
73
-
74
-
75
-
76
-
77
-
78
-
79
-
80
-
81
-
82
-
83
-
84
-
85
-
86
-
87
-
88
-
89
-
90
-
91
-
92
-
93
-
94
-
95
-
96
-
97
-
98
-
99
-
100
-
101
-
102
-
103
-
104
-
105
-
106
-
107
-
108
-
109
-
110
-
111
-
112
-
113
-
114
-
115
-
116
-
117
-
118
-
119
-
120
-
121
-
122
-
123
-
124
-
125
-
126
-
127
-
128
-
129
-
130
-
131
-
132
-
133
-
134
-
135
-
136
-
137
-
138
-
139
-
140
-
141
-
142
-
143
-
144
-
145
-
146
-
147
-
148
-
149
-
150
-
151
-
152
-
153
-
154
-
155
-
156
-
157
-
158
-
159
-
160
-
161
-
162
-
163
-
164
-
165
-
166
-
167
-
168
-
169
-
170
-
171
-
172
-
173
-
174
-
175
-
176
-
177
-
178
-
179
-
180
-
181
-
182
-
183
-
184
-
185
-
186
-
187
-
188
-
189
-
190
-
191
-
192
-
193
-
194
-
195
-
196
-
197
-
198
-
199
-
200
-
201
-
202
-
203
-
204
-
205
-
206
-
207
-
208
-
209
-
210
-
211
-
212
-
213
-
214
-
215
-
216
-
217
-
218
-
219
-
220
-
221
-
222
-
223
-
224
-
225
-
226
-
227
-
228
-
229
-
230
-
231
-
232
-
233
-
234
-
235
-
236
-
237
-
238
-
239
-
240
-
241
-
242
-
243
-
244
-
245
-
246
-
247
-
248
-
249
-
250
-
251
-
252
 |
 |
