Sony COM1BLACK Operating Instructions - Page 20
Charging the battery using the supplied USB cable, Connect the supplied USB cable to
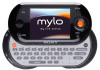 |
View all Sony COM1BLACK manuals
Add to My Manuals
Save this manual to your list of manuals |
Page 20 highlights
Table of Contents Index 20 Getting Started...Preparing a Power Source Charging the battery using the supplied USB cable Connect the supplied USB cable to the (USB) connector of the unit, and then connect the USB cable to the computer. USB cable (supplied) To (USB) connector The unit automatically turns on. The CHARGE and POWER indicators light up, and the battery indicator sections ( ) appear on the display in succession as charging progresses. A complete charge requires approximately 4 hours. Notes • The supplied interface cable must be used with the equipment in order to comply with the limits for a digital device pursuant to Subpart B of Prat 15 of FCC Rules. • If your unit is connected to your computer via the included USB cable and the computer enters a power saving mode (such as system suspend, sleep, or hibernation), then your unit's battery will begin discharging. • Do not leave the unit connected for extended periods to a notebook computer that is not connected to AC power, because the unit may discharge the computer's battery. • If the unit does not automatically turn on when you connect it to your computer using the USB cable, wait a few minutes, and then turn it on by sliding the POWER switch down ( page 22). • Connecting the unit via a USB hub may not work and is not supported. Connect the USB cable directly to the computer. • Charging may take a long time if you operate the unit while it is charging. Continued
-
 1
1 -
2
-
3
-
4
-
5
-
6
-
7
-
8
-
9
-
10
-
11
-
12
-
13
-
14
-
 15
15 -
 16
16 -
 17
17 -
 18
18 -
 19
19 -
 20
20 -
 21
21 -
 22
22 -
 23
23 -
 24
24 -
 25
25 -
26
-
27
-
28
-
29
-
30
-
31
-
32
-
33
-
34
-
35
-
36
-
37
-
38
-
39
-
40
-
41
-
42
-
43
-
44
-
45
-
46
-
47
-
48
-
49
-
50
-
51
-
52
-
53
-
54
-
55
-
56
-
57
-
58
-
59
-
60
-
61
-
62
-
63
-
64
-
65
-
66
-
67
-
68
-
69
-
70
-
71
-
72
-
73
-
74
-
75
-
76
-
77
-
78
-
79
-
80
-
81
-
82
-
83
-
84
-
85
-
86
-
87
-
88
-
89
-
90
-
91
-
92
-
93
-
94
-
95
-
96
-
97
-
98
-
99
-
100
-
101
-
102
-
103
-
104
-
105
-
106
-
107
-
108
-
109
-
110
-
111
-
112
-
113
-
114
-
115
-
116
-
117
-
118
-
119
-
120
-
121
-
122
-
123
-
124
-
125
-
126
-
127
-
128
-
129
-
130
-
131
-
132
-
133
-
134
-
135
-
136
-
137
-
138
-
139
-
140
-
141
-
142
-
143
-
144
-
145
-
146
-
147
-
148
-
149
-
150
-
151
-
152
-
153
-
154
-
155
-
156
-
157
-
158
-
159
-
160
-
161
-
162
-
163
-
164
-
165
-
166
-
167
-
168
-
169
-
170
-
171
-
172
-
173
-
174
-
175
-
176
-
177
-
178
-
179
-
180
-
181
-
182
-
183
-
184
-
185
-
186
-
187
-
188
-
189
-
190
-
191
-
192
-
193
-
194
-
195
-
196
-
197
-
198
-
199
-
200
-
201
-
202
-
203
-
204
-
205
-
206
-
207
-
208
-
209
-
210
-
211
-
212
-
213
-
214
-
215
-
216
-
217
-
218
-
219
-
220
-
221
-
222
-
223
-
224
-
225
-
226
-
227
-
228
-
229
-
230
-
231
-
232
-
233
-
234
-
235
-
236
-
237
-
238
-
239
-
240
-
241
-
242
-
243
-
244
-
245
-
246
-
247
-
248
-
249
-
250
-
251
-
252
 |
 |
