Sony DCR-TRV70 Network Function/Application Operating Instructions - Page 58
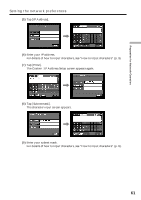
TEL No., User ID, Password, Address, Tap [Mail].
 |
View all Sony DCR-TRV70 manuals
Add to My Manuals
Save this manual to your list of manuals |
Page 58 highlights
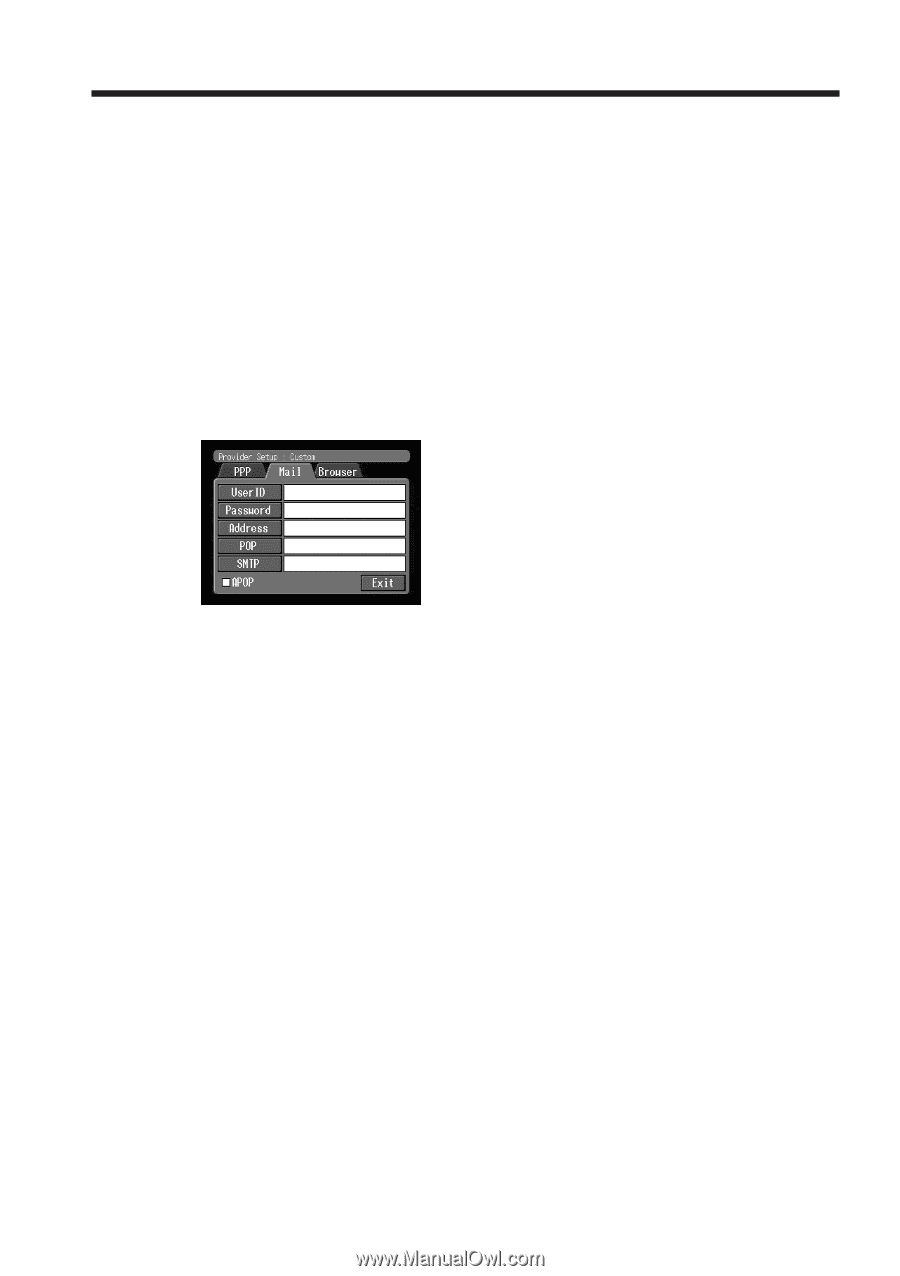
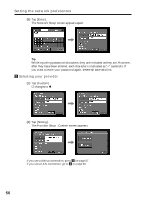
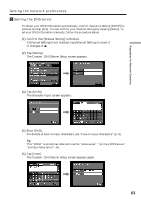
Setting the network preferences DNS2: Enter the secondary DNS server address of your provider, if necessary. This entry may be unnecessary, depending on your provider. For details, consult your provider. Tip This "DNS2" is sometimes referred to as the "secondary DNS server", etc. TEL No. 1: Enter the telephone number of your most convenient access point (p. 146). TEL No. 2/TEL No. 3: Enter second and third telephone numbers, if necessary. (4) Tap [Mail]. The Mail preference screen appears. Note The Mail preference screen and the Browser screen are shared by Dial-up Setup and LAN Setup. You cannot set these two preferences at the same time. (5) Set the following items: User ID: Enter the user ID for accessing the POP server. Password: Enter the password of your user ID for accessing the POP server. Your user ID and password are required to use email. Tip This "Password" is sometimes referred to as the "mail password", "mail server password", etc. Address: Enter your email address. Tip This "Address" is sometimes referred to as the "mail address", "email address", etc. POP: Enter the POP (Post Office Protocol) server address of your provider. The POP server is for receiving email. Tip This "POP server" is sometimes referred to as the "mail server", "POP3 server", etc. 58
-
 1
1 -
2
-
3
-
4
-
5
-
6
-
7
-
8
-
9
-
10
-
11
-
12
-
13
-
14
-
15
-
16
-
17
-
18
-
19
-
20
-
21
-
22
-
23
-
24
-
25
-
26
-
27
-
28
-
29
-
30
-
31
-
32
-
33
-
34
-
35
-
36
-
37
-
38
-
39
-
40
-
41
-
42
-
43
-
44
-
45
-
46
-
47
-
48
-
49
-
50
-
51
-
52
-
 53
53 -
 54
54 -
 55
55 -
 56
56 -
 57
57 -
 58
58 -
 59
59 -
 60
60 -
 61
61 -
 62
62 -
 63
63 -
64
-
65
-
66
-
67
-
68
-
69
-
70
-
71
-
72
-
73
-
74
-
75
-
76
-
77
-
78
-
79
-
80
-
81
-
82
-
83
-
84
-
85
-
86
-
87
-
88
-
89
-
90
-
91
-
92
-
93
-
94
-
95
-
96
-
97
-
98
-
99
-
100
-
101
-
102
-
103
-
104
-
105
-
106
-
107
-
108
-
109
-
110
-
111
-
112
-
113
-
114
-
115
-
116
-
117
-
118
-
119
-
120
-
121
-
122
-
123
-
124
-
125
-
126
-
127
-
128
-
129
-
130
-
131
-
132
-
133
-
134
-
135
-
136
-
137
-
138
-
139
-
140
-
141
-
142
-
143
-
144
-
145
-
146
-
147
-
148
-
149
-
150
-
151
-
152
-
153
-
154
-
155
-
156
-
157
-
158
-
159
-
160
-
161
-
162
-
163
-
164
-
165
-
166
-
167
-
168
 |
 |