Sony DCR-TRV70 Network Function/Application Operating Instructions - Page 64
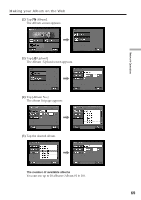
Tap [Enter]., Tap [Exit].
 |
View all Sony DCR-TRV70 manuals
Add to My Manuals
Save this manual to your list of manuals |
Page 64 highlights
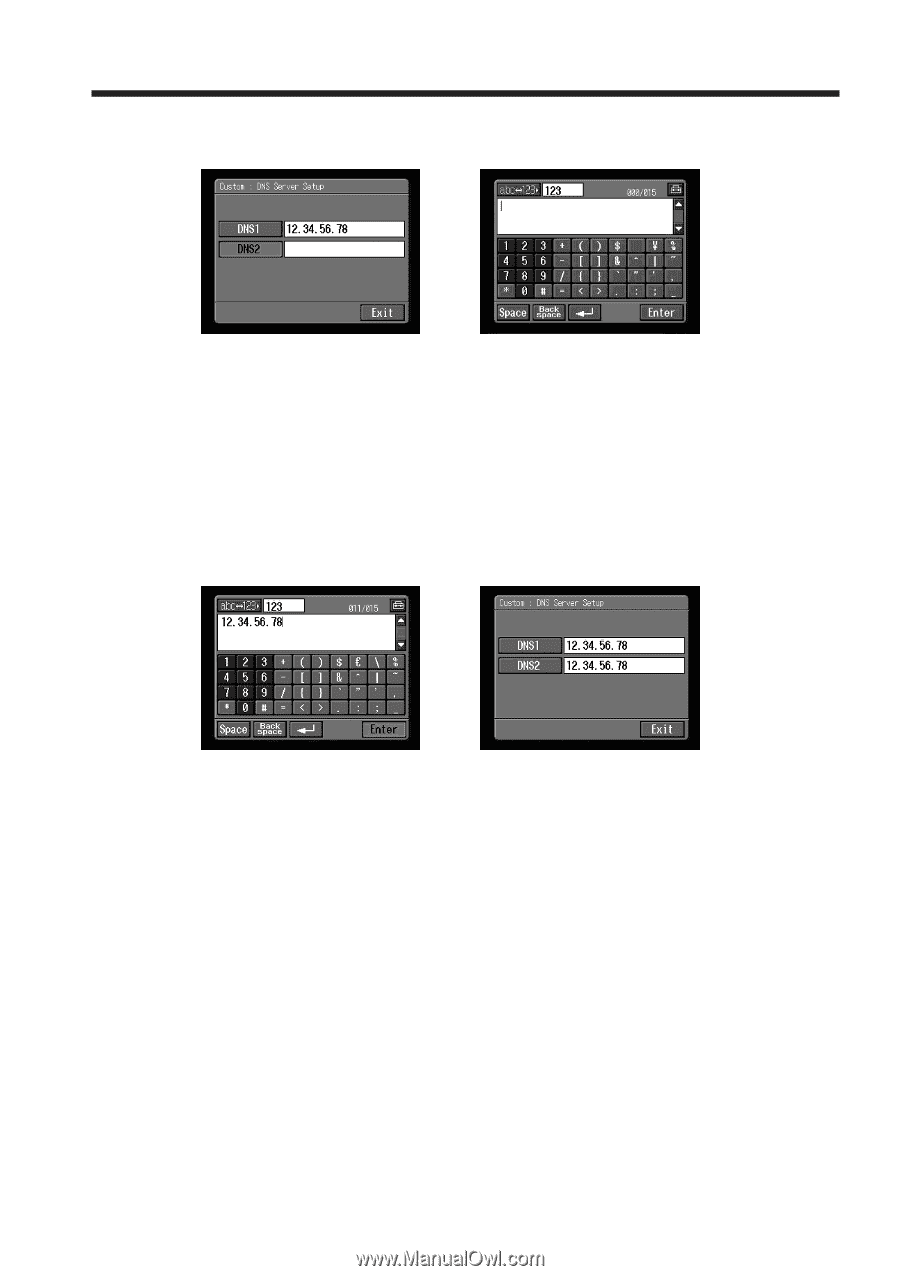
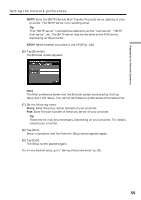
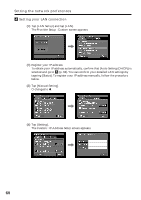
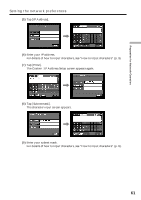
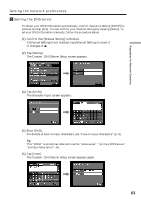
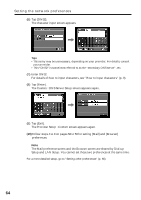
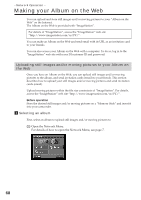
Setting the network preferences (6) Tap [DNS2]. The character input screen appears. , Tips •This entry may be unnecessary, depending on your provider. For details, consult your provider. •This "DNS2" is sometimes referred to as the "secondary DNS server", etc. (7) Enter DNS2. For details of how to input characters, see "How to input characters" (p. 9). (8) Tap [Enter]. The Custom : DNS Server Setup screen appears again. , (9) Tap [Exit]. The Provider Setup : Custom screen appears again. (10) Follow steps 4 to 9 on pages 58 to 59 for setting [Mail] and [Browser] preferences. Note The Mail preference screen and the Browser screen are shared by Dial-up Setup and LAN Setup. You cannot set these two preferences at the same time. For a more detailed setup, go to "Setting other preferences" (p. 65). 64
-
 1
1 -
2
-
3
-
4
-
5
-
6
-
7
-
8
-
9
-
10
-
11
-
12
-
13
-
14
-
15
-
16
-
17
-
18
-
19
-
20
-
21
-
22
-
23
-
24
-
25
-
26
-
27
-
28
-
29
-
30
-
31
-
32
-
33
-
34
-
35
-
36
-
37
-
38
-
39
-
40
-
41
-
42
-
43
-
44
-
45
-
46
-
47
-
48
-
49
-
50
-
51
-
52
-
53
-
54
-
55
-
56
-
57
-
58
-
 59
59 -
 60
60 -
 61
61 -
 62
62 -
 63
63 -
 64
64 -
 65
65 -
 66
66 -
 67
67 -
 68
68 -
 69
69 -
70
-
71
-
72
-
73
-
74
-
75
-
76
-
77
-
78
-
79
-
80
-
81
-
82
-
83
-
84
-
85
-
86
-
87
-
88
-
89
-
90
-
91
-
92
-
93
-
94
-
95
-
96
-
97
-
98
-
99
-
100
-
101
-
102
-
103
-
104
-
105
-
106
-
107
-
108
-
109
-
110
-
111
-
112
-
113
-
114
-
115
-
116
-
117
-
118
-
119
-
120
-
121
-
122
-
123
-
124
-
125
-
126
-
127
-
128
-
129
-
130
-
131
-
132
-
133
-
134
-
135
-
136
-
137
-
138
-
139
-
140
-
141
-
142
-
143
-
144
-
145
-
146
-
147
-
148
-
149
-
150
-
151
-
152
-
153
-
154
-
155
-
156
-
157
-
158
-
159
-
160
-
161
-
162
-
163
-
164
-
165
-
166
-
167
-
168
 |
 |