Sony RM-AX4000 Operating Instructions - Page 17
Installing the USB driver, Click [Next]., Click [Finish]. - usb driver windows 7
 |
UPC - 027242677036
View all Sony RM-AX4000 manuals
Add to My Manuals
Save this manual to your list of manuals |
Page 17 highlights
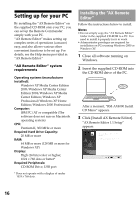
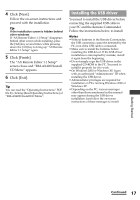
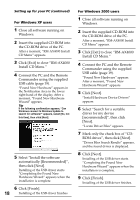
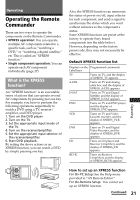
4 Click [Next]. Follow the on-screen instructions and proceed with the installation. Tip If the installation screen is hidden behind other windows If "AX Remote Editor 1.1 Setup" disappears behind other screen while installing, press the [Tab] key several times while pressing down the [Alt] key to bring up "AX Remote Editor 1.1 Setup" again. 5 Click [Finish]. The "AX Remote Editor 1.1 Setup" screen closes and "RM-AX4000 Install CD Menu" appears. 6 Click [Exit]. Tip You can read the "Operating Instructions" PDF file by clicking [Read Operating Instructions] of "RM-AX4000 Install CD Menu". Installing the USB driver You need to install the USB driver before connecting the supplied USB cable to your PC and the Remote Commander. Follow the instructions below to install. Notes • Without batteries in the Remote Commander, the USB connection cannot be detected by the PC even if the USB cable is connected. • Make sure to install the batteries before installing the USB driver. If the USB driver installation is interrupted by mistake, install it again from the beginning. • Do not simply copy the USB driver in the supplied CD-ROM to the PC. You need to install it properly for it to work. • On Windows 2000 or Windows XP, logon with an authorized "Administrator" ID when installing the USB driver. • Administrator privileges are required for installation on PCs running Windows 2000 or Windows XP. • Depending on the PC, various messages other than those mentioned in this manual may appear during the USB driver installation. Just follow the on-screen instructions of these messages to install. Getting Started Continued 17
-
 1
1 -
2
-
3
-
4
-
5
-
6
-
7
-
8
-
9
-
10
-
11
-
 12
12 -
 13
13 -
 14
14 -
 15
15 -
 16
16 -
 17
17 -
 18
18 -
 19
19 -
 20
20 -
 21
21 -
 22
22 -
23
-
24
-
25
-
26
-
27
-
28
-
29
-
30
-
31
-
32
-
33
-
34
-
35
-
36
-
37
-
38
-
39
-
40
-
41
-
42
-
43
-
44
-
45
-
46
-
47
-
48
-
49
-
50
-
51
-
52
-
53
-
54
-
55
-
56
-
57
-
58
-
59
-
60
-
61
-
62
-
63
-
64
-
65
-
66
-
67
-
68
-
69
-
70
-
71
-
72
-
73
-
74
-
75
-
76
-
77
-
78
-
79
-
80
-
81
-
82
-
83
-
84
-
85
-
86
-
87
-
88
-
89
-
90
-
91
-
92
-
93
-
94
-
95
-
96
 |
 |