Toshiba 32HLX95 Owners Manual
Toshiba 32HLX95 Manual
 |
View all Toshiba 32HLX95 manuals
Add to My Manuals
Save this manual to your list of manuals |
Toshiba 32HLX95 manual content summary:
- Toshiba 32HLX95 | Owners Manual - Page 1
OWNER'S MANUAL LCD TV/DVD Combination DIGITAL VIDEO HIGH-DEFINITION TELEVISION Because your TV has an integrated High Definition digital tuner, a separate High Definition tuner is not needed; however, to display a High Definition picture, the TV must be receiving a High Definition signal (such as - Toshiba 32HLX95 | Owners Manual - Page 2
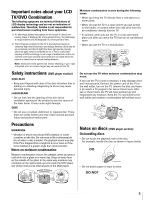
Dear Customer, Thank you for purchasing this Toshiba LCD TV/DVD Combination. This manual will help you use the many exciting features of your new TV. Before operating the TV/DVD, please read this manual completely, and keep it nearby for future reference. Safety Precautions WARNING: TO REDUCE THE - Toshiba 32HLX95 | Owners Manual - Page 3
normally, take the following precautions: • ALWAYS turn off the TV and unplug the power cord to avoid possible electric shock or fire. • NEVER allow your body to come in contact with any broken glass or liquid from the damaged TV. The LCD panel inside the TV contains glass and a toxic liquid. If - Toshiba 32HLX95 | Owners Manual - Page 4
, press, or place anything on the LCD screen. These actions will damage the LCD screen. If you need to clean the LCD screen, follow the instructions in item 28 on this page. Service 36) WARNING: RISK OF ELECTRIC SHOCK! Never attempt to service the TV yourself. Opening and removing the covers - Toshiba 32HLX95 | Owners Manual - Page 5
Important notes about your LCD TV/DVD Combination The following symptoms are technical limitations of LCD display technology and are not an indication of malfunction. Therefore, Toshiba is not responsible for perceived issues resulting from these symptoms. 1) An afterimage (ghost) may appear on the - Toshiba 32HLX95 | Owners Manual - Page 6
the STOP ( ) button is pressed. Notes on region numbers The region number of this DVD player of the TV is 1. If region numbers, which stand for their playable area, are printed on your DVD video disc and you do not find 1 or ALL , disc playback will not be allowed by the player. (In this case, the - Toshiba 32HLX95 | Owners Manual - Page 7
Video (moving pictures) 12 cm Approx. 74 minutes Audio CDs Audio 12 cm Approx. 74 minutes Because of problems and errors that can occur during the creation of DVD and CD software and/or the manufacture of DVD and CD discs, Toshiba cannot guarantee that the DVD player contained in this TV will - Toshiba 32HLX95 | Owners Manual - Page 8
your LCD TV/DVD Combination ... 5 FCC Declaration of Conformity Compliance Statement (Part 15 8 Learning about the remote control 25 Installing the remote control batteries 26 Using the remote control MODE button to control your other devices 26 Chapter 1: Introduction 10 Welcome to Toshiba - Toshiba 32HLX95 | Owners Manual - Page 9
™ interactive program guide 46 Setting up the TV Guide On Screen™ system 46 Navigating the TV Guide On Screen™ system 47 TV Guide On Screen™ remote control functions ........ 47 Video Window 48 Panel Menus 48 Info Box 49 TV Guide On Screen™ Icons 49 TV Guide On Screen™ Services 50 LISTINGS - Toshiba 32HLX95 | Owners Manual - Page 10
purchasing this Toshiba LCD TV/DVD combination, one of the innovative LCD TVs on the market. The goal of this manual is to guide you through setting up and operating your TV as quickly as possible. See "Important notes about your LCD TV/DVD Combination" on page 5. • Instructions in this manual are - Toshiba 32HLX95 | Owners Manual - Page 11
player's features, see Chapter 10. 17. For help, refer to the Troubleshooting Guide (Chapter 11). 18. For technical specifications and warranty information, see Chapter 12. 19. Enjoy your new LCD TV/DVD! Note: If you sell or transfer this television to a third party, be sure to reset the PIN code - Toshiba 32HLX95 | Owners Manual - Page 12
!£ SKIP !¢ OPEN/ CLOSE * * * Swivel angle TV top 9 VOLUME x • 3 TV/VIDEO 8 CHANNEL zy Top panel 0 6 MENU GUIDE 4 EXIT 7 POWER 5 x •zy TV front TV side panel !¶ DVD disc slot TIMER REC POWER 2 Red/Green LEDs 1 Remote sensor !∞ VIDEO-2 IN !§ Headphone jack 1 Remote sensor - Point the - Toshiba 32HLX95 | Owners Manual - Page 13
video output, such as a Toshiba DVD player with ColorStream®. See pages 18 and 19. Note: Component video cables carry only video and ANT-2 IN - Two inputs that support analog (NTSC) and digital (ATSC) off-air antenna signals and analog and digital (QAM) Cable TV signals. Note: If you have an - Toshiba 32HLX95 | Owners Manual - Page 14
allow them to work properly with this G-LINK™ port. Never use other aftermarket IR blaster or G-LINK™ cables with this TV. Other cables may not function properly and can cause damage. THIS TYPE OF DAMAGE IS NOT COVERED BY YOUR TOSHIBA WARRANTY. ● Optical audio cable is for connecting receivers with - Toshiba 32HLX95 | Owners Manual - Page 15
services (such as video-on-demand, a cable operator's enhanced program guide, and data-enhanced television services) will Connect the cable for your digital cable TV service to ANT-1 only. • When using any performance-related CableCARD™ issues with your Toshiba television, please contact the - Toshiba 32HLX95 | Owners Manual - Page 16
line input (refer to your VCR owner's manual for details), and then turn OFF the VCR. 4. See Chapter 5 for details on setting up the TV Guide On Screen™ system. 5. See Chapter 7 for details on using the TV Guide On Screen™ system. Note: The VIDEO/AUDIO OUT terminals output signals from the ANT - Toshiba 32HLX95 | Owners Manual - Page 17
line input (refer to your VCR owner's manual for details), and then turn OFF the VCR. 4. See Chapter 5 for details on setting up the TV Guide On Screen™ system. 5. See Chapter 7 for details on using the TV Guide On Screen™ system. Copyright © 2005 TOSHIBA CORPORATION. All rights reserved. 17 - Toshiba 32HLX95 | Owners Manual - Page 18
's manual for details), and then turn OFF the VCR. 4. See Chapter 5 for details on setting up the TV Guide On Screen™ system. 5. See Chapter 7 for details on using the TV Guide On Screen™ system. Note: The TV Guide On Screen™ system does not receive program listings from or for any satellite service - Toshiba 32HLX95 | Owners Manual - Page 19
Select the VIDEO 1 video input source on the TV.* To record a TV program while watching a DVD: Turn ON the VCR. Tune the VCR to the channel to record. Select the ColorStream HD 1 video input source on the TV* to view the DVD. To select the video input source, press INPUT on the remote control (see - Toshiba 32HLX95 | Owners Manual - Page 20
the ANT 1, ANT 2, VIDEO 1, and VIDEO 2 terminals when the appropriate input mode is selected. The playing disc's contents by the DVD section are not output. To use the TV Guide On Screen™ recording features: 1. Connect the G-LINK™ cable for VCR2 according to the instructions on page 23. 2. Make - Toshiba 32HLX95 | Owners Manual - Page 21
that you follow these procedures: • When turning on your electronic components, turn on the TV first, and then the HDMI or DVI device. • When turning off your electronic components, turn off the HDMI or DVI device first, and then the TV. To connect a DVI device, you will need: • one HDMI-to-DVI - Toshiba 32HLX95 | Owners Manual - Page 22
will need: one optical audio cable (Use an optical audio cable that has the larger "TosLink" connector and not the smaller "minioptical" connector.) To control the audio: Turn on the TV and the digital audio device. Press MENU on the TV's remote Format DVD Audio COVERED BY YOUR WARRANTY. Note: • - Toshiba 32HLX95 | Owners Manual - Page 23
guide: See Chapter 7. TV lower back panel *If you cannot locate the device's infrared sensor: 1. Turn OFF the device. 2. Starting at the lower left corner of the device, place the end of the device's remote control (with the infrared emitter) so it touches the front of the device and press POWER - Toshiba 32HLX95 | Owners Manual - Page 24
(if necessary) Note: • Some PC models cannot be connected to this TV. • An adapter is not needed for computers with a DOS/V compatible mini D-sub 15-pin terminal. • Depending on the DVD's title and the specifications of the PC on which you are playing the DVD-Video, some scenes may be skipped or you - Toshiba 32HLX95 | Owners Manual - Page 25
the video input source (page 60). MODE cycles through the six remote control device modes: TV, CBL/SAT, VCR/PVR, DVD, AUDIO1, and AUDIO2. The TV mode should be chosen to control the TV and Built-in DVD. Every time you turn the power on, the TV starts from the TV mode. The mode indicator light will - Toshiba 32HLX95 | Owners Manual - Page 26
, you will need to program the remote control. See "Programming the remote control to operate your other devices" on page 29. MODE Default device mode control (before programming) 1) TV Toshiba TV 2) CBL/SAT Toshiba Satellite receiver 3) VCR/PVR Toshiba VCR 4) DVD Toshiba DVD 5) AUDIO1 - Toshiba 32HLX95 | Owners Manual - Page 27
--- - channel) channel) INPUT TV/Video select TV TV TV TV TV TV TV PIC SIZE Selects the TV TV TV TV TV TV TV image shape. MENU/ Menu/ --- Action, --- Menu --- --- Menu ACTION Guide Menu Menu TV GUIDE/SETUP TV Guide --- Guide --- DVD setup --- --- Advance INFO - Toshiba 32HLX95 | Owners Manual - Page 28
Chapter 3: Using the remote control Remote control functional key chart (continued) Key Label Toshiba TV Cable Satellite (TV) (CBL/SAT) (CBL/SAT) VCR DVD/LD Receiver CD (AUDIO) (AUDIO) PVR (VCR) MUTE Sound mute*2 Sound mute*2 Sound mute*2 Sound mute*2 Sound mute*2 Sound mute*2 Sound mute - Toshiba 32HLX95 | Owners Manual - Page 29
will blink three times. The remote control will begin to cycle through the available codes again. If no key is pressed within 10 seconds while programming, the remote control will exit the program mode and return to the previous code. POWER Numbers MODE y CH y VOL z RECALL Copyright © 2005 TOSHIBA - Toshiba 32HLX95 | Owners Manual - Page 30
remote control Programming the remote control to operate your other devices (continued) Using the volume lock feature (8000) For the TV, CABLE/SAT, VCR, and DVD SAT mode light will blink two times will TV." To reset the features: While holding down RECALL, press 8 - 9 - 0 - 0. The Mode indicator will - Toshiba 32HLX95 | Owners Manual - Page 31
remote control Multi-brand remote 0127 MEMOREX 1130 FUNAI 0127, 0126, 0120, Replay TV 7102 MOTOROLA 1119, 1124, 1125, 0134 SAMSUNG 0137 0145, 0124 0133 1121, 1122, 1111, GO VIDEO 0137, 0151, 0163, SAMTRON 0163 1123, 1152 NEC 0139, 0110, 0111, TOSHIBA 0101, 0146, 0166, UNIVERSAL - Toshiba 32HLX95 | Owners Manual - Page 32
remote control Multi-brand remote 4119, 4118, 4121 PHILIPS 4123 32 Receivers (cont.) Brand PIONEER QUASAR PROSCAN QUASAR RCA SAMSUNG SANYO SHARP SONY TEAC TOSHIBA YAMAHA Code 5114 5100 5102, 5103 5101 5114 5108, 5109, 5110 5114 5114 5101 DVD players Brand AIWA APEX DENON FERGUSON HITACHI JVC - Toshiba 32HLX95 | Owners Manual - Page 33
remote control or TV top panel. Applications ➞ TV Guide On Screen™ ➞ Launch Gemstar / TV GUIDE Closed Caption Mode ➞ Off / CC1 / CC2 / CC3 / CC4 / T1 / T2 / T3 / T4 ➞ Closed Caption Advanced ➞ [ Advanced Closed Captions ➞ Off / Video / Video + ➞ Front TOSHIBA CORPORATION. All rights reserved. 33 - Toshiba 32HLX95 | Owners Manual - Page 34
the menu.) • All menus close automatically if you do not make a selection within 60 seconds except the signal meter menu which closes automatically after 5 minutes. • To close a menu instantly, press EXIT. 34 Copyright © 2005 TOSHIBA CORPORATION. All rights reserved. Remote control MENU ENTER - Toshiba 32HLX95 | Owners Manual - Page 35
RTN Back EXIT Exit 4. The following screen appears. Highlight "Set up TV Guide On Screen™ now" and press ENTER to continue. Screen 2: Enter the ZIP code (U.S.A.) or postal code (Canada) for your location (use the Number buttons on the remote control for numbers and yz for letters), and then press - Toshiba 32HLX95 | Owners Manual - Page 36
to when using your cable box, and then press ENTER. Screen 7 appears. Screen 10: The TV Guide On Screen™ system will test the code for the brand of Cable box you selected. Do not press any keys on the TV, remote control, or Cable box until the testing process is completed. When testing is completed - Toshiba 32HLX95 | Owners Manual - Page 37
TV Guide G-LINK™ terminal on the TV. Make sure the G-LINK™ have completed basic TV Guide On Screen™ TV Guide On Screen™ service. Press ENTER to display screen 15. Screen 18: Turn TV Guide On Screen™ system will test the code for the brand of VCR you selected. Do not press any keys on the TV, remote - Toshiba 32HLX95 | Owners Manual - Page 38
The TV Guide On Screen™ system receives program listings data through your Cable or over-the-air video signal. In order to receive regular program listing updates, remember to do the following: 1. Leave the TV in standby mode when it is not in use by turning it OFF but leaving the power cord - Toshiba 32HLX95 | Owners Manual - Page 39
then press ENTER. Preferences Favorite Channels Closed Caption Mode off Closed Caption Advanced Input Labeling Menu Language English will be "grayed out") in some instances (for example, if a cable box is connected to the ANT 1 input or if one of the VIDEO modes is the current input during TV Guide - Toshiba 32HLX95 | Owners Manual - Page 40
from the memory, you must manually delete it (see next page). • To tune the TV to a channel not programmed in the channel memory, you must use the Channel Number buttons on the remote control. • Programming channels for an antenna input configured for Cable will take substantially longer than for - Toshiba 32HLX95 | Owners Manual - Page 41
press ENTER. Note: "Cable Box" will appear only if you connected a cable box to your TV. Channel Add/Delete 2 2 - 1 manually add digital subchannels on a physical channel: Use the Channel Numbers and the Dash (-/100) on the remote Done Copyright © 2005 TOSHIBA CORPORATION. All rights reserved. 41 - Toshiba 32HLX95 | Owners Manual - Page 42
TV Closed Caption Mode CC1 Closed Caption first. will appear. You will need will change the favorite channel settings in the selected input. (This will not change the TV will appear only if you connected a cable box to your TV for another input, you will need to change the Input Selection first. Number - Toshiba 32HLX95 | Owners Manual - Page 43
lose the time and date settings when the power is restored. • If you manually set the time and date and then perform TV Guide On Screen™ setup, the manual time and date settings will be overridden by the TV Guide On Screen™ settings. Copyright © 2005 TOSHIBA CORPORATION. All rights reserved. 43 - Toshiba 32HLX95 | Owners Manual - Page 44
services will only operate with cable signal connected to Antenna 1. OK To view the CableCARD™ menu: 1. Press MENU and open the Applications menu. 2. Highlight CableCARD™ and press •. 3. Press yz to select one of the side menu items and press ENTER to display the information. Applications TV Guide - Toshiba 32HLX95 | Owners Manual - Page 45
Brand: Toshiba Model: 32HLX95 Software Version 0.8.2 Jun 13 2005 - 13:54:14 FW:1.41 Sub:41 Done Done To close the set). 4. Highlight Yes and press ENTER. The TV will turn off automatically after a few seconds. After the TV turns off, unplug the TV power cord and then plug it in again to complete - Toshiba 32HLX95 | Owners Manual - Page 46
when you turn on the TV. To turn off this feature, see page 38. Setting up the TV Guide On Screen™ system Follow these instructions to set up the TV Guide On Screen™ system so it can receive current program data for your area. Note: If you move the TV to a different ZIP/postal code, you will need - Toshiba 32HLX95 | Owners Manual - Page 47
SEARCH, SETUP, or SCHEDULE). 3. Press z to use that Service. Note: Helpful information about each Service appears in the Info Box. TV Guide On Screen™ remote control functions Note: • The TV Guide On Screen™ menus shown in this manual are for illustration purposes only. The channels, programs, and - Toshiba 32HLX95 | Owners Manual - Page 48
7: Using the TV Guide On Screen™ interactive program guide Navigating the TV Guide On Screen™ system (continued) Video Window • When you open the TV Guide On Screen™ system, the current program appears in the Video Window. • As you scroll through the listings, the Video Window will change to - Toshiba 32HLX95 | Owners Manual - Page 49
the remote control to cycle among the sizes. - The default Info Box size is Small. To change the default size, open the SETUP Service Closed captioning is available for the show. TV Rating • TV rating for the show. Record Once • Show is set to record once. • Other frequencies are Daily (manual - Toshiba 32HLX95 | Owners Manual - Page 50
in standby mode (power cord plugged in and power OFF) to download the entire TV Guide On Screen™ program schedule. Be sure to follow the instructions under "TV Guide On Screen™ Reminder" on page 38. LISTINGS screen • When you open the TV Guide On Screen™ system, LISTINGS is always the first service - Toshiba 32HLX95 | Owners Manual - Page 51
7: Using the TV Guide On Screen™ interactive program guide TV Guide On Screen™ Services (continued) SEARCH ). • With SEARCH highlighted in the Service Bar, press INFO to display a help screen. Press INFO again to close the screen. 2. Press z to TOSHIBA CORPORATION. All rights reserved. 51 - Toshiba 32HLX95 | Owners Manual - Page 52
Chapter 7: Using the TV Guide On Screen™ interactive program guide TV Guide On Screen™ Services (continued) SEARCH screen (continued) to close the panel menu. - CANCEL: Closes the panel menu, changes no information, and returns to the highlighted keyword. 52 Copyright © 2005 TOSHIBA CORPORATION. - Toshiba 32HLX95 | Owners Manual - Page 53
program guide TV Guide On Screen™ Services (continued) SCHEDULE screen The SCHEDULE service screen allows you to review, edit, or delete Record and Remind events you set previously. • With SCHEDULE highlighted in the Service Bar, press INFO to display a help screen. Press INFO again to close the - Toshiba 32HLX95 | Owners Manual - Page 54
Using the TV Guide On Screen™ interactive program guide TV Guide On Screen™ Services (continued) Record features (continued) 3) Manually set a show to Record 1. Highlight SCHEDULE in the Service Bar, and press MENU to display the Schedule Options panel menu. 2. Highlight NEW MANUAL RECORDING and - Toshiba 32HLX95 | Owners Manual - Page 55
Chapter 7: Using the TV Guide On Screen™ interactive program guide TV Guide On Screen™ Services (continued) Remind features You can set a Reminder to perform the following functions: • Automatically turn on the TV (if off ) at the scheduled reminder time, and tune the TV to the channel of the show - Toshiba 32HLX95 | Owners Manual - Page 56
TV Guide On Screen™ interactive program guide TV Guide On Screen™ Services (continued) Remind features (continued) Reminder notification banner Based on your option settings, a notification banner will appear on-screen, if your TV : This icon displays for manual reminders only. Remind conflict - Toshiba 32HLX95 | Owners Manual - Page 57
in the Service Bar, press INFO to display a help screen. Press INFO again to close the screen. 2. Press ENTER again to display the Confirming Your Settings screen. 3. Highlight one of the options, press ENTER, and follow the on-screen instructions. Copyright © 2005 TOSHIBA CORPORATION. All - Toshiba 32HLX95 | Owners Manual - Page 58
service or TV Guide On Screen™ system when the TV is powered on. Choices are On (default) and Off. Note: Set the AUTO GUIDE to Off if you do not want the TV Guide On Screen™ system to open every time you turn on the TV. 4. When finished, press ENTER to highlight DONE, and press ENTER again to close - Toshiba 32HLX95 | Owners Manual - Page 59
Chapter 7: Using the TV Guide On Screen™ interactive program guide TV Guide On Screen™ Services (continued) SETUP screen (continued) press ENTER again to close the menu and accept the changes (or highlight CANCEL to close the menu with no changes). Copyright © 2005 TOSHIBA CORPORATION. All rights - Toshiba 32HLX95 | Owners Manual - Page 60
the specific devices you have connected to the TV (see "Labeling the video input sources" on the next page). • The source can be "hidden." See page 61 for details. Numbers INPUT y z Remote control TV top panel TV/VIDEO CHANNEL zy { 60 Copyright © 2005 TOSHIBA CORPORATION. All rights reserved. - Toshiba 32HLX95 | Owners Manual - Page 61
the TV Guide On Screen™ setup. To label the video input sources: 1. Press MENU and open the Preferences menu. 2. Highlight Input Labeling and press ENTER. 3. Press yz to highlight the video source you want to label. Preferences Favorite Channels Closed Caption Mode CC1 Closed Caption Advanced - Toshiba 32HLX95 | Owners Manual - Page 62
in the channel history. This feature allows you to: • Keep a separate, temporary* history of the last 32 channels tuned from each of three inputs: ANT 1, ANT 2, and Cable Box. *Note: Turning off the TV will clear the channel history for all three inputs. • Quickly surf and tune your recently viewed - Toshiba 32HLX95 | Owners Manual - Page 63
32 channels that were tuned in the current input (ANT 1, ANT 2, and Cable Box inputs only). A separate history will be remote control. Clearing channels from the channel history • Turning off the TV will clear all three channel histories (ANT 1, ANT 2, and Cable Box). • Removing the CableCARD™ will - Toshiba 32HLX95 | Owners Manual - Page 64
the remote control. The previous channel will display. Each time you press CH RTN, the TV will switch will be cleared and the button will function as Channel Return, by switching back and forth between the last two channels that were selected. Channel Numbers - (dash) 64 Copyright © 2005 TOSHIBA - Toshiba 32HLX95 | Owners Manual - Page 65
sizes will vary depending on the format of the program you are viewing. Select the picture size that displays the current program the way that looks best to you. Your picture size preferences can be saved for each input on your TV. To select the picture size: 1. Press PIC SIZE on the remote - Toshiba 32HLX95 | Owners Manual - Page 66
TV's features Selecting the picture size (continued) TheaterWide 1 picture size (For 4:3 format program) • The center of the picture remains close press PIC SIZE on the remote control. Note: • If subtitles or captions) may be displays will vary depending TOSHIBA CORPORATION. All rights reserved. - Toshiba 32HLX95 | Owners Manual - Page 67
set the scroll settings: 1. Press INPUT on the remote control or TV/VIDEO on the TV to select the input for which you want to set TV Guide On Screen™ system is open. To turn on the auto aspect ratio feature: 1. Press MENU and open the Video menu. 2. Highlight Theater Settings and press ENTER. Video - Toshiba 32HLX95 | Owners Manual - Page 68
DVD (480i signal; 3:2 pulldown processed) from a DVD player connected to the VIDEO 1, VIDEO 2, ColorStream HD 1/HD 2 (component video), or HDMI inputs on the TV TV is left in FREEZE mode, after 15 minutes it will automatically release the FREEZE mode and return to the moving picture. Video Picture - Toshiba 32HLX95 | Owners Manual - Page 69
Using the TV's features Selecting select the picture mode: Press PIC MODE on the remote control. The following popup menu appears on- PIC MENU and open the Video menu. 2. Highlight Picture Settings and press ENTER. Video Picture Settings Advanced TOSHIBA CORPORATION. All rights reserved. 69 - Toshiba 32HLX95 | Owners Manual - Page 70
. If the signal is digital, the menu will display the text "CableClear" and will be "grayed out" with "Off" selected. • For the current inputs built-in DVD, ColorStream HD1, ColorStream HD2, or HDMI, the menu will display the text "DNR." If the video resolution is 480i, the available selections are - Toshiba 32HLX95 | Owners Manual - Page 71
is set to "On," the TV will detect changes in the picture quality that affect the appearance of your contrast settings and then automatically adjust the video. When dynamic contrast is set to "Selecting the picture mode" on page 69. Copyright © 2005 TOSHIBA CORPORATION. All rights reserved. 71 - Toshiba 32HLX95 | Owners Manual - Page 72
Chapter 8: Using the TV's features Using the closed caption mode The closed caption mode has two options: • Captions-An on-screen display of the dialog, narration, and sound effects of TV programs and videos that are closed captioned (usually marked "CC" in program guides). • Text-An on-screen - Toshiba 32HLX95 | Owners Manual - Page 73
Digital CC/Audio Selector and press ENTER. Applications TV Guide On Screen Digital CC/Audio Selector CableCARD Navigate Select CH RTN Back EXIT Exit 3. Press yz to select Closed Caption. Audio Closed Caption CC 1 Service 1 Copyright © 2005 TOSHIBA CORPORATION. All rights reserved. 73 - Toshiba 32HLX95 | Owners Manual - Page 74
CC/ Audio Selector and press ENTER. Applications TV Guide On Screen Digital CC/Audio Selector CableCARD 3. Press yz to select Audio, and then press x • to select the desired service. Navigate Select CH RTN Back EXIT Exit Audio Closed Caption CC 1 Service 1 Selecting stereo/SAP broadcasts The - Toshiba 32HLX95 | Owners Manual - Page 75
the sudden increase in volume that often happens when a TV program switches to a commercial). To turn on the StableSound® feature: 1. Press MENU and open StableSound ... Off To turn off the StableSound feature: Select Off in step 3 above. Copyright © 2005 TOSHIBA CORPORATION. All rights reserved - Toshiba 32HLX95 | Owners Manual - Page 76
TV's audio will sound fuller, richer, and wider. To adjust the WOW™ settings: 1. Put the TV 3D - To turn the surround sound effect On or Off WOW: FOCUS - To turn the vocal emphasis effect On Output Format DVD Audio Reset ENTER. To turn on the built terminal on the TV (see "Connecting Format DVD Audio - Toshiba 32HLX95 | Owners Manual - Page 77
, 1 Hour). 7. Highlight Done and press ENTER. 8. Turn off the TV. The TV will turn on automatically on the day(s) and at the time you set. The TV will then turn off automatically after the length of time you set in the TV ON Duration field. Note: • When a power failure occurs, the On/Off timer - Toshiba 32HLX95 | Owners Manual - Page 78
You can adjust the horizontal position/size, vertical position/size, clock phase, and sampling clock. This feature will be grayed out on the menu unless there is a PC connected to the TV (See "Connecting a personal computer(PC)" on page 24.) To set the PC setting: 1. Confirm a PC is connected - Toshiba 32HLX95 | Owners Manual - Page 79
which you are recording is "on hold" (i.e., locked) so your recordings will not be affected by channel changes. • Video resolution To close TV setting information on-screen: Press RECALL again. The TV will automatically turn itself off after approximately 15 minutes if it is tuned to a vacant - Toshiba 32HLX95 | Owners Manual - Page 80
code While the PIN code entering screen is displayed, press RECALL four times within 5 seconds. The PIN code will be cleared and you can enter a new PIN code. Changing your PIN code 1. Press MENU and highlight the CH RTN Back EXIT Exit 80 Copyright © 2005 TOSHIBA CORPORATION. All rights reserved. - Toshiba 32HLX95 | Owners Manual - Page 81
information, nothing will be displayed in the banner and ratings blocking will not take effect. • To display the rating of the program you are watching, press RECALL on the remote control. If it is not rated, the word "NONE" appears. TV - PG L V NONE Copyright © 2005 TOSHIBA CORPORATION. All - Toshiba 32HLX95 | Owners Manual - Page 82
Enter PIN code to temporaily unblock. **** until the TV is turned Cancel Done off, and will be enabled when the TV is turned on again. Locking video inputs You can use the Input Lock feature to lock the video input sources (VIDEO 1, VIDEO 2, ColorStream HD 1, ColorStream HD 2, HDMI, PC) and - Toshiba 32HLX95 | Owners Manual - Page 83
, 3 minutes, and 1 minute remain on the GameTimer. • If the TV loses power with time remaining on the GameTimer, when power is restored the TV will enter VIDEO LOCK mode (as if the GameTimer has expired) and you will have to deactivate the video lock (as described above). You can lock the top panel - Toshiba 32HLX95 | Owners Manual - Page 84
button on the remote control to TV mode when using the built-in DVD. Basic playback DVD VCD CD 1. Press POWER on the TV or on the remote control to turn on the TV. Press INPUT on the remote control or TV/VIDEO on the TV to select the Built-in DVD mode. 2. The DVD startup screen will appear on the - Toshiba 32HLX95 | Owners Manual - Page 85
features may not be available. Also refer to the instructions supplied with the DVDs. • Do not move the TV during playback. Doing so may damage the disc. If you want to move the TV to another room, be sure to eject the disc and turn off the power beforehand. • If the disc does not load after the - Toshiba 32HLX95 | Owners Manual - Page 86
. The playback of the selected title will start. Note: • Depending on the DVD, you may not be able to select the title. • Depending on the DVD, a "title menu" may simply be called a "menu" or "title" in the instructions supplied with the disc. • Depending on the DVD, the title menu may be displayed - Toshiba 32HLX95 | Owners Manual - Page 87
on screen display will disappear after a few seconds. SUBTITLE OFF In case of Video CD playback 1. Stop the disc playback. 2. Press MENU and open the Audio menu. 3. Highlight Audio Setup and press ENTER. Note: • Depending on the DVD, you may not be able to change subtitles, or to turn subtitles on - Toshiba 32HLX95 | Owners Manual - Page 88
10: DVD Playback To turn off the PBC VCD 1. Press number button 1 in the stop mode, then press ENTER. MP3/JPEG CD operation This TV can play on which MP3 files have been recorded in the disc slot. 2. A file menu screen will appear on the screen. Press yzx • and then press PLAY to select a folder. - Toshiba 32HLX95 | Owners Manual - Page 89
MP3/WMA files). Because this area of technology is still evolving, Toshiba cannot guarantee that all recordable discs will produce optimal playback quality. The technical criteria set forth in this owner's manual are meant only as a guide. • Please be advised that you must obtain permission from the - Toshiba 32HLX95 | Owners Manual - Page 90
General Troubleshooting Before calling a service technician, please check the following table for a possible cause of the symptom and some solutions. Symptom TV will not turn on Solution • Make sure the power cord is plugged in, and then press POWER. • The remote control batteries may be dead - Toshiba 32HLX95 | Owners Manual - Page 91
Chapter 11: Troubleshooting Symptom Sound problems Remote control problems Channel tuning problems Closed caption problems Rating Blocking (V-Chip) problems Recording problems TV stops responding to controls Other problems Solution • Check the antenna/cable connections (see Chapter 2). • The - Toshiba 32HLX95 | Owners Manual - Page 92
remote operation key is not functioning • Turn off the TV and unplug the AC power cord for several minutes, then replug it. Audio soundtrack and/or subtitle language is not changed when you play back a DVD • Multilingual languages are not recorded on the DVD disc. No subtitle • Some discs have - Toshiba 32HLX95 | Owners Manual - Page 93
the problem. After you set up the TV Guide On Screen™ system (Chapter 5), the program guide opens automatically by default when you turn on the TV. You can turn off the automatic program guide (see page 38) and instead press the TV GUIDE button on the remote control to manually open the TV Guide On - Toshiba 32HLX95 | Owners Manual - Page 94
to it, highlight SETUP in the Service Bar. Press z to select Change channel display. Follow the on-screen instructions. 16. Q: Why do all my channels display "No Listing?" A: The TV Guide On Screen™ system has not yet received its data download. The phrase "No Listing" will be replaced with program - Toshiba 32HLX95 | Owners Manual - Page 95
manual or contact your Cable TV company for proper wiring procedures. 32. Q: Is Help available in the TV Guide On Screen™ system? If so, how do I find it? A: Yes. Highlight any of the four main Services (Listings, Schedule, Setup, Search) and press INFO on the remote have a power failure, will I - Toshiba 32HLX95 | Owners Manual - Page 96
% (no moisture condensation) Supplied Accessories • Dual-wand IR blaster cable • Remote control with two size "AA" alkaline batteries • Clip (see item 19 on page 3) • Owner's Manual (this book) WARNING: If you decide to wall mount this television, always use the Toshiba wall bracket specified below - Toshiba 32HLX95 | Owners Manual - Page 97
use of this LCD TV/DVD Combination and connected equipment; or to units that have been modified or had the serial number removed, altered, defaced, or rendered illegible. How to Obtain Warranty Service If, after following all of the operating instructions in this manual and reviewing the section - Toshiba 32HLX95 | Owners Manual - Page 98
a limited ninety (90) day warranty for all parts and labor. Owner 's Manual and Product Registration Read this owner 's manual thoroughly before operating this LCD TV/DVD Combination. If you purchased your LCD TV/DVD Combination in Canada, register it online at www.toshiba.ca as soon as possible. By - Toshiba 32HLX95 | Owners Manual - Page 99
the costs of providing the source code. A copy of the LGPL source code in this product may be obtained by contacting Toshiba Consumer Solutions at (800)631-3811. There will be a charge to cover the costs of providing the source code. USB Protocol Copyright © 2005 The NetBSD Foundation, Inc. All - Toshiba 32HLX95 | Owners Manual - Page 100
Automatic programming 40 Manually adding and deleting 41 Cinema mode 68 Closed captions 72 Color temperature 70 ColorStream 13, 18, 19 Connecting devices 15-24 Component video cables 14 Component video (ColorStream 18, 19 D Device connections 15-24 Defaults, restore TV factory 45 Digital - Toshiba 32HLX95 | Owners Manual - Page 101
lock 83 Troubleshooting 90-95 TruBass 76 TV Guide On Screen 23, 35, 46 V V-Chip blocking (Locks menu 81, 82 VCR connection 16-20 Video cables 14 Video input labels 61 Video input lock 82 VOL (volume) yz buttons 25 W Warranty 97, 98 WOW™, SRS 76 ® ... Copyright © 2005 TOSHIBA CORPORATION - Toshiba 32HLX95 | Owners Manual - Page 102
OFFICE: 82 TOTOWA ROAD, WAYNE, NJ 07470, U.S.A. NATIONAL SERVICE DIVISION:1420-B TOSHIBA DRIVE, LEBANON, TN 37087, U.S.A. TOSHIBA OF CANADA LTD. HEAD OFFICE: 191 McNABB STREET, MARKHAM, ONTARIO, L3R 8H2, CANADA - TEL: (905) 470-5400 SERVICE CENTERS: TORONTO: 191 McNABB STREET, MARKHAM, ONTARIO L3R
-
 1
1 -
 2
2 -
 3
3 -
 4
4 -
 5
5 -
 6
6 -
 7
7 -
8
-
9
-
10
-
11
-
12
-
13
-
14
-
15
-
16
-
17
-
18
-
19
-
20
-
21
-
22
-
23
-
24
-
25
-
26
-
27
-
28
-
29
-
30
-
31
-
32
-
33
-
34
-
35
-
36
-
37
-
38
-
39
-
40
-
41
-
42
-
43
-
44
-
45
-
46
-
47
-
48
-
49
-
50
-
51
-
52
-
53
-
54
-
55
-
56
-
57
-
58
-
59
-
60
-
61
-
62
-
63
-
64
-
65
-
66
-
67
-
68
-
69
-
70
-
71
-
72
-
73
-
74
-
75
-
76
-
77
-
78
-
79
-
80
-
81
-
82
-
83
-
84
-
85
-
86
-
87
-
88
-
89
-
90
-
91
-
92
-
93
-
94
-
95
-
96
-
97
-
98
-
99
-
100
-
101
-
102
 |
 |
32HLX95
37HLX95
© 2005 TOSHIBA CORPORATION
All Rights Reserved
Owner’s Record
The model number and serial number are on the back
of your TV. Record these numbers in the spaces below.
Refer to these numbers whenever you communicate
with your Toshiba dealer about this TV.
Model number:
Serial number:
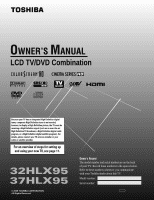
LCD TV/DVD Combination
O
WNER’S
M
ANUAL
HIGH
-DEFINITION TELEVISION
For an overview of steps for setting up
and using your new TV, see page 11.
DIGITAL VIDEO
YC/M1
23566698A
Because your TV has an integrated High Definition digital
tuner, a separate High Definition tuner is not needed;
however, to display a High Definition picture, the TV must be
receiving a High Definition signal (such as an over-the-air
High Definition TV broadcast, a High Definition digital cable
program, or a High Definition digital satellite program). For
details, please contact your TV antenna installer or your
cable or satellite provider.