Toshiba 52HM95 Owner's Manual - English - Page 39
cable is installed properly.
 |
UPC - 022265251157
View all Toshiba 52HM95 manuals
Add to My Manuals
Save this manual to your list of manuals |
Page 39 highlights
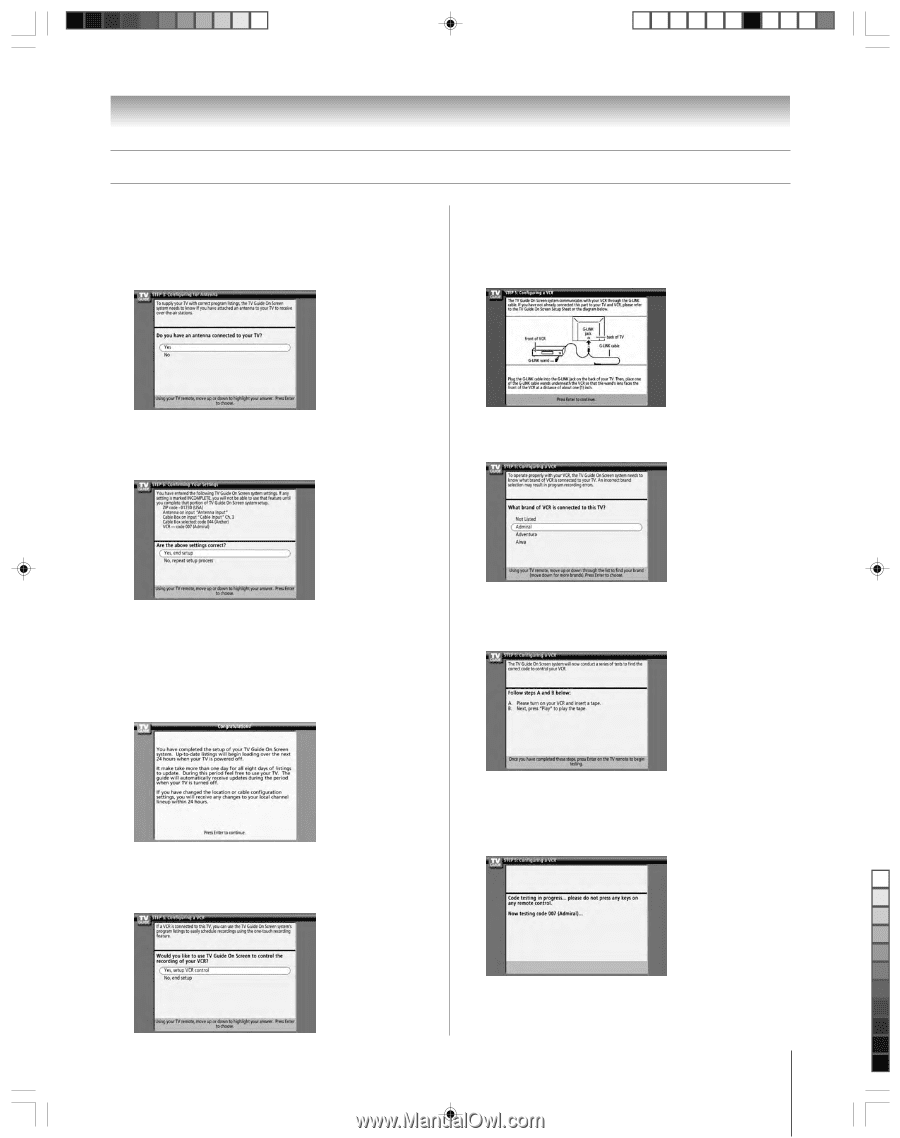
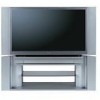
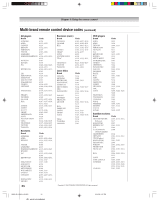
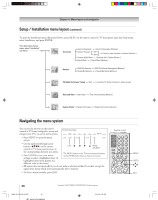
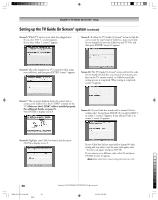
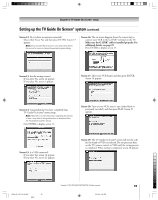
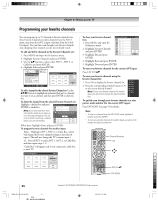
Chapter 5: TV Guide On Screen® setup Setting up the TV Guide On Screen® system (continued) Screen 12: Do you have an antenna connected? Select either Yes or No, and then press ENTER. Screen 13 appears. Note: If you selected NO in screen 3, you must select YES in this screen to receive a channel lineup and program listings. Screen 16: The on-screen diagram shows the correct way to connect your VCR to the G-LINK® terminal on the TV. Make sure the G-LINK® cable is installed properly. For additional details, see page 25. Press ENTER to display screen 17. Screen 13: Are the settings correct? If you select Yes, screen 14 appears. If you select No, screen 1 appears. Screen 17: Select your VCR brand, and then press ENTER. Screen 18 appears. Screen 14: Congratulations! You have completed basic TV Guide On Screen® system setup. Note: Read the on-screen information regarding the amount of time it may take for listing information to download from the TV Guide On Screen® service. Press ENTER to display screen 15. Screen 18: Turn on your VCR, insert a tape (either blank or previously recorded), and then press PLAY. Screen 19 appears. Screen 15: Is a VCR connected? If you select Yes, screen 16 appears. If you select No, screen 21 appears. Screen 19: The TV Guide On Screen® system will test the code for the brand of VCR you selected. Do not press any keys on the TV, remote control, or VCR until the testing process is completed. When testing is completed, screen 20 appears. HM95_R1_037-40_061505 39 Black Copyright © 2005 TOSHIBA CORPORATION. All rights reserved. 6/24/05, 9:36 PM 39
-
 1
1 -
2
-
3
-
4
-
5
-
6
-
7
-
8
-
9
-
10
-
11
-
12
-
13
-
14
-
15
-
16
-
17
-
18
-
19
-
20
-
21
-
22
-
23
-
24
-
25
-
26
-
27
-
28
-
29
-
30
-
31
-
32
-
33
-
 34
34 -
 35
35 -
 36
36 -
 37
37 -
 38
38 -
 39
39 -
 40
40 -
 41
41 -
 42
42 -
 43
43 -
 44
44 -
45
-
46
-
47
-
48
-
49
-
50
-
51
-
52
-
53
-
54
-
55
-
56
-
57
-
58
-
59
-
60
-
61
-
62
-
63
-
64
-
65
-
66
-
67
-
68
-
69
-
70
-
71
-
72
-
73
-
74
-
75
-
76
-
77
-
78
-
79
-
80
-
81
-
82
-
83
-
84
-
85
-
86
-
87
-
88
-
89
-
90
-
91
-
92
-
93
-
94
-
95
-
96
-
97
-
98
-
99
-
100
-
101
-
102
-
103
-
104
-
105
-
106
-
107
-
108
-
109
-
110
-
111
-
112
 |
 |