Xerox 3600B User Guide - Page 35
Using Tray 2 or optional tray 3, Changing the size of the paper in Tray 2, Tray 2 - support
 |
UPC - 095205742640
View all Xerox 3600B manuals
Add to My Manuals
Save this manual to your list of manuals |
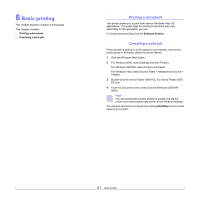
Page 35 highlights
Using Tray 2 or optional tray 3 Use the print material you use for the majority of your print jobs in Tray 2. Tray 2 can hold a maximum of 500 sheets of 75 g/m2 (20 lb) paper. You can purchase an optional tray 3 and attach it below Tray 2 to load an additional 500 sheets of paper. 1 Pull tray out and press the metal plate until it locks into position. 4 Load paper with the side to be printed on face down. 2 Squeeze the paper width guide and adjust the paper width guide so that it lightly touches the paper stack. 3 Flex or fan the edge of the paper stack to separate the pages before loading. You can load letterhead paper with the design side face down. The top edge of the sheet with the logo should be placed at the front of tray. Notes • If you experience problems with paper feed, place one sheet at a time in multi-purpose tray. • You can load previously printed paper. The printed side should be facing up with an uncurled edge at the front. If you experience problems with paper feed, turn the paper around. Note that the print quality is not guaranteed. Changing the size of the paper in Tray 2 To load longer sizes of paper, such as Legal-sized paper, you need to adjust the paper guides to extend paper tray. 1 4 2 3 1 paper length guide 2 support guide 3 paper width guides 4 back plate 5.5
-
 1
1 -
2
-
3
-
4
-
5
-
6
-
7
-
8
-
9
-
10
-
11
-
12
-
13
-
14
-
15
-
16
-
17
-
18
-
19
-
20
-
21
-
22
-
23
-
24
-
25
-
26
-
27
-
28
-
29
-
 30
30 -
 31
31 -
 32
32 -
 33
33 -
 34
34 -
 35
35 -
 36
36 -
 37
37 -
 38
38 -
 39
39 -
 40
40 -
41
-
42
-
43
-
44
-
45
-
46
-
47
-
48
-
49
-
50
-
51
-
52
-
53
-
54
-
55
-
56
-
57
-
58
-
59
-
60
-
61
-
62
-
63
-
64
-
65
-
66
-
67
-
68
-
69
-
70
-
71
-
72
-
73
-
74
-
75
-
76
-
77
-
78
-
79
-
80
-
81
-
82
-
83
-
84
-
85
-
86
-
87
-
88
-
89
-
90
-
91
-
92
-
93
-
94
-
95
-
96
-
97
-
98
-
99
-
100
-
101
-
102
-
103
-
104
-
105
-
106
-
107
-
108
-
109
 |
 |
