Asus DiGiMatrix User Guide
Asus DiGiMatrix Manual
 |
View all Asus DiGiMatrix manuals
Add to My Manuals
Save this manual to your list of manuals |
Asus DiGiMatrix manual content summary:
- Asus DiGiMatrix | User Guide - Page 1
® DiGiMatrix Digital Entertainment PC AB-V10 User Guide - Asus DiGiMatrix | User Guide - Page 2
the express written permission of ASUSTeK COMPUTER INC. ("ASUS"). Product warranty or service will not be extended if: (1) the product is BY ASUS. ASUS ASSUMES NO RESPONSIBILITY OR LIABILITY FOR ANY ERRORS OR INACCURACIES THAT MAY APPEAR IN THIS MANUAL, INCLUDING THE PRODUCTS AND SOFTWARE DESCRIBED - Asus DiGiMatrix | User Guide - Page 3
contents Notices vi Safety information vii About this guide viii System package contents x Chapter 1: System a CPU 2-6 2.6 Installing a DIMM 2-9 2.7 Replacing the top cover 2-10 2.8 Connecting cables 2-11 2.8.1 Power adapter operating system 3-2 3.2 Powering up 3-2 ASUS DiGiMatrix iii - Asus DiGiMatrix | User Guide - Page 4
3.6.1 Installing ASUS Home Theater 3-22 3.6.2 Using ASUS Home Theater 3-24 5.6.3 Entertainment modes 3-26 3.7 ASUS Wireless LAN adapter 3-35 3.7.1 Installing the WLAN Card utilities and driver ...... 3-36 3.7.2 Setting the Windows® XP wireless options ....... 3-36 3.7.3 Other support CD options - Asus DiGiMatrix | User Guide - Page 5
disk drive A-3 A.1.4 Connecting the Subsystem to DiGiMatrix A-4 A.2 DiGiMatrix remote controller A-5 A.2.1 Specifications A-5 A.2.2 Remote control layout A-5 A.2.3 Remote control functions in Audio DJ A-6 A.2.4 Remote control functions in Home Theater .......... A-7 A.3 Optical drive technical - Asus DiGiMatrix | User Guide - Page 6
equipment has been tested and found to comply with the limits for a Class B digital device, pursuant and used in accordance with manufacturer's instructions, may cause harmful interference to radio digital apparatus does not exceed the Class B limits for radio noise emissions from digital - Asus DiGiMatrix | User Guide - Page 7
the product on a stable surface. • If you encounter technical problems with the product, contact a qualified service technician or your retailer. Lithium-Ion Battery Warning CAUTION: Danger of explosion if battery is incorrectly replaced. Replace only with the same or equivalent type recommended by - Asus DiGiMatrix | User Guide - Page 8
This chapter provides step-by-step instructions on how to install components in the ASUS DiGiMatrix system. 3. Chapter 3: Starting up This chapter helps you power up the system and install drivers and utilities from the support CD. 4. Chapter 4: Motherboard Information This chapter gives information - Asus DiGiMatrix | User Guide - Page 9
guide ASUS hardware and software products. Refer to the ASUS contact information. 2. Optional documentation Your product package may include optional documentation, such as warranty flyers, that may have been added by your dealer. These documents are not part of the standard package. ASUS DiGiMatrix - Asus DiGiMatrix | User Guide - Page 10
ASUS DiGiMatrix Digital Entertainment System with • ASUS P4SQ motherboard • DVD-ROM/CD-RW/DVD-RW drive • 7-in-1 storage card reader 2. Cables • Universal power adapter and cable (100V-240V) • HDTV cable • Audio/video cable • Video out cable • Audio out cable 3. Accessories • Radio antenna • Remote - Asus DiGiMatrix | User Guide - Page 11
System Introduction Chapter 1 This chapter gives a general description of the ASUS DiGiMatrix. The chapter lists the system features including introduction on the front and rear panel, and internal components. ASUS DiGiMatrix - Asus DiGiMatrix | User Guide - Page 12
home entertainment system in one. Powered by the ASUS P4SQ motherboard, DiGiMatrix delivers the cutting edge technology for your computing and multimedia entertainment needs. DiGiMatrix comes with a slim optical drive, TV and FM tuner, 4-slot card reader, wireless LAN adapter, and 6-channel digital - Asus DiGiMatrix | User Guide - Page 13
sensor. This sensor receives signals from the DiGiMatrix remote controller. See page A-5 for details on the remote controller. 8. Audio DJ power button. Press this button to turn on the DiGiMatrix Audio DJ. The Audio DJ feature allows you to play CD/DVD audio tracks and MP3 files on your hard disk - Asus DiGiMatrix | User Guide - Page 14
. Press this button to perform various functions in different modes. In CD/HD mode, selects the next audio track/file. In Radio mode, to the illustration on the right. You can not close the front panel door if a flash memory card is inserted into any of the card slots. 13 14 15 16 17 18 - VOLUME - Asus DiGiMatrix | User Guide - Page 15
power failure or software problems. Insert the emergency eject pin or a paper clip into this hole to manually eject the tray and the disc. 19. SmartMedia® card slot. This slot is for a SmartMedia® storage card. 20. Secure Digital peripherals, and other PC devices. 24. Headphone ASUS DiGiMatrix 1-5 - Asus DiGiMatrix | User Guide - Page 16
connects the optional DiGiMatrix subsystem. See page A-2 for details on the DiGiMatrix subsystem. 11. DC IN socket. This socket connects the power adapter and plug. 12. DC OUT socket. This socket connects the DC power cable that supplies power to the optional DiGiMatrix Subsystem. See page A-4 for - Asus DiGiMatrix | User Guide - Page 17
using the supplied HDTV, instructions on installing other system components. 2 3 1 7 4 5 6 8 1. Standby power LED 2. HDD power plug (to HDD power connector) 3. IDE cable (to HDD connector) 4. Chassis fan 5. CPU fan 6. DIMM sockets 7. HDD metal tray 8. Optical drive shield ASUS DiGiMatrix - Asus DiGiMatrix | User Guide - Page 18
LED panel displays the CPU temperature in degree Celsius when DiGiMatrix is in Windows® mode. Audio DJ The LED panel displays the playlist number when Audio DJ is set to HD mode. In play status, the LED panel displays the play icon, track number, and track duration. 00 HD CD FM 18:30 00 - Asus DiGiMatrix | User Guide - Page 19
Basic Installation Chapter 2 This chapter provides step-by-step instructions on how to install components in the ASUS DiGiMatrix system. ASUS DiGiMatrix - Asus DiGiMatrix | User Guide - Page 20
Inline Memory Module (DIMM) Tool Phillips (cross) screw driver 2.2 Before you proceed Take note of the following precautions before you install components into the DiGiMatrix system. 1. Use a grounded wrist strap or touch a safely grounded object or to a metal object, such as the power supply case - Asus DiGiMatrix | User Guide - Page 21
the two screws that secure the top cover to the chassis. 1 1 2. Use a Phillips (cross) screw driver to remove the top cover screws. Keep the screws for later use. 3. Pull the top cover slightly toward the cover, then lift it up from the chassis. Set the top cover aside. 4 ASUS DiGiMatrix 2-3 - Asus DiGiMatrix | User Guide - Page 22
2.4 Installing a hard disk drive The DiGiMatrix system supports one UltraATA133 IDE hard disk drive (HDD). To install a hard hard disk drive as Master device before connecting the IDE cable and power plug. Refer to the HDD documentation on how to set the drive as a Master device. - Asus DiGiMatrix | User Guide - Page 23
IDE connector on the drive. 4. Connect the 4-pin power plug to the HDD power connector. 5. Place the drive on the tray. Insert the tacks (To side of the drive) 5 Metal tacks (To bottom of the drive) 7. Replace the metal cover by aligning its side hooks with the tray rail and optical drive shield. - Asus DiGiMatrix | User Guide - Page 24
® 4/Celeron processor. To install a CPU: 1. Loosen the CPU fan screws. 2. Disconnect the CPU fan cable from the CPU fan connector on the motherboard. 3. Lift the CPU fan. 1 3 2 The DiGiMatrix system comes with a pre-installed proprietary CPU fan. Do not replace the CPU fan. 2-6 Chapter 2: Basic - Asus DiGiMatrix | User Guide - Page 25
. 10. When the CPU is in place, push down the socket lever to secure the CPU. The lever clicks on the side tab to indicate that it is locked. The CPU fits only in one correct orientation. DO NOT force the CPU into the socket to prevent bending the pins and damaging the CPU! ASUS DiGiMatrix 2-7 - Asus DiGiMatrix | User Guide - Page 26
chassis fan connector. Refer to page 4-11 for the location of the chassis fan connector. 14. Reinstall the CPU fan over the CPU heatsink. Fasten the CPU fan screws to the motherboard. 14 15. Connect the CPU fan cable to the CPU fan connector. Refer to page 4-11 for the location of 15 the - Asus DiGiMatrix | User Guide - Page 27
Memory Module (DIMM) sockets. These sockets support up to 2GB system memory using unbuffered non-ECC PC2700/2100/1600 DIMMs. Follow these steps to install a DDR DIMM. 1. Locate the two DIMM sockets on the motherboard DO NOT force a DIMM into a socket to avoid damaging the DIMM. ASUS DiGiMatrix 2-9 - Asus DiGiMatrix | User Guide - Page 28
the top cover After installing the components, follow these instructions to replace the top cover. 1. Position the front edge of the top cover at least two inches from the front panel cover. Fit the top cover tabs - Asus DiGiMatrix | User Guide - Page 29
the power from the source is within the operating range. 4. Connect the DC IN power plug to the DiGiMatrix DC IN socket. 4 DC IN power 2 plug 3 Power LED 1 Power adapter Power cable Use an outlet adapter if the power plug does not fit the power outlet in your area. ASUS DiGiMatrix 2-11 - Asus DiGiMatrix | User Guide - Page 30
2.8.2 Radio antenna Connect the radio antenna plug to the DiGiMatrix antenna port. Place the radio antenna at an elevated location to achieve better reception. Radio antenna 2.8.3 Audio/Video cable This cable connects a video casette recorder ( - Asus DiGiMatrix | User Guide - Page 31
jack to the video input port of the TV set. The TV set receives only video signals from the DiGiMatrix system. HDTV 2.8.6 Audio out cable This cable connects a 6-channel audio system. 1 To connect a 6- Center Front Speaker Out Surround * Low Frequency Enhanced Output ASUS DiGiMatrix 2-13 - Asus DiGiMatrix | User Guide - Page 32
2.9 Connecting external devices To the front panel Audio Devices HDD Mic - VOLUME + To the rear panel Line In Line Out Mic Camera Headphone Scanner RJ-45 PS/2 Mouse DiGiMatrix subsystem VGA DVI USB Mouse PS/2 KB 2-14 Chapter 2: Basic Installation - Asus DiGiMatrix | User Guide - Page 33
Starting up Chapter 3 This chapter helps you power up the system and install drivers and utilities from the support CD. ASUS DiGiMatrix - Asus DiGiMatrix | User Guide - Page 34
Audio DJ feature. Audio DJ power button System power button - VOLUME + 3.3 Support CD information The support CD that came with the DiGiMatrix system contains useful software and several utility drivers that enhance the motherboard features. • Screen display and driver options may not be the - Asus DiGiMatrix | User Guide - Page 35
NOT enabled in your computer, browse the contents of the support CD to locate the file ASSETUP.EXE from the BIN folder. Double-click the ASSETUP.EXE to run the CD. 3.3.2 Drivers menu The drivers menu shows the available device drivers if the system detects installed devices. Install the necessary - Asus DiGiMatrix | User Guide - Page 36
Click this item to install the USB 2.0 driver. ITE Remote Controller driver This item installs the driver for the DiGiMatrix remote controller. USB Card Reader Tool This item installs the driver for the DiGiMatrix 4-slot card reader. ASUS DiGiMatrix TV Card Driver Click this item to install the - Asus DiGiMatrix | User Guide - Page 37
the motherboard supports. USB Card Reader Tool This item installs the driver for the DiGiMatrix 4-slot card reader. ASUS PC Probe This utility continuously monitors vital system information such as fan rotations, CPU temperature, and system voltages, and alerts you on any detected problems. This - Asus DiGiMatrix | User Guide - Page 38
item installs the ASUS screensaver. 3.3.4 ASUS contact information Click the Contact tab to display the ASUS contact information. 3.3.5 Other information The icons on the top right side of the screen give additional information on the motherboard and the contents of the support CD. 3-6 Chapter - Asus DiGiMatrix | User Guide - Page 39
in the support CD have wizards that will conveniently guide you through the installation. View the online help or readme file that came with the software for more information. 3.4.1 ASUS Update The ASUS Update is a utility that allows you to update the motherboard BIOS and drivers. This utility - Asus DiGiMatrix | User Guide - Page 40
ROM information is displayed. Click Flash to update the BIOS. If you selected the option to update the BIOS from a file, a window pops up prompting you to locate the file. Select the file, click Save, then follow the screen instructions to complete the update process. 3-8 Chapter 3: Starting up - Asus DiGiMatrix | User Guide - Page 41
box. To launch ASUS PC Probe, click the Windows Start button, point to Programs, and then ASUS Utility, and then click Probe Vx.xx. The PC Probe icon in the taskbar system tray indicates that ASUS PC Probe is running. Clicking the icon allows you to see the status of your PC. ASUS DiGiMatrix 3-9 - Asus DiGiMatrix | User Guide - Page 42
Using ASUS PC Probe Monitoring tab Monitor Summary Shows a summary of the items being monitored. Temperature Monitor Shows the system temperature (for supported processors only). Temperature Warning threshold adjustment (Move the slider up to increase the threshold level or down to decrease the - Asus DiGiMatrix | User Guide - Page 43
component of your DiGiMatrix for future reference. Information tab Hard Drive Shows the used and free space of the DiGiMatrix' hard disk drive and the file allocation table or file system used. Memory Shows the DiGiMatrix memory load, memory usage, and paging file usage. ASUS DiGiMatrix 3-11 - Asus DiGiMatrix | User Guide - Page 44
pertinent to the DiGiMatrix, such as CPU type, CPU speed, and internal/external frequencies, and memory size. Utility tab Utility Lets you run programs outside of the ASUS Probe modules. To run a program, click Execute Program. NOTE: This feature is currently unavailable. ASUS PC Probe Task Bar - Asus DiGiMatrix | User Guide - Page 45
and Application from the support CD that came with the motherboard package to activate the 6-channel audio feature. You must use 4-channel or 6-channel speakers for this setup. Setting to multi-channel audio After installing the audio driver, follow these instructions to adjust the audio settings - Asus DiGiMatrix | User Guide - Page 46
, you will see a black circle moving on the screen indicating the audio path. The Play Test Noise button becomes Stop Playing button. Click this button at any time to stop playing. 9. Click the Close button when done. 10. The MIDI Music - Asus DiGiMatrix | User Guide - Page 47
Windows® taskbar to display the Volume Control window. 2. Click the Volume Control Advanced button. The Advanced Controls for Volume Control window on the Microphone Advanced button to display the Advanced Controls for Microphone window. 2. Check the box opposite Mic2 Select to enable the front - Asus DiGiMatrix | User Guide - Page 48
the Audio DJ feature. The Music Wizard utility is included in the support CD that came with the DiGiMatrix package. Refer page 3-5 to install Music Wizard. Launching Music Wizard Launch the Music Wizard utility from the Windows® desktop by clicking Start > All Programs > O2Micro Music Wizard > Music - Asus DiGiMatrix | User Guide - Page 49
, then click Select. Click Unselect to remove the folder. 3. Click OK when done. You may also drag and drop MP3 files to the Selected Files window to add more files to the playlist. Saving your playlist or folder When prompted, save the playlist or the folder. Type a file name, then click - Asus DiGiMatrix | User Guide - Page 50
or folder To add/remove a file to/from a playlist: 1. Select a playlist, then click Edit. 2. Select the file you wish to add from the Existing Files window, then click Select. Click OK when done. To remove a file, select the file from the Selected Files - Asus DiGiMatrix | User Guide - Page 51
/DVD, or tune into a FM radio station without entering the DiGiMatrix operating system. Use the audio buttons in the front panel or the remote controller to navigate through the Audio DJ window. You must install Audio DJ from the support CD to use this feature. See page 3-6. To turn on the Audio DJ - Asus DiGiMatrix | User Guide - Page 52
DJ window displays the audio sources (Hard Disk, CD/DVD Device 1, and Radio FM Device), play medium, and player status. To select an audio source: 1. Press the STOP ( ) button until the Player Status displays Playlist Mode. 2. Press the STOP ( ) button again, or the button on the remote controller - Asus DiGiMatrix | User Guide - Page 53
NEXT or PREVIOUS button or the buttons on the remote controller to select a preset station, if any. CD/DVD Device 1 Radio FM Device play media : radio FM Player Status : Playlist Mode may also press the or on the remote controller. Press the volume dial to MUTE sound. ASUS DiGiMatrix 3-21 - Asus DiGiMatrix | User Guide - Page 54
you to maximize the DiGiMatrix multimedia features. The following sections provide information on installing and using the ASUS Home Theater. 3.6.1 Installing ASUS Home Theater Place the ASUS Home Theater CD into the optical drive to start installation. The initial installation window appears. Click - Asus DiGiMatrix | User Guide - Page 55
the Home Theater General, Pictures, Television, and DVD settings by clicking their respective tabbed property sheets. 3. Click OK when done. You may also change the Home Theater settings using the Setup button in the Home Theater main window. See pages 24, 33, and 34 for details. ASUS DiGiMatrix - Asus DiGiMatrix | User Guide - Page 56
the same interface. This flexibility allows you to switch from one entertainment mode to another without opening different entertainment applications. Below is the ASUS Home Theater main window. Window control buttons Entertainment mode buttons Mode display Mode display - Displays the current or - Asus DiGiMatrix | User Guide - Page 57
The control panel Each Home Theater window is equipped with a control panel to control the entertainment modes. The control panel buttons and functions are illustrated below. Some control panel buttons change from one entertainment system to another. Stop Pause Play Previous Rewind/ Replay Forward - Asus DiGiMatrix | User Guide - Page 58
5.6.3 Entertainment modes TV Home Theater lets you to watch TV on your DiGiMatrix system. The TV window has six sub-menus. Change the TV channel by clicking the Channel buttons on the control panel or the or on the remote controller. On initial use, Home Theater instructs you to autoscan available - Asus DiGiMatrix | User Guide - Page 59
Replay The Home Theater TV has an instant replay capability that lets you replay a portion of a recorded program. Click the REWIND/REPLAY button to activate the instant replay feature. You may only use this feature when watching a recorded program or while recording a TV program. Guide Click the - Asus DiGiMatrix | User Guide - Page 60
allows you to set a schedule to record a TV program. To add a recording schedule, click . Home Theater automatically saves a recorded program in the Windows® My Videos folder. Home Theater records TV programs in MPEG file format. To create a recording schedule: 1. Select the recording settings - Asus DiGiMatrix | User Guide - Page 61
(TV/ S-Video/Composite), and record quality (Good/Better/Best). Click the side arrows to view available options. 3. Click the to return to the TV main window. TV Audio The TV Audio button allows you to set the TV audio output to Stereo, Mono or SAP. Click to select other options - Asus DiGiMatrix | User Guide - Page 62
to display audio CD/DVD tracks. Control the audio playback using the control panel buttons. Ambience Click to change media browser ambience Click the Rewind/Replay or Forward button to change the media browser ambience. Home Theater only lists the audio files saved in the Windows® My Music folder - Asus DiGiMatrix | User Guide - Page 63
clips saved in the Windows® My Videos folder. It also displays video clips information including the file name, file size, and date of recording. Rotate Right Rotate Left Zoom Out Zoom In The Video Clips window only lists video clips saved in the Windows® My Videos folder. ASUS DiGiMatrix 3-31 - Asus DiGiMatrix | User Guide - Page 64
DVD audio language. You may select an audio language if the DVD supports multilanguage audio. Subtitle Language. Allows you to select an available DVD set your audio output to analog or digital (S/PDIF). Speaker configuration. Home Theater automatically detects your speaker configuration. Change the - Asus DiGiMatrix | User Guide - Page 65
Audio Source. This item allows you to set your audio source to CD Player, Microphone, Aux, Line In, Phone, or Mono Out. Record Quality. Set your recording quality to Good, Better, or Best. Click Next to display the Picture settings window or Close to return to the main window. ASUS DiGiMatrix 3-33 - Asus DiGiMatrix | User Guide - Page 66
. Click Finish to return to the main window. Closing Home Theater Click the button anytime to display the close window. Close - Click this button to exit Home Theater and return to the Windows® desktop. Stand By - Click this option to put the DiGiMatrix in a stand-by mode. Shutdown - Click this - Asus DiGiMatrix | User Guide - Page 67
to access point) and Adhoc (wireless LAN adapter to other wireless devices) network types • Windows® 2000/XP compatible The wireless LAN adapter operating distance may be shorter if there are walls, barriers, or interferences in the home layout or operating environment. ASUS DiGiMatrix 3-35 - Asus DiGiMatrix | User Guide - Page 68
LAN adapter driver and the Control Center utility in your DiGiMatrix system: 1. Insert the DiGiMatrix support CD to the optical drive. 2. In the Drivers window, Click the ASUS Wireless LAN Adapter Driver item. An installation window appears. 3. Click Install ASUS WLAN Card Utilities/Driver to begin - Asus DiGiMatrix | User Guide - Page 69
the wireless option, the Setup Wizard window appears. Click Next. The setup wizard windows may vary on different operating systems. "My Configuration" section on page 3-39 for details. Station Mode Follow these instructions to set your wireless LAN adapter in station (STA) mode. Select a wireless - Asus DiGiMatrix | User Guide - Page 70
wireless network to which the adapter is associated. Click Next to configure the TCP/IP settings. The wizard prompts you to return to the previous window and select another wireless network if the wireless LAN adapter is not connected to the selected network. 3-38 Chapter 3: Starting up - Asus DiGiMatrix | User Guide - Page 71
supports automatic IP address assignment. If not, obtain the IP settings from your network administrator, then enter the IP address manually. Click Next when done. The TCP/IP configuration window appears when you run the setup wizard on Windows operation mode, then click Next. ASUS DiGiMatrix 3-39 - Asus DiGiMatrix | User Guide - Page 72
Creating your own wireless LAN (Soft AP and Ad-hoc modes) When prompted, assign an SSID (Network Name) to the soft access point (AP) or wireless LAN network (Ad-hoc) you wish to create, then select a radio channel that you wish to use in communicating with other wireless devices. Click Next to - Asus DiGiMatrix | User Guide - Page 73
SSID of the hidden wireless LAN from the network administrator. To connect to a hidden wireless LAN: Select Connect to a hidden wireless LAN, then click Next. ASUS DiGiMatrix 3-41 - Asus DiGiMatrix | User Guide - Page 74
When prompted, enter the SSID of the hidden wireless LAN you obtained from the network administrator. Click Next. If the hidden wireless LAN you wish to access has an enabled Wired Equivalent Privacy (WEP) encryption, the setup wizard prompts you to enable data encyption. Check the Data encryption - Asus DiGiMatrix | User Guide - Page 75
settings if your network supports automatic assignment of IP address. If not, obtain the IP settings from your network administrator, then enter the IP address manually. Click Next when done. The wireless LAN adapter setup is complete. Click Finish to close the setup wizard. ASUS DiGiMatrix 3-43 - Asus DiGiMatrix | User Guide - Page 76
or not. Click Next. The wizard will require you to create a home network connection if your computer is not connected to the Internet. 2. Select network connection, the wizard instructs you to create one using the Windows® interface or the support CD from your Internet Service Provider (ISP). 3-44 - Asus DiGiMatrix | User Guide - Page 77
you are using to connect to the host computer or residential gateway. Click Next. 2. Select the network adapters that connect to other computers in your home network, if any. The wizard will bridge these networks with the wireless LAN adapter. Click Next. ASUS DiGiMatrix 3-45 - Asus DiGiMatrix | User Guide - Page 78
3. The wizard creates a network bridge between your wired (LAN) and wireless (wireless LAN adapter) network connections. Click Next. Network bridge is a process of connecting several wired or wireless LAN segments. See page 3-70 for details. 4. Click Yes when an Internet Sharing Configuration dialog - Asus DiGiMatrix | User Guide - Page 79
. 8. The selected network connections are bridged. 9. The Network Connections window displays the bridged network connections. 10. Click Finish to close the setup wizard. Refer to Windows® XP Help and Support Center for articles and help files on the Network Bridge function. ASUS DiGiMatrix 3-47 - Asus DiGiMatrix | User Guide - Page 80
ICS if your computer connects directly to the Internet: 1. Select the number of IP address assigned to you by your Internet Service Provider (ISP). Click Next. The wizard will instruct you to enable ICS or create a network bridge if you are assigned two or more IP addresses. 2. The setup wizard - Asus DiGiMatrix | User Guide - Page 81
not have a dial-up connection, the wizard will instruct you to create one using the Windows® interface or the support CD from your Internet Service Provider (ISP). 2. Select whether your computer directly connects page 3-48 if your computer directly connects to the Internet. ASUS DiGiMatrix 3-49 - Asus DiGiMatrix | User Guide - Page 82
Center utility The Control Center utility is a management software that launches applications and configures network settings. The Control Center Utility starts automatically when the system boots and displays the Control Center icon in the Windows® taskbar. The Control Center icon serves as an - Asus DiGiMatrix | User Guide - Page 83
Service Set Identifier (SSID). This field displays the SSID of the network to which the card is associated or is intending to join. The SSID is a group name shared by every member of a wireless network. Only client PCs radio communication with an access point or a Wi-Fi device. ASUS DiGiMatrix 3-51 - Asus DiGiMatrix | User Guide - Page 84
host and Ethernet adapter configurations. IP Config displays TCP/IP information including the IP address, subnet mask, default gateway, DNS and Windows Internet Naming Service (WINS) configurations. Use the IP Config Tab to verify your network settings. IP Release. Click to release the DHCP IP - Asus DiGiMatrix | User Guide - Page 85
and wired LAN (Ethernet) via the AP. Select the Ad Hoc mode to communicate directly with other mobile clients within the wireless LAN adapter range. ASUS DiGiMatrix 3-53 - Asus DiGiMatrix | User Guide - Page 86
recommended for systems running on AC power. Other options include MAX_PSP (Maximum Power Savings) and Fast_PSP (Fast power-saving mode) Others. Click operate on an Open System mode. Key Format allows you to set a hexadecimal digit or ASCII character WEP key. Key Length allows you to choose a 64-bit - Asus DiGiMatrix | User Guide - Page 87
each other or with an access point. Two ways to assign WEP keys Manual Assignment. For a 64-bit encryption, enter 10 hexadecimal digits (0~9, a~f, A~F) or 5 ASCII characters in each of the four WEP keys advanced settings. We recommended that you keep the default settings. ASUS DiGiMatrix 3-55 - Asus DiGiMatrix | User Guide - Page 88
the wireless LAN adapter. The Soft AP tab appears only on systems running on Windows® XP. SoftAP/STA Mode. This field allows you to select the wireless LAN item to activate the firewall and prevent unauthorized access to your home or small office network. Available Network Connections. This field - Asus DiGiMatrix | User Guide - Page 89
window displays the available networks within the wireless LAN adapter range and the following network settings: BSSID - The IEEE MAC address of the available wireless networks. SSID - SSID (service icon to view the software version, driver version, and copyright information ASUS DiGiMatrix 3-57 - Asus DiGiMatrix | User Guide - Page 90
icons Apply. Click to apply the changes made on wireless LAN adapter configuration and settings. OK. Click to close the Wireless Settings utility window. Cancel. Click to cancel any changes made on wireless LAN adapter configuration or settings. Clicking Cancel closes the Wireless Settings utility - Asus DiGiMatrix | User Guide - Page 91
The About Control Center menu displays the the software copyright and version information. Control Center left-click & Connect - Scans available wireless networks within range. Wireless Option - Sets your Windows® XP wireless networking environment. See page 3-36 for details. The Control Center left - Asus DiGiMatrix | User Guide - Page 92
in a wireless network. The Soft AP feature is available only on systems running on Windows® XP. Station Mode (STA) Follow these instructions to set your wireless LAN adapter in Station (STA) mode. Windows® 2000 OS 1. Launch the Wireless Settings utility by double-clicking the Control Center icon - Asus DiGiMatrix | User Guide - Page 93
encryption if the selected AP has an enabled WEP encryption. Refer to the Site Survey window to determine whether the selected AP has an enabled (ON) or disabled (OFF) WEP icon in the property window, then select the Status tab. Look for the Associated State field to confirm. ASUS DiGiMatrix 3-61 - Asus DiGiMatrix | User Guide - Page 94
station mode. Enter the Wireless Settings utility 1. Double-click the Control Center icon in the Windows taskbar to open the Wireless Settings utility. 2. Click the Config icon in the property window, then select the Soft AP tab. Select Station Mode. 3. The following confirmation dialog box appears - Asus DiGiMatrix | User Guide - Page 95
Control Center icon in the Windows taskbar to open the Wireless Settings utility. 2. Click the Config icon in the property window of the Wireless Settings utility, then select the SoftAP tab. Select Soft AP Mode, then click Apply. 3. A confirmation window appears click Yes. ASUS DiGiMatrix 3-63 - Asus DiGiMatrix | User Guide - Page 96
Mode when the Change Mode window appears. Click OK. 3. The Soft AP icon replaces the Control Center utility icon in the Windows® taskbar. Other Soft AP a wireless device connected to the soft AP. Power Saving Mode - displays the Power Saving Mode used by the wireless device connected to the soft - Asus DiGiMatrix | User Guide - Page 97
Event Log The Event Log tab displays detected system events including the date and time of the event and event type. Click Clear Log to clear the event log window. ASUS DiGiMatrix 3-65 - Asus DiGiMatrix | User Guide - Page 98
Internet Connection Sharing (ICS) ICS is a Windows® XP feature allowing several computers in a wired or wireless network to share a single Internet connection. With ICS, other wireless clients in a home or small office network rely on the wireless LAN adapter for Internet access. Enable Internet - Asus DiGiMatrix | User Guide - Page 99
Start > Connect To > Show all connections from the Windows® desktop. 2. Click File from the menu, then select New Connection. 3. A New Connection Wizard appears. Click Next. 4. When prompted, select the Network connection type. Select Connect to the Internet, then click Next. ASUS DiGiMatrix 3-67 - Asus DiGiMatrix | User Guide - Page 100
5. Select Set up my connection manually, then click Next. 6. Depending on your network connection, select Connect using a broadband connection that requires a user name and password or Connect using a dial-up modem, - Asus DiGiMatrix | User Guide - Page 101
the connection. 10. The Network Connections window displays the created connection. Return to the Wireless Settings utility. Select the created connection from the Available Network Connections, then drag it to the Internet field. Refer to the steps on page 3-66 to enable ICS. ASUS DiGiMatrix 3-69 - Asus DiGiMatrix | User Guide - Page 102
bridge is essential in enabling ICS among wireless clients in a home network. You must have Administrator privileges before you can create a adapter: 1. Open the Wireless Settings utility. Select Config from the property window, then select the Soft AP tab. 2. Select a network connection from - Asus DiGiMatrix | User Guide - Page 103
7. The Network Connections window displays the bridged network connections. Only LAN connections may be bridged with the wireless LAN adapter. The Wireless Settings utility instructs you to change your settings if you bridge a non-LAN connection with the wireless LAN adapter. ASUS DiGiMatrix 3-71 - Asus DiGiMatrix | User Guide - Page 104
3-72 Chapter 3: Starting up - Asus DiGiMatrix | User Guide - Page 105
Motherboard Info Chapter 4 This chapter gives information about the P4SQ motherboard that came with the system. This chapter includes the motherboard layout, jumper settings, and connector locations. ASUS DiGiMatrix - Asus DiGiMatrix | User Guide - Page 106
ASUS P4SQ motherboard comes already installed in the ASUS DiGiMatrix system. This chapter provides technical information about the motherboard for future upgrades or system reconfiguration. 4.2 Motherboard components 1 2 3 4 56 7 20 1918 171615 14 13 12 11 10 9 8 4-2 Chapter 4: Motherboard - Asus DiGiMatrix | User Guide - Page 107
commonly used Super I/O functionality. The chipset supports a Standard Infrared (SIR), TV remote control, PS/2 mouse, PS/2 keyboard, card reader, and Flash ROM. It also employs the SmartGuardian technology that monitors CPU and chassis fan speeds and other system conditions. ASUS DiGiMatrix 4-3 - Asus DiGiMatrix | User Guide - Page 108
IDE power plug that supplies power to the hard disk and optical drives. 19 10/100 LAN controller. The LAN controller allows connection to a Local Area Network (LAN) through a network hub. 20 Display controller. This chip supports TV, S-Video and DVI output signals. 4-4 Chapter 4: Motherboard Info - Asus DiGiMatrix | User Guide - Page 109
Motherboard layout SEC_IDE ADAPTER 27.2cm (10.7in) DDR DIMM2 (64/72-bit, 184-pin module) DDR DIMM1 (64/72-bit, 184-pin module) Socket 478 SiS 651 HOST/ Memmory Controller USB1 USB2 USB1 USB2 AD1980 FONT MIC PWRSW AUD_CON CD CR2032 3V Lithium Cell CMOS Power SiS 962LUA Chipset PRI_IDE PCI1 USB5 - Asus DiGiMatrix | User Guide - Page 110
Unit (CPU) The motherboard comes with a surface mount 478-pin Zero Insertion Force (ZIF) socket. This socket is specifically designed for instructions, and higher data transfer rate. Gold Arrow P4SQ P4SQ Socket 478 Refer to page 2-6 for CPU installation procedures. 4-6 Chapter 4: Motherboard - Asus DiGiMatrix | User Guide - Page 111
4.5 System memory The motherboard has two Double Data Rate (DDR) DIMM sockets that supports up to 2GB unbuffered non-ECC PC2700/2100/1600 DDR DIMMs. 104 Pins 80 Pins P4SQ P4SQ 184-Pin DDR DIMM Sockets You may install - Asus DiGiMatrix | User Guide - Page 112
Time Clock (RTC) RAM in CMOS. You can clear the CMOS memory of date, time, and system setup parameters by erasing the CMOS RTC RAM data. The RAM data in CMOS, that include system setup information such as system passwords, is powered by the onboard button cell battery. To erase the RTC RAM: 1. Turn - Asus DiGiMatrix | User Guide - Page 113
4.7 Connectors This section describes and illustrates the connectors on the motherboard. 1. USB 2.0 header (5-1 pin USB5) The USB5 header connects to the 4-pin J3 connector on +5VSB DJ_SCANRW +5V PIC_DOUT PIC_DIN PIC_DIN PIC_DOUT GND 1 LCD_PANEL P4SQ P4SQ LCD Panel Connector ASUS DiGiMatrix 4-9 - Asus DiGiMatrix | User Guide - Page 114
PIN 1 PIN 1 The SEC_IDE connector connects the optional DiGiMatrix Subsystem. The DiGiMatrix Subsystem is designed to provide additional storage, and an extra optical drive. Refer to page A-2. DiGiMatrix Subsystem The DiGiMatrix Subsystem is purchased separately. 4-10 Chapter 4: Motherboard Info - Asus DiGiMatrix | User Guide - Page 115
5. Internal audio connectors (4-pin AUX, CD) These connectors allow you to receive stereo audio input from sound sources such as a CD-ROM, TV tuner, or MPEG card. Right Audio Channel Ground Ground Left Audio Channel P4SQ P4SQ Internal Audio Connectors CD(Black) AUX(White) ASUS DiGiMatrix 4-11 - Asus DiGiMatrix | User Guide - Page 116
connector (4-pin IDEPWR) The IDE power connector is for the IDE power cable. This connector supplies power to the hard disk drive and the DVD-ROM/CD-RW/ DVD-RW drive. +5V GND GND +12V P4SQ IDEPWR P4SQ IDE Power Connector 7. Front panel LED connector (6-pin LED_CON) The front panel LED connector - Asus DiGiMatrix | User Guide - Page 117
P4SQ Encoder Connector EC_CON Mute GND 9. Rear panel audio connectors (10-1 pin AUD_CON) This connector is for the ASUS proprietary rear panel audio board that supports the rear panel audio I/O ports. +5V VREFOUT GND SURR_L SURR_R LINE_IN_RT LINE_IN_LT LOUT_R LOUT_L 1 AUD_CON P4SQ P4SQ Audio - Asus DiGiMatrix | User Guide - Page 118
) This connects to the the system power switch button on the DiGiMatrix front panel. PWRSW P4SQ P4SQ Power Switch Connector 11. Audio DJ panel connector (10-1 pin A_DJPANEL) The Audio DJ panel connector is for the ASUS proprietary Audio DJ panel that supports the front panel audio buttons and IR - Asus DiGiMatrix | User Guide - Page 119
BIOS Information Chapter 5 This chapter tells how to change system settings through the BIOS Setup menus and describes the BIOS parameters. ASUS DiGiMatrix - Asus DiGiMatrix | User Guide - Page 120
so it is accessible by simply pressing + during the Power-On Self Tests (POST). The ASUS Update utility allows you to download an updated BIOS file and update the BIOS in the Windows® operating system. See page 3-7 for details. Using ASUS EZ Flash to update the BIOS Follow these steps to - Asus DiGiMatrix | User Guide - Page 121
file name that you downloaded from the ASUS website, then press . EZ in File] BIOS Version: P4SQ Boot Block WARNING! Continue to update the if you typed Y. Flash Memory: SST 49LF004 Update Main BIOS the BIOS area! Doing so may cause system boot failure. 8. When the update process is done - Asus DiGiMatrix | User Guide - Page 122
CMOS RAM of the EEPROM. The EEPROM on the motherboard stores the Setup utility. When you start up the computer, the system provides you with the opportunity to run this program. Press during the Power-On Self Test predetermined choices. Because the BIOS software is constantly being updated, - Asus DiGiMatrix | User Guide - Page 123
to the advanced features. POWER Use this menu to configure and enable power management features. BOOT Use this menu to arrow Up or Down arrow - (minus key) + (plus key) or spacebar or or Function Description Displays the ASUS DiGiMatrix 5-5 - Asus DiGiMatrix | User Guide - Page 124
the entire help document. Press to display the first page, press to go to the last page. To exit the help window, press or . that explanations appear in the Item Specific Help window located to the right of each menu. This window displays the help text for the currently - Asus DiGiMatrix | User Guide - Page 125
. To clear the password, highlight this field and press . The same dialog box as above appears. Press . The password is set to [Disabled]. ASUS DiGiMatrix 5-7 - Asus DiGiMatrix | User Guide - Page 126
by erasing the CMOS Real Time Clock (RTC) RAM. The RAM data containing the password information is powered by the onboard button cell battery. See section ] Installed Memory [XXX MB] This field automatically displays the amount of conventional memory detected by the system during the boot process. - Asus DiGiMatrix | User Guide - Page 127
may detect incorrect parameters. In these cases, select [User Type HDD] to manually enter the IDE hard disk drive parameters. Refer to the next section for details , make sure you have the correct configuration information supplied by the drive manufacturer. Incorrect settings may cause the system - Asus DiGiMatrix | User Guide - Page 128
[User Type HDD] Manually enter the number of cylinders, heads and sectors per If no drive is installed or if you are removing a drive and not replacing it, select [None]. Other options for the Type field are: [CD-ROM] - for IDE CD-ROM drives [LS120] - for LS-120 compatible floppy disk drives [ZIP] - Asus DiGiMatrix | User Guide - Page 129
Table] [Manual] Cylinders This Translation Method field to [Manual]. Head This field configures Translation Method field to [Manual]. Sector This field configures Method field to [Manual]. CHS Capacity This field that the drive supports. Note that optimum value and set it manually. To make changes to - Asus DiGiMatrix | User Guide - Page 130
SMART Monitoring [Disabled] This field allows you to enable or disable the S.M.A.R.T. (Self-Monitoring, Analysis and Reporting Technology) system that utilizes internal hard disk drive monitoring technology. This parameter is normally disabled because the resources used in the SMART monitoring - Asus DiGiMatrix | User Guide - Page 131
Status [On] This field enables users to activate the Number Lock function upon system boot. Configuration options: [Off] [On] Keyboard Auto-Repeat Rate [12/Sec] This displaying the first and second characters. Configuration options: [1/4 Sec] [1/2 Sec] [3/4 Sec] [1 Sec] ASUS DiGiMatrix 5-13 - Asus DiGiMatrix | User Guide - Page 132
one of the preset speeds, [2000MHz] or [2667MHz], or select [Manual] if you wish to adjust the setting manually. Configuration options: [Manual] [2000MHz] [2667MHz] The CPU speed parameter is non-configurable when you install a locked CPU. Memory Frequency [Auto] This field determines whether the - Asus DiGiMatrix | User Guide - Page 133
PS/2 mouse is detected at startup. Configuration options: [Auto] [Enabled] USB Legacy Support [Auto] This motherboard supports Universal Serial Bus (USB) devices. The default of [Auto] allows the system to by default. Configuration options: [Europe] [U.S.] [Japan] [East Europe] ASUS DiGiMatrix 5-15 - Asus DiGiMatrix | User Guide - Page 134
5.4.1 Chip Configuration SDRAM Configuration [By SPD] This parameter allows you to set the optimal timings for items 2-5, depending on the memory modules that you are using. The default setting is [By SPD], which configures items 2-5 by reading the contents in the SPD (Serial Presence Detect) - Asus DiGiMatrix | User Guide - Page 135
more system memory you share with VGA, the less memory space is left for other system devices. Configuration options: [4M] [8M] [16M] [32M] [64M] 5.4.2 PCI Configuration PCI Latency Timer [32] Leave this field to the default setting [32] for best performance and stability. ASUS DiGiMatrix 5-17 - Asus DiGiMatrix | User Guide - Page 136
[S-Video] and the TV Out Function to [NTSC]. TV Type [S-Video] This item allows you to select the type of TV that connects to the DiGiMatrix system. Set to [S-Video] if you will connect a TV with S-Video port. Set to [Hi-Vision 1080iTV] if you will connect a high-definition TV. Configuration - Asus DiGiMatrix | User Guide - Page 137
to use the onboard LAN feature. Configuration options: [Enabled] [Disabled] Onboard SIS 10/100 LAN Boot ROM [Disabled] This field allows you to enable or disable the option ROM in the onboard LAN set the appropriate field to [Disabled]. Configuration options: [Auto] [Disabled] ASUS DiGiMatrix 5-19 - Asus DiGiMatrix | User Guide - Page 138
Onboard IEEE 1394 Controller [Enabled] This field allows you to enable or disable the onboard IEEE 1394 controller. Configuration options: [Enabled] [Disabled] Onboard VIA USB Controller [Enabled] This field allows you to enable or disable the onboard VIA USB controller. Configuration options: [ - Asus DiGiMatrix | User Guide - Page 139
95, you need to install Windows with the APM feature. In Windows 98 or later, APM is automatically installed as indicated by a battery and power cord icon labeled "Power Management" in the Control Panel. Select the item "Advanced" in the Power Management Properties dialog box. ASUS DiGiMatrix 5-21 - Asus DiGiMatrix | User Guide - Page 140
] ACPI Suspend To RAM [Enabled] This field allows you to enable or disable the ACPI Suspend-to-RAM feature. To support this feature, the +5VSB of the power supply should have the capacity to provide more than 720mA current. Configuration options: [Enabled] [Disabled] Suspend Mode [Disabled] Sets the - Asus DiGiMatrix | User Guide - Page 141
day by selecting [By Date]. Configuration options: [Disabled] [Everyday] [By Date] The Automatic Power Up feature does not work if the system is powered down by an operating system, such Windows® 98, that has Advanced Configuration and Power Interface (ACPI) support enabled. ASUS DiGiMatrix 5-23 - Asus DiGiMatrix | User Guide - Page 142
the ASUS Q-Fan feature that smartly adjusts the CPU/chassis fan speed for more efficient system operation. Configuration options: [Disabled] [Enabled] MB Temperature [xxxC/xxxF] CPU Temperature [xxxC/xxxF] The onboard hardware monitor automatically detects and display the power supply and CPU - Asus DiGiMatrix | User Guide - Page 143
the boot sequence. Pressing [Enter] will show the product ID of the connected IDE hard disk drive. ATAPI CD-ROM This field allows you to select the ATAPI CD-ROM drive to use in the boot sequence. Pressing [Enter] will show the product ID of the connected ATAPI CD-ROM drives. ASUS DiGiMatrix 5-25 - Asus DiGiMatrix | User Guide - Page 144
boot sector. The system halts and displays a warning message when it detects a virus. If this occurs, you can either allow the operation to continue or use a virus-free bootable floppy disk to restart and investigate your system. Configuration options: [Enabled] [Disabled] Quick Power On Self Test - Asus DiGiMatrix | User Guide - Page 145
selected are saved to the CMOS RAM. The CMOS RAM is sustained by an onboard backup battery and stays on even when the PC is turned off. When you select this option, a confirmation window appears. Select [Yes] to and password, the BIOS asks for a confirmation before exiting. ASUS DiGiMatrix 5-27 - Asus DiGiMatrix | User Guide - Page 146
to load the default values for each of the parameters on the Setup menus. When you select this option or if you press , a confirmation window appears. Select [Yes] to load default values. Select Exit Saving Changes or make other changes before saving the values to the non-volatile RAM. Discard - Asus DiGiMatrix | User Guide - Page 147
Appendix The Appendix provides information on the DiGiMatrix Subsystem, remote controller, optical drive technical specifications, and IEEE 802.11b channels for the wireless LAN adapter. ASUS DiGiMatrix Appendix - Asus DiGiMatrix | User Guide - Page 148
and an extra optical drive to the DiGiMatrix. The Subsystem package includes the following. • CD-RW drive • IDE cable • DC power cable The following sections describe the Subsystem features, installation, and connection to the DiGiMatrix system. The Subsystem is purchased separately. A.1.1 Front and - Asus DiGiMatrix | User Guide - Page 149
the Subsystem rear panel, locate the two screws that secure the top cover to the chassis. 2. Use a Phillips (cross) screw driver to power plug to the HDD power connector. 1 2 3. Place the drive on the tray. 4. Secure the drive with two side screws. 5. Replace the top cover. 3 4 ASUS DiGiMatrix - Asus DiGiMatrix | User Guide - Page 150
Connecting the Subsystem to DiGiMatrix Follow these instructions to connect the Subsystem to the DiGiMatrix. 4 5 1 7 3 6 2 1. Place the Subsystem on top of the DiGiMatrix. 2. Connect one end of the IDE cable to the DiGiMatrix IDE connector. 3. Loosen one top cover screw on the DiGiMatrix, then - Asus DiGiMatrix | User Guide - Page 151
DiGiMatrix from a distance. Use the remote controller to navigate through the Audio DJ and ASUS Home Theater windows. A.2.1 Specifications Operating range Power Source Receiver 5 meters (max) 2 x "AA" batteries Built-in infrared receiver A.2.2 Remote control layout Multimedia buttons Mode/Memory - Asus DiGiMatrix | User Guide - Page 152
A.2.3 Remote control functions in Audio DJ Buttons CD/DVD Hard Disk FM Radio Turns the Audio DJ system on 0 ~ 9 DiGiMatrix operating system on You may turn on the operating system using the OS START ( ) button only when DiGiMatrix is in Audio DJ mode. In soft-off state, the remote controller - Asus DiGiMatrix | User Guide - Page 153
A.2.4 Remote control functions in Home Theater ASUS DiGiMatrix Button TV Radio ASUS Home Theater Music Pictures Video Clips DVD -- -- Open Music mode -- -- -- -- -- Open TV mode -- -- -- -- -- -- Open Pictures mode Channel up Next preset station -- -- Channel down - Asus DiGiMatrix | User Guide - Page 154
Home Theater / Return to the Home Theater main window Return to the entertainment mode main window Mute -- Change subtitle Show menu Select audio language Full screen Move right Move left Move up Move down Enter Select chapter You may use the OS START ( ) button to wake up the DiGiMatrix system - Asus DiGiMatrix | User Guide - Page 155
specifications Specification DVD-R/-RW/CD-R/-RW DVD-ROM/CD-RW Combination Drive Combination Drive Write Speed DVD-R DVD-RW CD-R CD-RW HS CD-RW Read Speed DVD-ROM DVD-RAM CD-ROM Random Access Time DVD-ROM DVD-RAM CD-ROM Random Seek Time DVD-ROM DVD-RAM CD 60,000 POH 192KB ASUS DiGiMatrix A-9 - Asus DiGiMatrix | User Guide - Page 156
A.4 Wireless LAN adapter channels The IEEE 802.11b standard for Wireless LAN allocated the 2.4 GHz frequency band into 14 overlapping operating channels. Each channel corresponds to a different set of frequencies. The table below shows the center frequencies of each channel. Channel 1 2 3 4 5 6 7 - Asus DiGiMatrix | User Guide - Page 157
transmission rate. Channels 1, 6 and 11 are independent and do not overlap each other. We recommended that you tune your wireless LAN adapter to these channels. ASUS DiGiMatrix A-11 - Asus DiGiMatrix | User Guide - Page 158
A-12 Appendix
-
 1
1 -
 2
2 -
 3
3 -
 4
4 -
 5
5 -
 6
6 -
 7
7 -
8
-
9
-
10
-
11
-
12
-
13
-
14
-
15
-
16
-
17
-
18
-
19
-
20
-
21
-
22
-
23
-
24
-
25
-
26
-
27
-
28
-
29
-
30
-
31
-
32
-
33
-
34
-
35
-
36
-
37
-
38
-
39
-
40
-
41
-
42
-
43
-
44
-
45
-
46
-
47
-
48
-
49
-
50
-
51
-
52
-
53
-
54
-
55
-
56
-
57
-
58
-
59
-
60
-
61
-
62
-
63
-
64
-
65
-
66
-
67
-
68
-
69
-
70
-
71
-
72
-
73
-
74
-
75
-
76
-
77
-
78
-
79
-
80
-
81
-
82
-
83
-
84
-
85
-
86
-
87
-
88
-
89
-
90
-
91
-
92
-
93
-
94
-
95
-
96
-
97
-
98
-
99
-
100
-
101
-
102
-
103
-
104
-
105
-
106
-
107
-
108
-
109
-
110
-
111
-
112
-
113
-
114
-
115
-
116
-
117
-
118
-
119
-
120
-
121
-
122
-
123
-
124
-
125
-
126
-
127
-
128
-
129
-
130
-
131
-
132
-
133
-
134
-
135
-
136
-
137
-
138
-
139
-
140
-
141
-
142
-
143
-
144
-
145
-
146
-
147
-
148
-
149
-
150
-
151
-
152
-
153
-
154
-
155
-
156
-
157
-
158
 |
 |
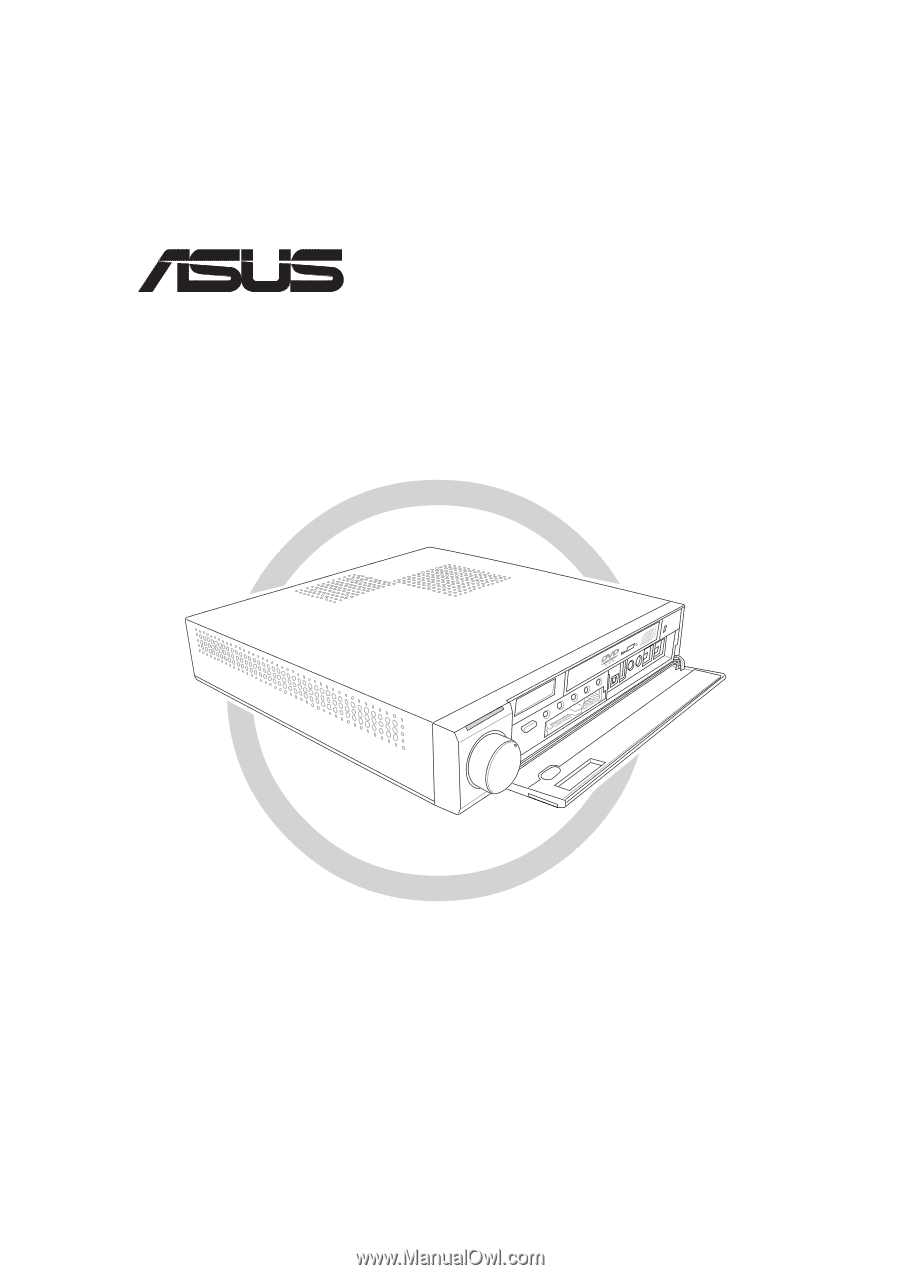
Digital Entertainment PC
AB-V10
®
DiGiMatrix
User Guide