Asus DiGiMatrix User Guide - Page 25
Position the CPU above
 |
View all Asus DiGiMatrix manuals
Add to My Manuals
Save this manual to your list of manuals |
Page 25 highlights
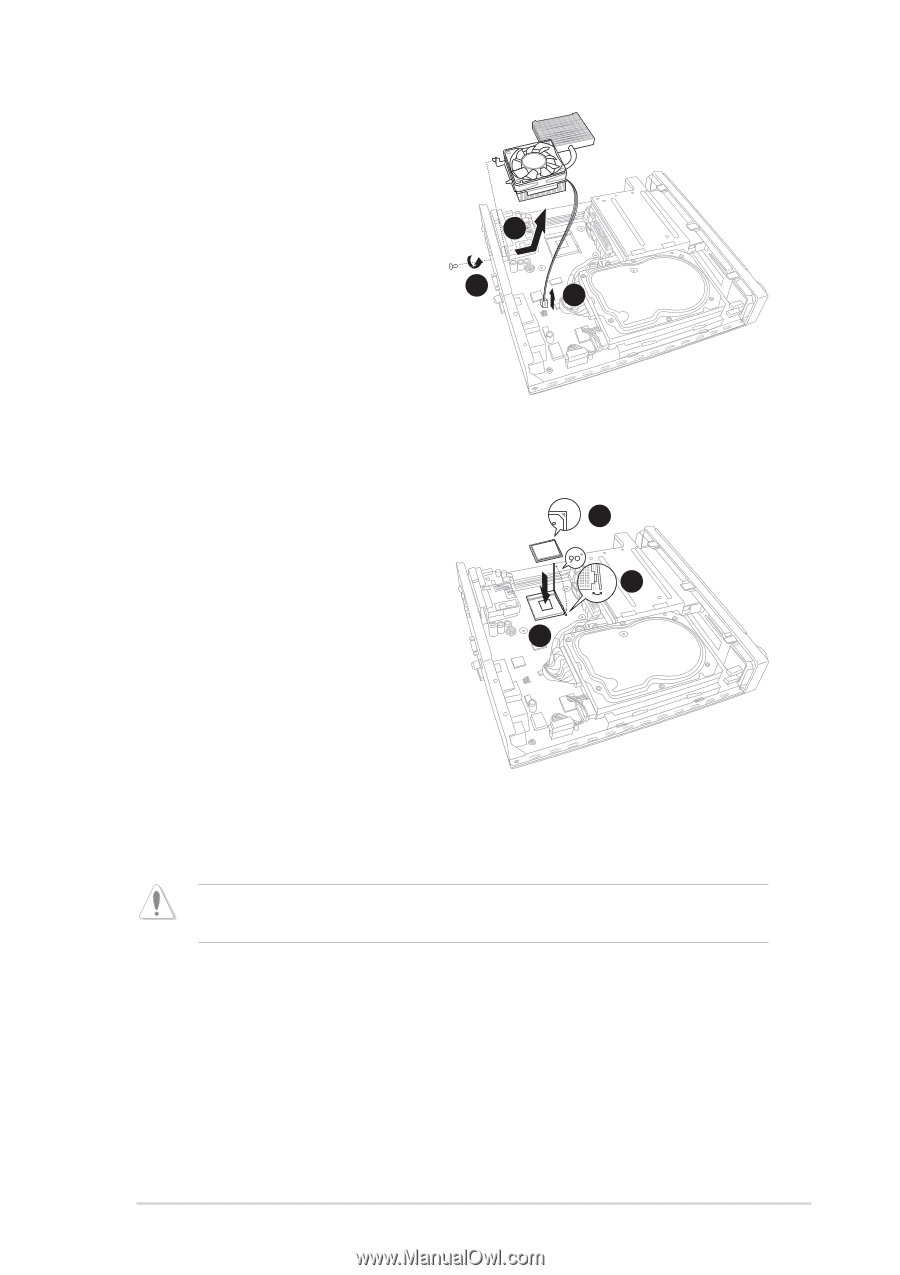
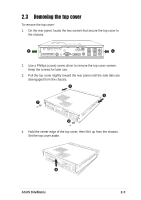
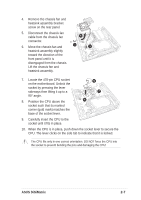
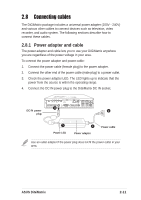
4. Remove the chassis fan and heatsink assembly bracket screw on the rear panel. 5. Disconnect the chassis fan cable from the chassis fan 6 connector. 4 6. Move the chassis fan and 5 heatsink assembly slightly toward the direction of the front panel until it is disengaged from the chassis. Lift the chassis fan and heatsink assembly. 7. Locate the 478-pin CPU socket on the motherboard. Unlock the socket by pressing the lever sideways then lifting it up to a 90° angle. 8. Position the CPU above the socket such that its marked corner (gold mark) matches the base of the socket lever. 8 7 9 9. Carefully insert the CPU to the socket until it fits in place. 10. When the CPU is in place, push down the socket lever to secure the CPU. The lever clicks on the side tab to indicate that it is locked. The CPU fits only in one correct orientation. DO NOT force the CPU into the socket to prevent bending the pins and damaging the CPU! ASUS DiGiMatrix 2-7
-
 1
1 -
2
-
3
-
4
-
5
-
6
-
7
-
8
-
9
-
10
-
11
-
12
-
13
-
14
-
15
-
16
-
17
-
18
-
19
-
 20
20 -
 21
21 -
 22
22 -
 23
23 -
 24
24 -
 25
25 -
 26
26 -
 27
27 -
 28
28 -
 29
29 -
 30
30 -
31
-
32
-
33
-
34
-
35
-
36
-
37
-
38
-
39
-
40
-
41
-
42
-
43
-
44
-
45
-
46
-
47
-
48
-
49
-
50
-
51
-
52
-
53
-
54
-
55
-
56
-
57
-
58
-
59
-
60
-
61
-
62
-
63
-
64
-
65
-
66
-
67
-
68
-
69
-
70
-
71
-
72
-
73
-
74
-
75
-
76
-
77
-
78
-
79
-
80
-
81
-
82
-
83
-
84
-
85
-
86
-
87
-
88
-
89
-
90
-
91
-
92
-
93
-
94
-
95
-
96
-
97
-
98
-
99
-
100
-
101
-
102
-
103
-
104
-
105
-
106
-
107
-
108
-
109
-
110
-
111
-
112
-
113
-
114
-
115
-
116
-
117
-
118
-
119
-
120
-
121
-
122
-
123
-
124
-
125
-
126
-
127
-
128
-
129
-
130
-
131
-
132
-
133
-
134
-
135
-
136
-
137
-
138
-
139
-
140
-
141
-
142
-
143
-
144
-
145
-
146
-
147
-
148
-
149
-
150
-
151
-
152
-
153
-
154
-
155
-
156
-
157
-
158
 |
 |