Autodesk 05726-091452-9060 User Guide - Page 26
To insert an image, without scanning resolution information in scale 1:1
 |
UPC - 606121590040
View all Autodesk 05726-091452-9060 manuals
Add to My Manuals
Save this manual to your list of manuals |
Page 26 highlights
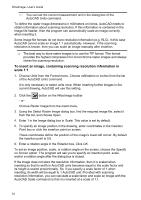
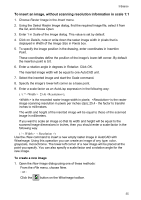
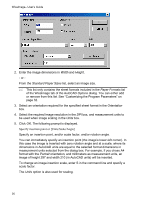
3 Basics To insert an image, without scanning resolution information in scale 1:1 1. Choose Raster Image in the Insert menu. 2. Using the Select Raster Image dialog, find the required image file, select it from the list, and choose Open. 3. Enter 1 in Scale of the Image dialog. This value is set by default. 4. Click on Details, note or write down the raster image width in pixels that is displayed in Width of the Image Size in Pixels box. 5. To specify the image position in the drawing, enter coordinates in Insertion Point. These coordinates define the position of the image's lower-left corner. By default the insertion point is 0,0. 6. Enter a rotation angle in degrees in Rotation. Click OK. The inserted image width will be equal to one AutoCAD unit. 7. Select the inserted image and start the Scale command. 8. Specify the image's lower-left corner as a base point. 9. Enter a scale factor as an AutoLisp expression in the following way: ( / ( * 25.4) ); is the recorded raster image width in pixels; is the raster image scanning resolution in pixels per inches (dpi); 25.4 - the factor to transfer inches to millimeters. The width and height of the inserted image will be equal to those of the scanned image in millimeters. If you want to scale an image so that its width and height will be equal to the scanned image dimensions in inches, then you should enter a scale factor in the following way: ( / < Width > < Resolution >) Use the rNew command to insert a new empty raster image in AutoCAD with WiseImage. Using this operation you can create an image of any type: color, grayscale, monochrome. The lower-left corner of a new image will be placed at the point you specify. You can also specify a scale factor and a rotation angle for the new image. To create a new image 1. Open the New Image dialog using one of these methods: From the rFile menu, choose New. - or - Click the button on the WiseImage toolbar. 25
-
 1
1 -
2
-
3
-
4
-
5
-
6
-
7
-
8
-
9
-
10
-
11
-
12
-
13
-
14
-
15
-
16
-
17
-
18
-
19
-
20
-
 21
21 -
 22
22 -
 23
23 -
 24
24 -
 25
25 -
 26
26 -
 27
27 -
 28
28 -
 29
29 -
 30
30 -
 31
31 -
32
-
33
-
34
-
35
-
36
-
37
-
38
-
39
-
40
-
41
-
42
-
43
-
44
-
45
-
46
-
47
-
48
-
49
-
50
-
51
-
52
-
53
-
54
-
55
-
56
-
57
-
58
-
59
-
60
-
61
-
62
-
63
-
64
-
65
-
66
-
67
-
68
-
69
-
70
-
71
-
72
-
73
-
74
-
75
-
76
-
77
-
78
-
79
-
80
-
81
-
82
-
83
-
84
-
85
-
86
-
87
-
88
-
89
-
90
-
91
-
92
-
93
-
94
-
95
-
96
-
97
-
98
-
99
-
100
-
101
-
102
-
103
-
104
-
105
-
106
-
107
-
108
-
109
-
110
-
111
-
112
-
113
-
114
-
115
-
116
-
117
-
118
-
119
-
120
-
121
-
122
-
123
-
124
-
125
-
126
-
127
-
128
-
129
-
130
-
131
-
132
-
133
-
134
-
135
-
136
-
137
-
138
-
139
-
140
-
141
-
142
-
143
-
144
-
145
-
146
-
147
-
148
-
149
-
150
-
151
-
152
-
153
-
154
-
155
-
156
-
157
-
158
-
159
-
160
-
161
-
162
-
163
-
164
-
165
-
166
-
167
-
168
-
169
-
170
-
171
-
172
-
173
-
174
-
175
-
176
-
177
-
178
-
179
-
180
-
181
-
182
-
183
-
184
-
185
-
186
-
187
-
188
-
189
-
190
-
191
-
192
-
193
-
194
-
195
-
196
-
197
-
198
-
199
-
200
-
201
-
202
-
203
-
204
-
205
-
206
-
207
-
208
-
209
-
210
-
211
-
212
-
213
-
214
-
215
-
216
-
217
-
218
-
219
-
220
-
221
-
222
-
223
-
224
-
225
-
226
-
227
-
228
-
229
-
230
-
231
-
232
-
233
-
234
-
235
 |
 |
