Behringer DEEPMIND 12 Manual - Page 36
Cal Aftertouch, Calibrate Pedal
 |
View all Behringer DEEPMIND 12 manuals
Add to My Manuals
Save this manual to your list of manuals |
Page 36 highlights
36 DeepMind 12 User Manual CAL AFTERTOUCH To calibrate the KEYBOARD AFTERTOUCH, please use the following procedure: Note: During the calibration the GLOBAL, -/NO and +/YES switches will be flashing. If at any time you want to cancel the calibration routine, you can press the -/NO switch. No previous calibration data will be changed if you do cancel the routine. To confirm the calibration at each stage press +/YES as described below. 1. In order to start the calibration routine, make sure that the '
-
 1
1 -
2
-
3
-
4
-
5
-
6
-
7
-
8
-
9
-
10
-
11
-
12
-
13
-
14
-
15
-
16
-
17
-
18
-
19
-
20
-
21
-
22
-
23
-
24
-
25
-
26
-
27
-
28
-
29
-
30
-
 31
31 -
 32
32 -
 33
33 -
 34
34 -
 35
35 -
 36
36 -
 37
37 -
 38
38 -
 39
39 -
 40
40 -
 41
41 -
42
-
43
-
44
-
45
-
46
-
47
-
48
-
49
-
50
-
51
-
52
-
53
-
54
-
55
-
56
-
57
-
58
-
59
-
60
-
61
-
62
-
63
-
64
-
65
-
66
-
67
-
68
-
69
-
70
-
71
-
72
-
73
-
74
-
75
-
76
-
77
-
78
-
79
-
80
-
81
-
82
-
83
-
84
-
85
-
86
-
87
-
88
-
89
-
90
-
91
-
92
-
93
-
94
-
95
-
96
-
97
-
98
-
99
-
100
-
101
-
102
-
103
-
104
-
105
-
106
-
107
-
108
-
109
-
110
-
111
-
112
-
113
-
114
-
115
-
116
-
117
-
118
-
119
-
120
-
121
-
122
-
123
-
124
-
125
-
126
-
127
-
128
-
129
-
130
-
131
-
132
-
133
-
134
-
135
-
136
-
137
-
138
-
139
-
140
-
141
-
142
-
143
-
144
-
145
-
146
-
147
-
148
-
149
-
150
-
151
-
152
-
153
-
154
-
155
-
156
-
157
-
158
-
159
-
160
-
161
-
162
-
163
-
164
-
165
-
166
 |
 |

36
DeepMind 12 User Manual
CAL AFTERTOUCH
To calibrate the KEYBOARD AFTERTOUCH, please use the following procedure:
Note:
During the calibration the GLOBAL, -/NO and +/YES switches will be
flashing. If at any time you want to cancel the calibration routine, you can press
the -/NO switch. No previous calibration data will be changed if you do cancel the
routine. To confirm the calibration at each stage press +/YES as described below.
1.
In order to start the calibration routine, make sure that the '<' symbol on the
CAL AFTERTOUCH line is highlighted and press +/YES.
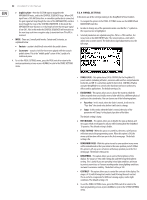
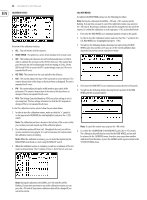
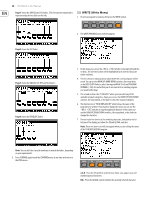
2.
You will see the following display showing a bar representing the current
AFTERTOUCH value (0% for no pressure). Also on this screen you can see the
stored calibration data above the bar and the current value below the bar:
3.
Now apply pressure to any one of the keys (or multiple keys) until the value
stops increasing.
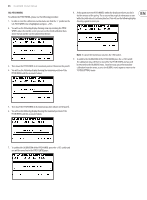
4.
You will see the following display showing the maximum position of the
AFTERTOUCH and the associated value:
Note:
To cancel the routine you can press the -/NO switch.
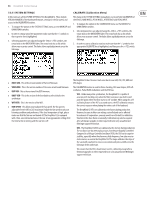
5.
To confirm the CALIBRATION of the AFTERTOUCH press the +/YES switch:
The calibration data will then be stored for the AFTERTOUCH and you will
be returned to the CALIBRATE menu. From here you can perform another
calibration from the menu, or press the GLOBAL switch again to return to the
SYSTEM SETTINGS menu.
CALIBRATE PEDAL
To calibrate the PEDAL please use the following process:
Note:
During the calibration the GLOBAL, -/NO and +/YES switches will be
flashing. If at any time you want to cancel the calibration routine, you can press
the -/NO switch. No previous calibration data will be changed if you do cancel the
routine. To confirm the calibration at each stage press +/YES as described below.
1.
In order to start the calibration routine, make sure that the '<' symbol on the
CALIBRATE PEDAL line is highlighted and press +/YES.
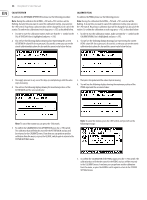
2.
You will see the following display showing a bar representing the current
PEDAL value (0% for no pressure). Also on this screen you can see the stored
calibration data above the bar and the current value below the bar:
3.
Then press the pedal until the value stops increasing.
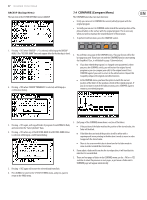
4.
You will see the following display showing the maximum position of the
PEDAL input and the associated value:
Note:
To cancel the routine, press the -/NO switch, and you will see the
following message:
5.
To confirm the CALIBRATION of the PEDAL input, press the +/YES switch: The
calibration data will then be stored for the PEDAL and you will be returned
to the CALIBRATE menu. From here you can perform another calibration
from the menu, or press the GLOBAL switch again to return to the SYSTEM
SETTINGS menu.