Brother International MFC 9420CN Network Users Manual - English - Page 75
Setting Up a Group for Broadcasting
 |
UPC - 012502614074
View all Brother International MFC 9420CN manuals
Add to My Manuals
Save this manual to your list of manuals |
Page 75 highlights
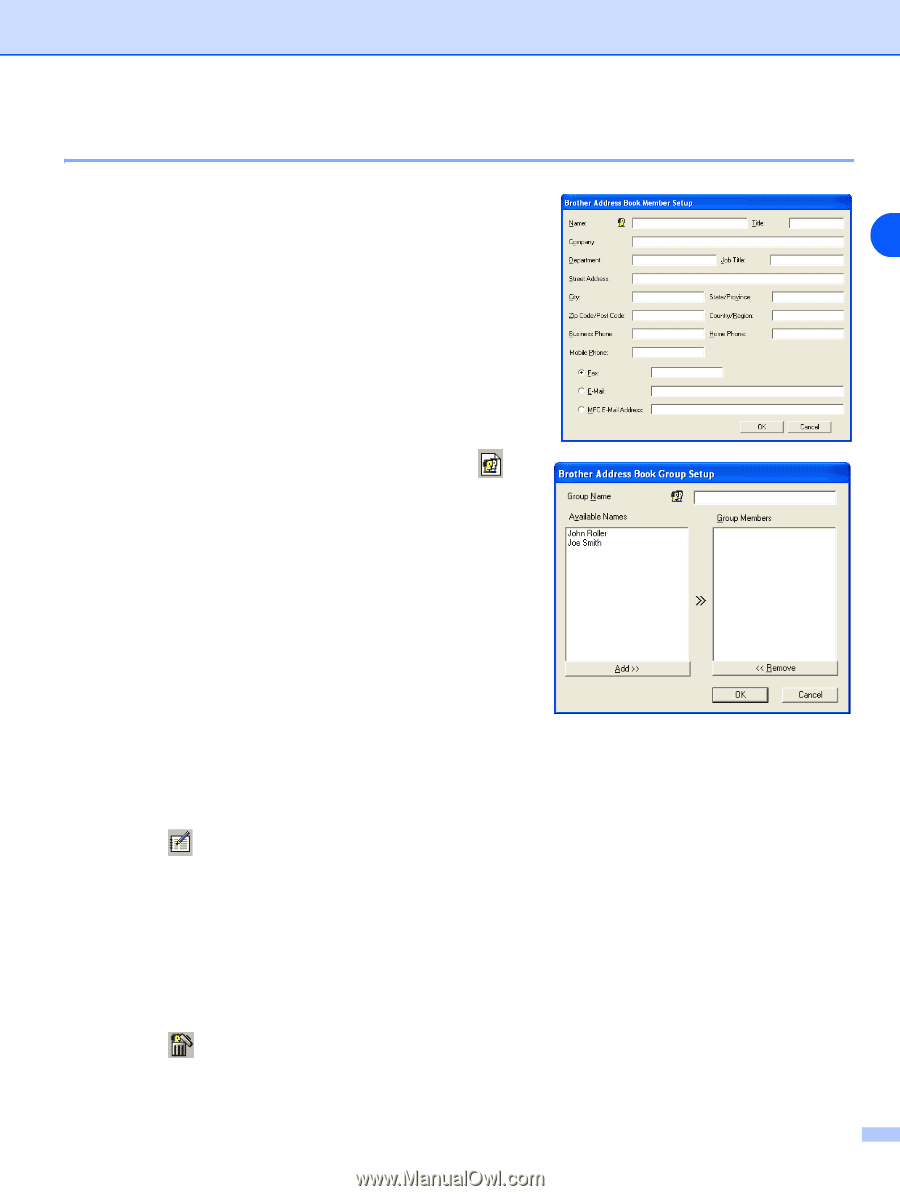
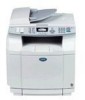
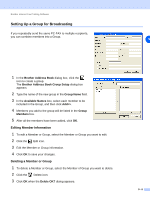
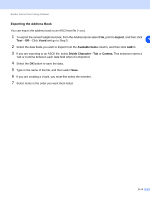
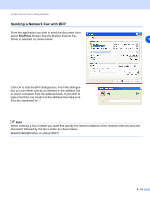
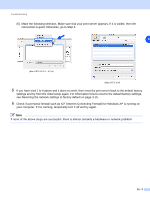
Brother Internet Fax Printing Software Setting Up a Group for Broadcasting If you repeatedly send the same PC-FAX to multiple recipients, you can combine members into a Group. 9 1 In the Brother Address Book dialog box, click the icon to create a group. The Brother Address Book Group Setup dialog box appears: 2 Type the name of the new group in the Group Name field. 3 In the Available Names box, select each member to be included in the Group, and then click Add>>. 4 Members you add to the group will be listed in the Group Members box. 5 After all the members have been added, click OK. Editing Member Information 1 To edit a Member or Group, select the Member or Group you want to edit. 2 Click the Edit icon. 3 Edit the Member or Group information. 4 Click OK to save your changes. Deleting a Member or Group 1 To delete a Member or Group, select the Member of Group you want to delete. 2 Click the Delete icon. 3 Click OK when the Delete OK? dialog appears. 9 - 8
-
 1
1 -
2
-
3
-
4
-
5
-
6
-
7
-
8
-
9
-
10
-
11
-
12
-
13
-
14
-
15
-
16
-
17
-
18
-
19
-
20
-
21
-
22
-
23
-
24
-
25
-
26
-
27
-
28
-
29
-
30
-
31
-
32
-
33
-
34
-
35
-
36
-
37
-
38
-
39
-
40
-
41
-
42
-
43
-
44
-
45
-
46
-
47
-
48
-
49
-
50
-
51
-
52
-
53
-
54
-
55
-
56
-
57
-
58
-
59
-
60
-
61
-
62
-
63
-
64
-
65
-
66
-
67
-
68
-
69
-
 70
70 -
 71
71 -
 72
72 -
 73
73 -
 74
74 -
 75
75 -
 76
76 -
 77
77 -
 78
78 -
 79
79 -
 80
80 -
81
-
82
-
83
-
84
-
85
-
86
-
87
-
88
-
89
-
90
-
91
-
92
-
93
-
94
 |
 |