Brother International MFC490CW Users Manual - English - Page 109
Enhance Photos, Auto Correct
 |
UPC - 012502620495
View all Brother International MFC490CW manuals
Add to My Manuals
Save this manual to your list of manuals |
Page 109 highlights
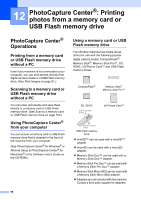
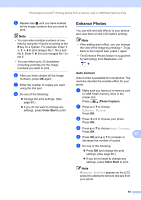
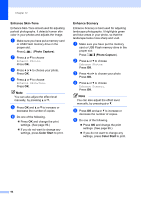
PhotoCapture Center®: Printing photos from a memory card or USB Flash memory drive e Repeat step d until you have entered all the image numbers that you want to print. Note • You can enter multiple numbers at one time by using the l key for a comma or the # key for a hyphen. For example, Enter 1, l, 3, l, 6 to print images No.1, No.3 and No.6. Enter 1, #, 5 to print images No.1 to No.5. • You can enter up to 12 characters (including commas) for the image numbers you want to print. f After you have chosen all the image numbers, press OK again. g Enter the number of copies you want using the dial pad. h Do one of the following: „ Change the print settings. (See page 99.) „ If you do not want to change any settings, press Color Start to print. Enhance Photos 12 You can edit and add effects to your photos and view them on the LCD before printing. Note • After adding each effect, you can enlarge the view of the image by pressing l. To go back to the original size, press l again. • The Enhance Photos feature is supported by technology from Reallusion, Inc. Auto Correct 12 Auto Correct is available for most photos. The machine decides the suitable effect for your photo. a Make sure you have put a memory card or USB Flash memory drive in the proper slot. Press (Photo Capture). b Press a or b to choose Enhance Photos. Press OK. c Press d or c to choose your photo. Press OK. d Press a or b to choose Auto Correct. Press OK. e Press OK and a or b to increase or 12 decrease the number of copies. f Do one of the following. „ Press OK and change the print settings. (See page 99.) „ If you do not want to change any settings, press Color Start to print. Note If Remove Red-Eye appears on the LCD, press # to attempt to remove red-eye from your photo. 93
-
 1
1 -
2
-
3
-
4
-
5
-
6
-
7
-
8
-
9
-
10
-
11
-
12
-
13
-
14
-
15
-
16
-
17
-
18
-
19
-
20
-
21
-
22
-
23
-
24
-
25
-
26
-
27
-
28
-
29
-
30
-
31
-
32
-
33
-
34
-
35
-
36
-
37
-
38
-
39
-
40
-
41
-
42
-
43
-
44
-
45
-
46
-
47
-
48
-
49
-
50
-
51
-
52
-
53
-
54
-
55
-
56
-
57
-
58
-
59
-
60
-
61
-
62
-
63
-
64
-
65
-
66
-
67
-
68
-
69
-
70
-
71
-
72
-
73
-
74
-
75
-
76
-
77
-
78
-
79
-
80
-
81
-
82
-
83
-
84
-
85
-
86
-
87
-
88
-
89
-
90
-
91
-
92
-
93
-
94
-
95
-
96
-
97
-
98
-
99
-
100
-
101
-
102
-
103
-
 104
104 -
 105
105 -
 106
106 -
 107
107 -
 108
108 -
 109
109 -
 110
110 -
 111
111 -
 112
112 -
 113
113 -
 114
114 -
115
-
116
-
117
-
118
-
119
-
120
-
121
-
122
-
123
-
124
-
125
-
126
-
127
-
128
-
129
-
130
-
131
-
132
-
133
-
134
-
135
-
136
-
137
-
138
-
139
-
140
-
141
-
142
-
143
-
144
-
145
-
146
-
147
-
148
-
149
-
150
-
151
-
152
-
153
-
154
-
155
-
156
-
157
-
158
-
159
-
160
-
161
-
162
-
163
-
164
-
165
-
166
-
167
-
168
-
169
-
170
-
171
-
172
-
173
-
174
-
175
-
176
-
177
-
178
-
179
-
180
-
181
-
182
-
183
-
184
-
185
-
186
-
187
-
188
-
189
-
190
-
191
-
192
-
193
-
194
-
195
-
196
-
197
-
198
-
199
-
200
-
201
-
202
-
203
-
204
-
205
-
206
-
207
-
208
-
209
-
210
-
211
-
212
-
213
-
214
-
215
-
216
 |
 |
