Campbell Scientific CSAT3B CSAT3B Three-Dimensional Sonic Anemometer - Page 9

Example CRBasic Datalogger Programs

Page 9 highlights

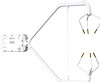
Table of Contents B.1.2 Temperature B-2 B.2 References B-3 C. Example CRBasic Datalogger Programs C-1 C.1 Simple SDM Program C-1 C.2 Simple CPI Program C-2 C.3 Advanced CPI Program C-3 Figures 4-1. Mounting a CM20X crossarm with crossarm-to-pole bracket 2 4-2. CSAT3B mounting 3 4-3. Grounding lug of CSAT3B 3 4-4. Cable connection for SDM 4 4-5. Cable connections for CPI 5 4-6. SDM and power wiring to a CR1000 datalogger 6 4-7. CPI and power connections to a CR6 datalogger 7 4-8. Lit status light on CSAT3B block 7 5-1. CM250 mount 9 5-2. Campbell Scientific resource DVD 10 5-3. Options for CSAT3BCBL1 Power/SDM cable 12 5-4. Options for CSAT3BCBL2 power cable 12 5-5. Options for cabling CPI or RS-485 communications 13 5-6. FW05 thermocouple 13 5-7. FW/ENC for storing fragile thermocouples 14 5-8. CSAT3B Power/SDM splitter 15 5-9. CSAT3B CPI/RS-485 splitter 15 5-10. HUB-SDM8 for multiple CSAT3B connections with SDM communications 16 5-11. HUB-CPI for multiple CSAT3B connections to CPI communications 17 5-12. CAT6 Ethernet cable 17 6-1. Dimensions of CSAT3B 21 7-1. Connecting CSAT3B using Device Configuration Utility 22 7-2. Real-time data subscreen while connected to CSAT3B with Device Configuration Utility 25 7-3. CM210 mounting kit with CM20X crossarm 26 7-4. CSAT3B mounting 27 7-5. CSAT3B shown with coordinate system, with arrows representing positive x, y, and z axes 28 7-6. Exploded view of fine-wire thermocouple with CSAT3B 29 7-7. CSAT3B with fine-wire thermocouple mounted 30 7-8. SDM/Power connections 33 7-9. Wiring to power and SDM ports on CR1000 datalogger 33 7-10. SDM daisy chain (CSAT3B sensor arms and grounding cables not shown 35 7-11. SDM star topology (CSAT3B sensors arms and grounding cables not shown 36 7-12. Power and CPI cable connections 37 7-13. CPI connection to a CR6 datalogger 37 7-14. CPI daisy chain (CSAT3B sensor arms and grounding cables not shown 39 7-15. CPI star topology (CSAT3B sensor arms and grounding cables not shown 40 7-16. RS-485 cable connections 41 iii

  • 1
  • 2
  • 3
  • 4
  • 5
  • 6
  • 7
  • 8
  • 9
  • 10
  • 11
  • 12
  • 13
  • 14
  • 15
  • 16
  • 17
  • 18
  • 19
  • 20
  • 21
  • 22
  • 23
  • 24
  • 25
  • 26
  • 27
  • 28
  • 29
  • 30
  • 31
  • 32
  • 33
  • 34
  • 35
  • 36
  • 37
  • 38
  • 39
  • 40
  • 41
  • 42
  • 43
  • 44
  • 45
  • 46
  • 47
  • 48
  • 49
  • 50
  • 51
  • 52
  • 53
  • 54
  • 55
  • 56
  • 57
  • 58
  • 59
  • 60
  • 61
  • 62
  • 63
  • 64
  • 65
  • 66
  • 67
  • 68
  • 69
  • 70
  • 71
  • 72
  • 73
  • 74
  • 75
  • 76
  • 77
  • 78
  • 79
  • 80
  • 81
  • 82
  • 83
  • 84
  • 85
  • 86
  • 87
  • 88

Table of Contents
B.1.2
Temperature
..............................................................................
B-2
B.2
References
........................................................................................
B-3
C.
Example CRBasic Datalogger Programs
..............
C-1
C.1
Simple SDM Program
......................................................................
C-1
C.2
Simple CPI Program
........................................................................
C-2
C.3
Advanced CPI Program
...................................................................
C-3
Figures
4-1.
Mounting a CM20X crossarm with crossarm-to-pole bracket
.............
2
4-2.
CSAT3B mounting
..............................................................................
3
4-3.
Grounding lug of CSAT3B
..................................................................
3
4-4.
Cable connection for SDM
..................................................................
4
4-5.
Cable connections for CPI
...................................................................
5
4-6.
SDM and power wiring to a CR1000 datalogger
.................................
6
4-7.
CPI and power connections to a CR6 datalogger
.................................
7
4-8.
Lit status light on CSAT3B block
........................................................
7
5-1.
CM250 mount
......................................................................................
9
5-2.
Campbell Scientific resource DVD
....................................................
10
5-3.
Options for CSAT3BCBL1 Power/SDM cable
..................................
12
5-4.
Options for CSAT3BCBL2 power cable
...........................................
12
5-5.
Options for cabling CPI or RS-485 communications
.........................
13
5-6.
FW05 thermocouple
...........................................................................
13
5-7.
FW/ENC for storing fragile thermocouples
.......................................
14
5-8.
CSAT3B Power/SDM splitter
............................................................
15
5-9.
CSAT3B CPI/RS-485 splitter
............................................................
15
5-10.
HUB-SDM8 for multiple CSAT3B connections with SDM
communications
..............................................................................
16
5-11.
HUB-CPI for multiple CSAT3B connections to CPI
communications
..............................................................................
17
5-12. CAT6 Ethernet cable
..........................................................................
17
6-1.
Dimensions of CSAT3B
....................................................................
21
7-1.
Connecting CSAT3B using
Device Configuration Utility
.................
22
7-2.
Real-time data subscreen while connected to CSAT3B with
Device Configuration Utility
..........................................................
25
7-3.
CM210 mounting kit with CM20X crossarm
.....................................
26
7-4.
CSAT3B mounting
............................................................................
27
7-5.
CSAT3B shown with coordinate system, with arrows representing
positive x, y, and z axes
..................................................................
28
7-6.
Exploded view of fine-wire thermocouple with CSAT3B
.................
29
7-7.
CSAT3B with fine-wire thermocouple mounted
...............................
30
7-8.
SDM/Power connections
....................................................................
33
7-9.
Wiring to power and SDM ports on CR1000 datalogger
...................
33
7-10.
SDM daisy chain (CSAT3B sensor arms and grounding cables
not shown)
......................................................................................
35
7-11.
SDM star topology (CSAT3B sensors arms and grounding cables
not shown)
......................................................................................
36
7-12.
Power and CPI cable connections
......................................................
37
7-13.
CPI connection to a CR6 datalogger
..................................................
37
7-14.
CPI daisy chain (CSAT3B sensor arms and grounding cables not
shown)
............................................................................................
39
7-15.
CPI star topology (CSAT3B sensor arms and grounding cables
not shown)
......................................................................................
40
7-16. RS-485 cable connections
..................................................................
41
iii