Canon CanoScan D660U Canon Plug-in Module CS-U3.9 User's Guide - Page 11
Set the Scan Mode, Output Device, Resolution - specifications
 |
View all Canon CanoScan D660U manuals
Add to My Manuals
Save this manual to your list of manuals |
Page 11 highlights
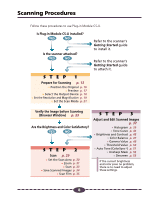
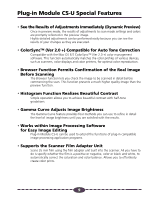
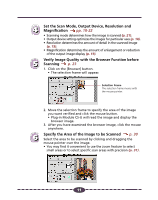
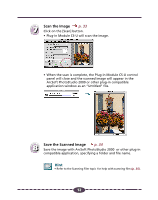
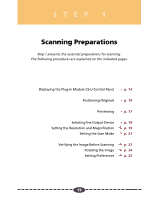
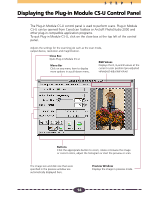
4 Set the Scan Mode, Output Device, Resolution and Magnification pp. 18-22 • Scanning mode determines how the image is scanned (p. 21). • Output device setting optimizes the images for particular uses (p. 18). • Resolution determines the amount of detail in the scanned image (p. 19). • Magnification determines the amount of enlargement or reduction of the output image display (p. 19). Verify Image Quality with the Browser Function before 5 Scanning p. 23 1. Click on the [Browser] button. • The selection frame will appear. Selection Frame The selection frame moves with the mouse pointer. ➟ 2. Move the selection frame to specify the area of the image you want verified and click the mouse button. • Plug-in Module CS-U will read the image and display the browser image. 3. After you have examined the browser image, click the mouse anywhere. 6 Specify the Area of the Image to be Scanned p. 30 Select the area to be scanned by clicking and dragging the mouse pointer over the image. • You may find it convenient to use the zoom feature to select small areas or to select specific scan areas with precision (p. 31). 11
-
 1
1 -
2
-
3
-
4
-
5
-
 6
6 -
 7
7 -
 8
8 -
 9
9 -
 10
10 -
 11
11 -
 12
12 -
 13
13 -
 14
14 -
 15
15 -
 16
16 -
17
-
18
-
19
-
20
-
21
-
22
-
23
-
24
-
25
-
26
-
27
-
28
-
29
-
30
-
31
-
32
-
33
-
34
-
35
-
36
-
37
-
38
-
39
-
40
-
41
-
42
-
43
-
44
-
45
-
46
-
47
-
48
-
49
-
50
-
51
-
52
-
53
-
54
-
55
-
56
-
57
-
58
-
59
-
60
-
61
-
62
-
63
-
64
-
65
-
66
-
67
-
68
-
69
-
70
-
71
 |
 |
