Canon CanoScan D660U Canon Plug-in Module CS-U3.9 User's Guide - Page 25
Setting Preferences, Output Device, Aspect Ratio
 |
View all Canon CanoScan D660U manuals
Add to My Manuals
Save this manual to your list of manuals |
Page 25 highlights
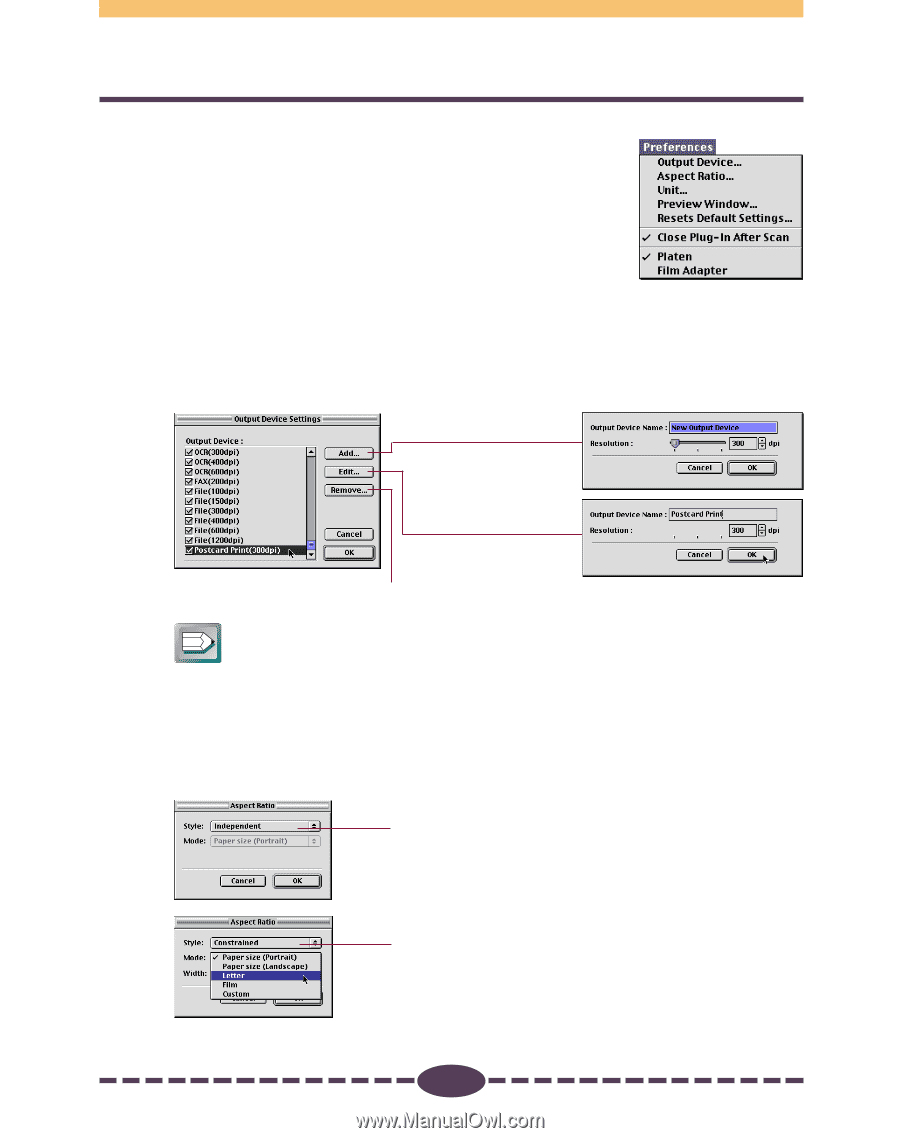
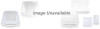
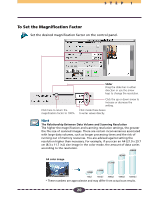
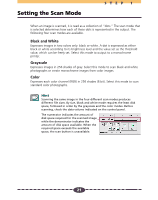
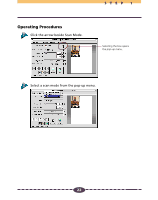
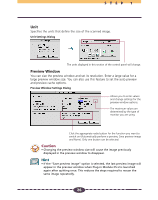
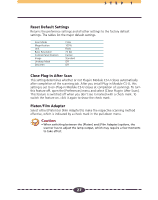
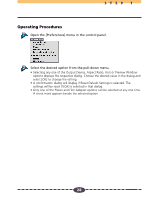
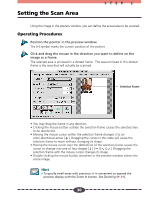
Setting Preferences STEP 1 The Preference settings determine how Plug-in Module CSU operates for the following options: output device (printer, files), scan area setting method, size display units, preview window size, and close plug-in after scan. You can change these options at any time or restore the factory default settings. To change any of these options, use the Preferences menu. Output Device Adds new output devices or file formats to the pop-up menu in the control panel. Devices are displayed by name. Resolution and other settings can be changed for the devices or the devices can be removed. Adds a new device. Allows you to change the name and resolution setting. Allows you to remove a device from the list. Hint • The preset devices cannot be edited or deleted. Aspect Ratio To set the size of the area to be scanned, drag the mouse to size the selection frame in the preview window. The area inside the borders of the selection frame will be scanned. When the [Independent] setting is selected, the selection frame can be freely resized and reshaped by dragging it. When the [Constrained] setting is selected, choose a paper size in the [Mode] option. The selection frame will have a fixed aspect ratio (height to width ratio) when it is resized in the preview window. 25
-
 1
1 -
2
-
3
-
4
-
5
-
6
-
7
-
8
-
9
-
10
-
11
-
12
-
13
-
14
-
15
-
16
-
17
-
18
-
19
-
 20
20 -
 21
21 -
 22
22 -
 23
23 -
 24
24 -
 25
25 -
 26
26 -
 27
27 -
 28
28 -
 29
29 -
 30
30 -
31
-
32
-
33
-
34
-
35
-
36
-
37
-
38
-
39
-
40
-
41
-
42
-
43
-
44
-
45
-
46
-
47
-
48
-
49
-
50
-
51
-
52
-
53
-
54
-
55
-
56
-
57
-
58
-
59
-
60
-
61
-
62
-
63
-
64
-
65
-
66
-
67
-
68
-
69
-
70
-
71
 |
 |