Canon CanoScan D660U Canon Plug-in Module CS-U3.9 User's Guide - Page 35
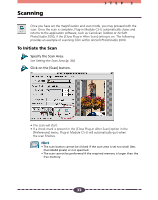
Scanning Film
 |
View all Canon CanoScan D660U manuals
Add to My Manuals
Save this manual to your list of manuals |
Page 35 highlights
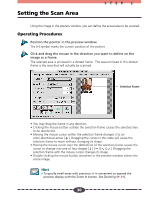
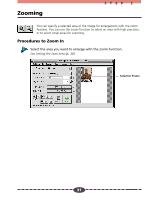
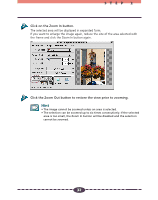
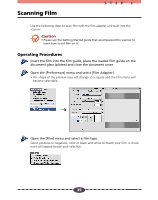
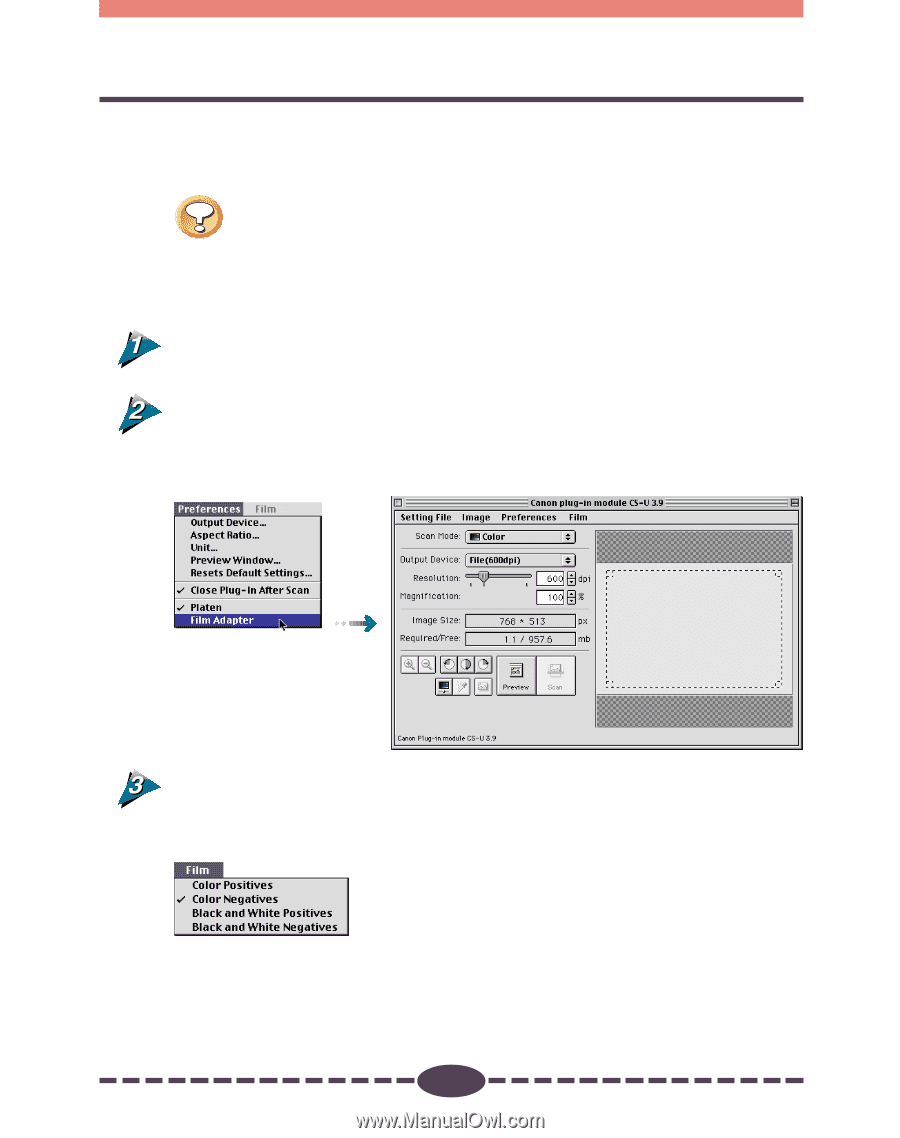
Scanning Film STEP 2 Use the following steps to scan film with the film adapter unit built into the scanner. Caution • Please see the Getting Started guide that accompanied the scanner to learn how to set film on it. Operating Procedures Insert the film into the film guide, place the loaded film guide on the document glass (platen) and close the document cover. Open the [Preferences] menu and select [Film Adapter]. • The shape of the preview area will change to a square and the Film menu will become selectable. Open the [Film] menu and select a film type. Select positives or negatives, color or black and white to match your film. A check mark will appear beside your selection. 35
-
 1
1 -
2
-
3
-
4
-
5
-
6
-
7
-
8
-
9
-
10
-
11
-
12
-
13
-
14
-
15
-
16
-
17
-
18
-
19
-
20
-
21
-
22
-
23
-
24
-
25
-
26
-
27
-
28
-
29
-
 30
30 -
 31
31 -
 32
32 -
 33
33 -
 34
34 -
 35
35 -
 36
36 -
 37
37 -
 38
38 -
 39
39 -
 40
40 -
41
-
42
-
43
-
44
-
45
-
46
-
47
-
48
-
49
-
50
-
51
-
52
-
53
-
54
-
55
-
56
-
57
-
58
-
59
-
60
-
61
-
62
-
63
-
64
-
65
-
66
-
67
-
68
-
69
-
70
-
71
 |
 |
35
S T E P
2
Use the following steps to scan film with the film adapter unit built into the
scanner.
Caution
•
Please see the Getting Started guide that accompanied the scanner to
learn how to set film on it.
Operating Procedures
Insert the film into the film guide, place the loaded film guide on the
document glass (platen) and close the document cover.
Open the [Preferences] menu and select [Film Adapter].
• The shape of the preview area will change to a square and the Film menu will
become selectable.
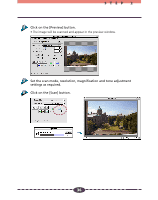
Open the [Film] menu and select a film type.
Select positives or negatives, color or black and white to match your film. A check
mark will appear beside your selection.
Scanning Film