Canon S820D S820D Quick Start Guide - Page 22
Adjusting the Print Head - Operation Panel
 |
View all Canon S820D manuals
Add to My Manuals
Save this manual to your list of manuals |
Page 22 highlights
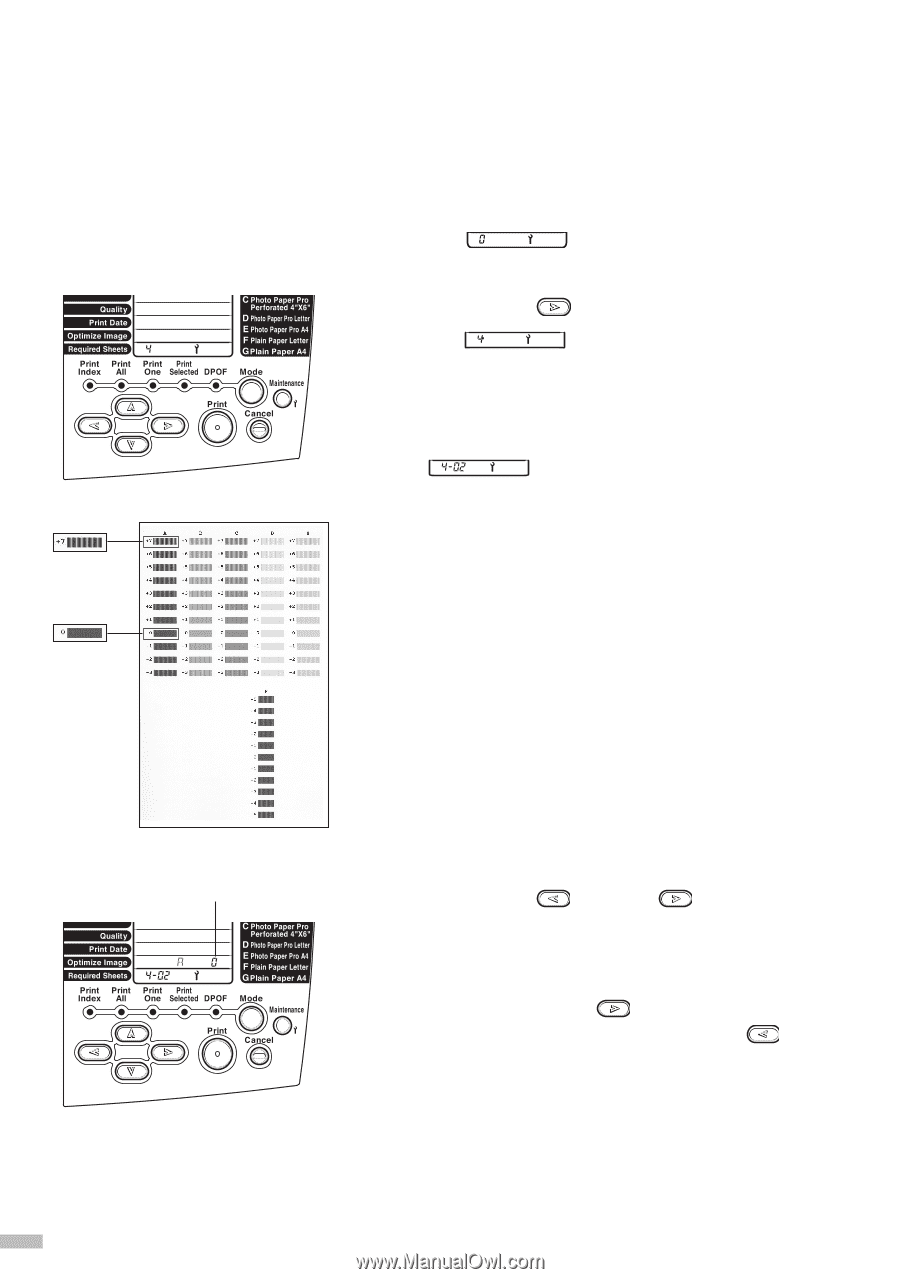
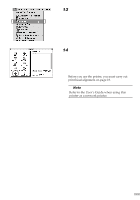
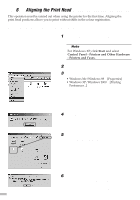
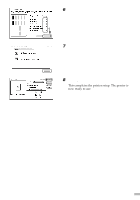
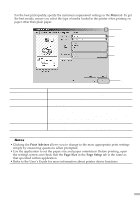
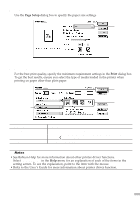
s Adjusting the Print Head - Operation Panel - To print photographs more beautifully, be sure to adjust the position of the print head before you begin printing on your purchased printer for the first time. You should also adjust the print head position if lines or smudges appear when you print photographs. 1 Press the Maintenance button. The Sheets. icon is displayed in Required 2 Press the The (right) button four times. icon is displayed. 3 Check that A4-sized paper is set, and press the Print button. Patterns are printed. When printing ends, the icon is displayed. Pattern in which vertical lines stand out Pattern in which vertical lines do not stand out 4 Examine the printed page, place a check mark on the pattern in which the vertical lines that stand out the least. pattern number 5 Press the (left) or (right) button to display the pattern number (+7 to 3) of column A where the check mark was placed in step 4. When you press the (right) button, the number increases; when you press the (left) button, the number decreases. 6 Press the Print button. 20
-
 1
1 -
2
-
3
-
4
-
5
-
6
-
7
-
8
-
9
-
10
-
11
-
12
-
13
-
14
-
15
-
16
-
 17
17 -
 18
18 -
 19
19 -
 20
20 -
 21
21 -
 22
22 -
 23
23 -
 24
24 -
 25
25 -
 26
26 -
 27
27 -
28
-
29
-
30
-
31
-
32
-
33
-
34
-
35
-
36
-
37
-
38
-
39
-
40
-
41
-
42
-
43
-
44
-
45
-
46
-
47
-
48
-
49
-
50
-
51
-
52
-
53
-
54
-
55
-
56
-
57
-
58
-
59
-
60
-
61
-
62
-
63
-
64
-
65
-
66
-
67
-
68
 |
 |