Canon S820D S820D Quick Start Guide - Page 49
Correcting Photographs Image Correction
 |
View all Canon S820D manuals
Add to My Manuals
Save this manual to your list of manuals |
Page 49 highlights
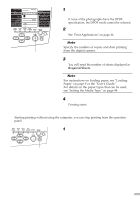
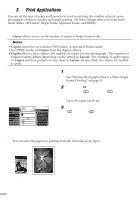
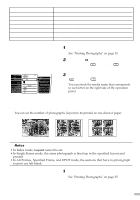
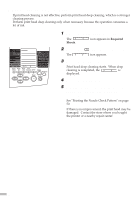
¯Note In DPOF mode, set Print Date from the digital camera. 1 Set the print mode. See "Printing Photographs" on page 35. 2 Move the (cursor) to Print Date by pressing the (top) and (bottom) buttons. 3 Select OFF (disable)/ON (enable) for date printing by pressing the (left) or (right) button. s Correcting Photographs (Image Correction) This function automatically corrects photographs before printing them. This function is effective when printing photographs that fogged because of fluorescent lighting effects or photographs that do not have proper exposure. ¯Notes • When image correction is performed, printing may take a long time. • The actual image and coloring may differ from the printed ones depending on the photograph. 1 Set the print mode. See "Printing Photographs" on page 35. 2 Move the (cursor) to Optimize Image by pressing the (top) and (bottom) buttons. 3 Select OFF (disable)/ON (enable) for image correction by pressing the (left) of (right) buttons. 47
-
 1
1 -
2
-
3
-
4
-
5
-
6
-
7
-
8
-
9
-
10
-
11
-
12
-
13
-
14
-
15
-
16
-
17
-
18
-
19
-
20
-
21
-
22
-
23
-
24
-
25
-
26
-
27
-
28
-
29
-
30
-
31
-
32
-
33
-
34
-
35
-
36
-
37
-
38
-
39
-
40
-
41
-
42
-
43
-
 44
44 -
 45
45 -
 46
46 -
 47
47 -
 48
48 -
 49
49 -
 50
50 -
 51
51 -
 52
52 -
 53
53 -
 54
54 -
55
-
56
-
57
-
58
-
59
-
60
-
61
-
62
-
63
-
64
-
65
-
66
-
67
-
68
 |
 |
