Dell 2330d User's Guide (HTML) - Page 111
Direct Attachment With a Network Cable Using a Print Server, Print Test
 |
UPC - 884116003618
View all Dell 2330d manuals
Add to My Manuals
Save this manual to your list of manuals |
Page 111 highlights
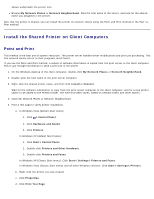
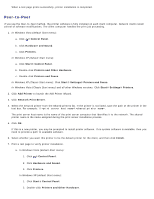
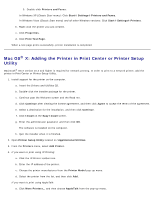
During software installation, the printer is set up to be "shared" so that other network computers can print to it. Direct Attachment With a Network Cable (Using a Print Server) A print server is any designated computer that centrally manages all client print jobs. If you are sharing your printer in a small workgroup environment and want to control all print jobs on this network, connect the printer to a print server. NOTE: Print a printer settings page to get the IP address and MAC address of the printer network adapter before setting up the network printer. For more information, see Printing a Network Setup Page. 1. Insert the Drivers and Utilities CD. The Drivers and Utilities CD launches the installation software automatically. 2. When the Drivers and Utilities CD screen appears, click Network Installation - Install the printer for use on a network, and then click Next. 3. Select I am setting up a print server to share printers with others on the network, and then click Next. 4. Select the network printer(s) you want to install. If you do not see your printer listed, click Refresh List to refresh the list, or click Manual Add to add a printer to the network. 5. Click Next. 6. For each printer driver listed: NOTE: Three printer drivers are listed for each printer you selected: a Printer Control Language (PCL), PostScript (PS), and Host Based Printing (HBP) driver. a. Select the printer driver from the list. b. If you want to change the printer name, enter a new name in the Printer Name field. c. If you want other users to access this printer, select Share this printer with other computers, and then enter a share name that users can easily identify. d. If you want this printer to be the default printer, select Set this printer to default. e. If you do not want to install the particular driver for the printer, select Do not install this printer. 7. Click Next. 8. Select the check box next to the software and documentation you want to install, and then click Install. The drivers, additional software, and documentation are installed on your computer. When the installation is completed, a Congratulations! screen appears. 9. If you do not want to print a test page: Click Finish. If you want to print a test page: a. Select the check box next to the printer(s) on which you want to print a test page. b. Click Print Test Page.
-
 1
1 -
2
-
3
-
4
-
5
-
6
-
7
-
8
-
9
-
10
-
11
-
12
-
13
-
14
-
15
-
16
-
17
-
18
-
19
-
20
-
21
-
22
-
23
-
24
-
25
-
26
-
27
-
28
-
29
-
30
-
31
-
32
-
33
-
34
-
35
-
36
-
37
-
38
-
39
-
40
-
41
-
42
-
43
-
44
-
45
-
46
-
47
-
48
-
49
-
50
-
51
-
52
-
53
-
54
-
55
-
56
-
57
-
58
-
59
-
60
-
61
-
62
-
63
-
64
-
65
-
66
-
67
-
68
-
69
-
70
-
71
-
72
-
73
-
74
-
75
-
76
-
77
-
78
-
79
-
80
-
81
-
82
-
83
-
84
-
85
-
86
-
87
-
88
-
89
-
90
-
91
-
92
-
93
-
94
-
95
-
96
-
97
-
98
-
99
-
100
-
101
-
102
-
103
-
104
-
105
-
 106
106 -
 107
107 -
 108
108 -
 109
109 -
 110
110 -
 111
111 -
 112
112 -
 113
113 -
 114
114 -
 115
115 -
 116
116 -
117
-
118
-
119
-
120
-
121
-
122
-
123
-
124
-
125
-
126
-
127
-
128
-
129
-
130
-
131
-
132
-
133
 |
 |
