Dell 2330d User's Guide (HTML) - Page 21
Cleaning the Exterior of the Printer, NOTICE, CAUTION
 |
UPC - 884116003618
View all Dell 2330d manuals
Add to My Manuals
Save this manual to your list of manuals |
Page 21 highlights
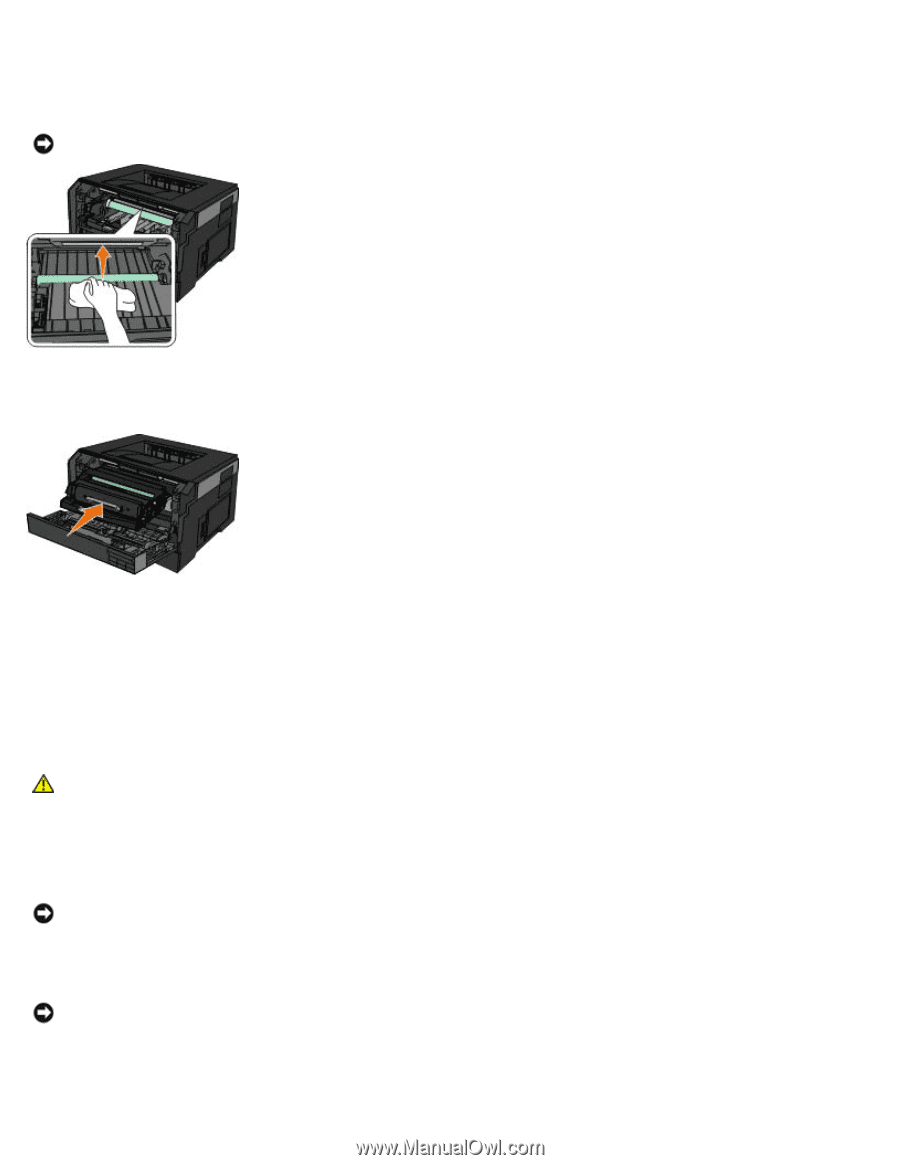
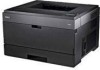
4. Locate the glass printhead lens, which is located within the recessed area in the top of the printer. 5. Gently wipe the printhead lens with a clean, dry, lint-free cloth. NOTICE: Not using a clean, dry, lint-free cloth may result in damage to the printhead lens. 6. Install the imaging drum kit with the toner cartridge by aligning the blue arrow guides of the imaging drum kit with the blue arrows found in the printer and pushing the imaging drum into the printer as far as it will go. The imaging drum kit clicks into place when correctly installed. 7. Close the front cover. 8. Turn the printer back on. Cleaning the Exterior of the Printer 1. Make sure that the printer is turned off and unplugged from the wall outlet. CAUTION: To avoid the risk of electric shock, unplug the power cord from the wall outlet and disconnect all cables to the printer before proceeding. 2. Remove paper from the paper support and paper exit tray. 3. Dampen a clean, lint-free cloth with water. NOTICE: Do not use household cleaners or detergents, as they may damage the finish of the printer. 4. Wipe only the outside of the printer, making sure to remove any ink residue that has accumulated on the paper exit tray. NOTICE: Using a damp cloth to clean the interior may cause damage to your printer. Damage to the printer caused by not following the correct instructions for cleaning will not be covered under warranty. 5. Make sure the paper support and paper exit tray are dry before beginning a new print job.
-
 1
1 -
2
-
3
-
4
-
5
-
6
-
7
-
8
-
9
-
10
-
11
-
12
-
13
-
14
-
15
-
 16
16 -
 17
17 -
 18
18 -
 19
19 -
 20
20 -
 21
21 -
 22
22 -
 23
23 -
 24
24 -
 25
25 -
 26
26 -
27
-
28
-
29
-
30
-
31
-
32
-
33
-
34
-
35
-
36
-
37
-
38
-
39
-
40
-
41
-
42
-
43
-
44
-
45
-
46
-
47
-
48
-
49
-
50
-
51
-
52
-
53
-
54
-
55
-
56
-
57
-
58
-
59
-
60
-
61
-
62
-
63
-
64
-
65
-
66
-
67
-
68
-
69
-
70
-
71
-
72
-
73
-
74
-
75
-
76
-
77
-
78
-
79
-
80
-
81
-
82
-
83
-
84
-
85
-
86
-
87
-
88
-
89
-
90
-
91
-
92
-
93
-
94
-
95
-
96
-
97
-
98
-
99
-
100
-
101
-
102
-
103
-
104
-
105
-
106
-
107
-
108
-
109
-
110
-
111
-
112
-
113
-
114
-
115
-
116
-
117
-
118
-
119
-
120
-
121
-
122
-
123
-
124
-
125
-
126
-
127
-
128
-
129
-
130
-
131
-
132
-
133
 |
 |