Dell Dimension 4500C Dell Dimension 4500C Owner's Manual - Page 79
Reattaching the Front Door
 |
View all Dell Dimension 4500C manuals
Add to My Manuals
Save this manual to your list of manuals |
Page 79 highlights
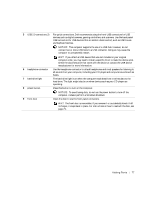
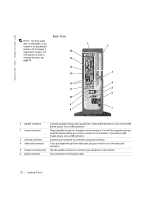
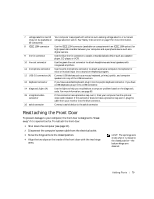
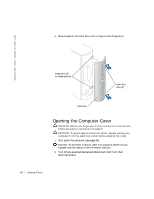
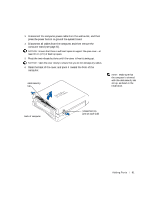
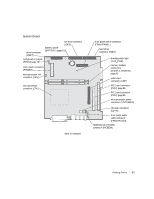
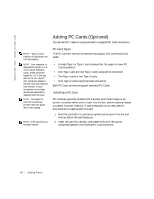
7 voltage selection switch (may not be available on all computers) 8 IEEE 1394 connector 9 line-in connector 10 line-out connector 11 microphone connector 12 USB 2.0 connectors (4) 13 keyboard connector 14 diagnostic lights (4) 15 integrated video connector 16 serial connector Your computer is equipped with either an auto-sensing voltage selector or a manual voltage selection switch. See "Safety Instructions" on page 9 for more information. Use the IEEE 1394 connector (available on computers with an IEEE 1394 option) for high-speed data transfer between your computer and a peripheral device such as a digital camera. Use the blue line-in connector to attach a record/playback device such as a cassette player, CD player, or VCR. Use the green line-out connector to attach headphones and most speakers with integrated amplifiers. Use the pink microphone connector to attach a personal computer microphone for voice or musical input into a sound or telephony program. Connect USB devices such as a mouse, keyboard, printer, joystick, and computer speakers into any of the USB connectors. If you have a standard keyboard, plug it into the purple keyboard connector. If you have a USB keyboard, plug it into a USB connector. Use the lights to help you troubleshoot a computer problem based on the diagnostic code. For more information, see page 60. If this connector has a protective cap over it, then your computer has the optional video card installed. If this connector does not have a protective cap over it, plug the cable from your monitor into the blue connector. Connect a serial device to the serial connector. Reattaching the Front Door To prevent damage to your computer, the front door is designed to "break away" if it is opened too far. To reattach the front door: 1 Shut down the computer (see page 34). 2 Disconnect the computer's power cable from the electrical outlet. 3 Move the hinge arms to the closed position. 4 Align the two clips on the inside of the front door with the two hinge arms. HINT: The top hinge arm clicks when it is moved to the closed position-the bottom hinge arm does not. Adding Pa rts 79
-
 1
1 -
2
-
3
-
4
-
5
-
6
-
7
-
8
-
9
-
10
-
11
-
12
-
13
-
14
-
15
-
16
-
17
-
18
-
19
-
20
-
21
-
22
-
23
-
24
-
25
-
26
-
27
-
28
-
29
-
30
-
31
-
32
-
33
-
34
-
35
-
36
-
37
-
38
-
39
-
40
-
41
-
42
-
43
-
44
-
45
-
46
-
47
-
48
-
49
-
50
-
51
-
52
-
53
-
54
-
55
-
56
-
57
-
58
-
59
-
60
-
61
-
62
-
63
-
64
-
65
-
66
-
67
-
68
-
69
-
70
-
71
-
72
-
73
-
 74
74 -
 75
75 -
 76
76 -
 77
77 -
 78
78 -
 79
79 -
 80
80 -
 81
81 -
 82
82 -
 83
83 -
 84
84 -
85
-
86
-
87
-
88
-
89
-
90
-
91
-
92
-
93
-
94
-
95
-
96
-
97
-
98
-
99
-
100
-
101
-
102
-
103
-
104
-
105
-
106
-
107
-
108
-
109
-
110
 |
 |