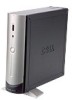
Dell Dimension 4500C Dell Dimension 4500C Owner's Manual - Page 87
board. Insert the card firmly into the card connector on the riser board. - network drivers
 |
View all Dell Dimension 4500C manuals
Add to My Manuals
Save this manual to your list of manuals |
Page 87 highlights
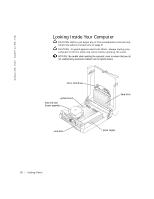
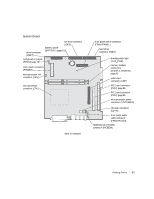
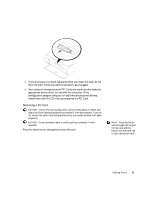
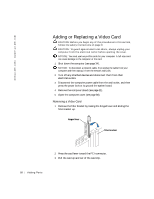
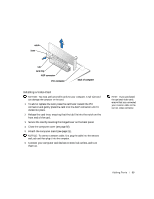
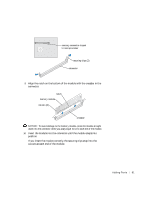
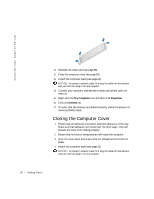
7 If you are installing a new card, remove the filler bracket to create an empty card-slot opening. If you are replacing a card that is already installed in the computer, remove the card. If necessary, disconnect any cables connected to the card. Grasp the card by its top corners, and ease it out of its connector. 8 Prepare the card for installation. See the documentation that came with the card for information on configuring the card, making internal connections, or otherwise customizing it for your computer. CAUTION: Some network adapters automatically start the computer when they are connected to a network. To guard against electrical shock, be sure to unplug your computer from its electrical outlet before installing any cards. 9 Insert the card into the card connector. If the card is full-length, insert the end of the card into the card guide bracket as you lower the card toward its connector on the system board. Insert the card firmly into the card connector on the riser board. 10 Lower the retention arm and press it into place, securing the card(s) in the computer. 11 Reconnect any cables that you previously removed. 12 Connect any cables that should be attached to the card. See the documentation for the card for information about the card's cable connections. NOTICE: Do not route card cables over or behind the cards. Cables routed over the cards can prevent the computer cover from closing properly or cause damage to the equipment. 13 Close the computer cover (see page 92). 14 Attach the computer stand (see page 21). NOTICE: To connect a network cable, first plug the cable into the network wall jack and then plug it into the computer. 15 Connect your computer and devices to electrical outlets, and turn them on. 16 Install any drivers required for the card as described in the card documentation. Adding Pa rts 87
-
 1
1 -
2
-
3
-
4
-
5
-
6
-
7
-
8
-
9
-
10
-
11
-
12
-
13
-
14
-
15
-
16
-
17
-
18
-
19
-
20
-
21
-
22
-
23
-
24
-
25
-
26
-
27
-
28
-
29
-
30
-
31
-
32
-
33
-
34
-
35
-
36
-
37
-
38
-
39
-
40
-
41
-
42
-
43
-
44
-
45
-
46
-
47
-
48
-
49
-
50
-
51
-
52
-
53
-
54
-
55
-
56
-
57
-
58
-
59
-
60
-
61
-
62
-
63
-
64
-
65
-
66
-
67
-
68
-
69
-
70
-
71
-
72
-
73
-
74
-
75
-
76
-
77
-
78
-
79
-
80
-
81
-
 82
82 -
 83
83 -
 84
84 -
 85
85 -
 86
86 -
 87
87 -
 88
88 -
 89
89 -
 90
90 -
 91
91 -
 92
92 -
93
-
94
-
95
-
96
-
97
-
98
-
99
-
100
-
101
-
102
-
103
-
104
-
105
-
106
-
107
-
108
-
109
-
110
 |
 |