Dell Latitude XFR D630 Service Manual - Page 100
Installing the PC Card Reader Cage
 |
View all Dell Latitude XFR D630 manuals
Add to My Manuals
Save this manual to your list of manuals |
Page 100 highlights
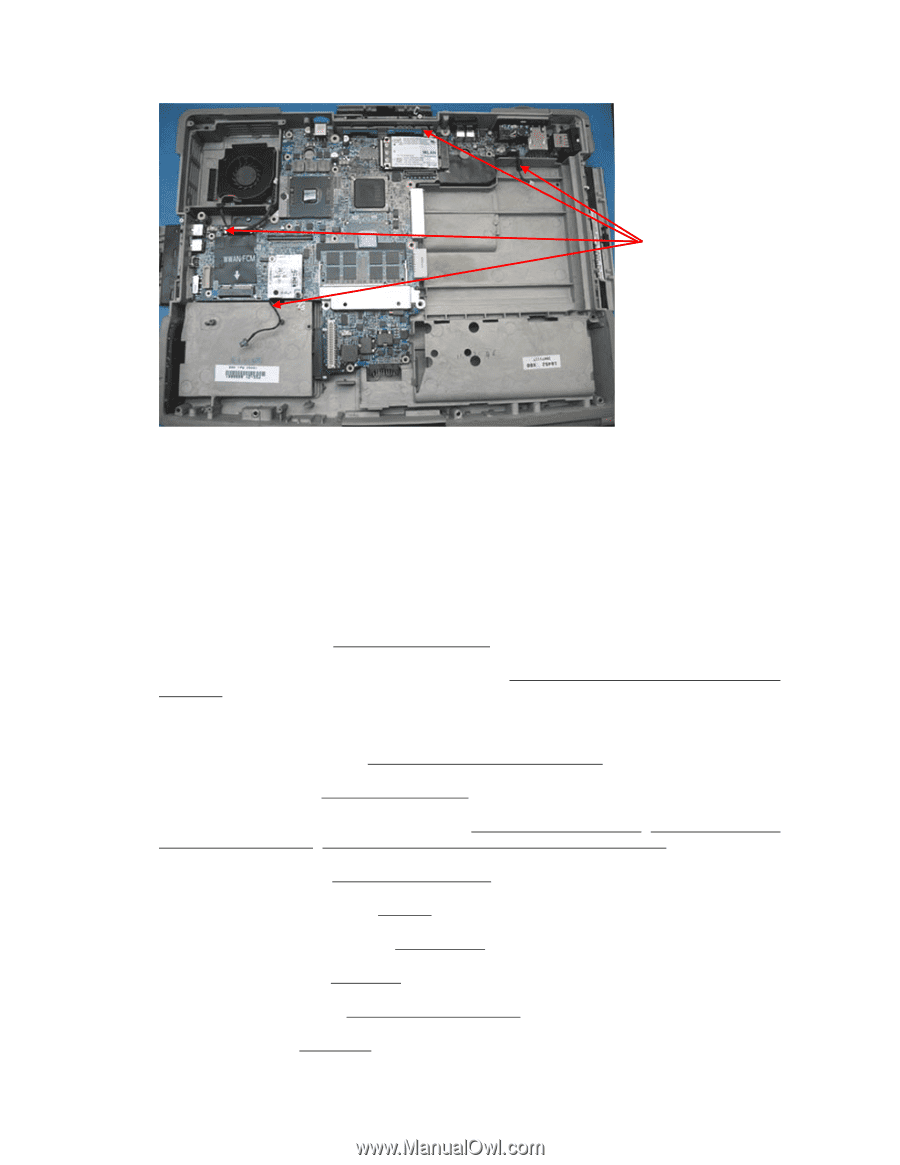
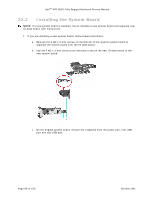
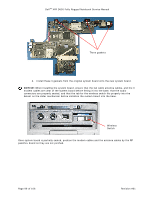
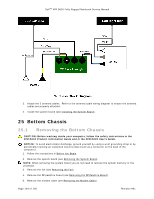
DellTM XFR D630 Fully Rugged Notebook Service Manual Ensure cables are properly routed. 2. Complete the seating of the system board and again verify the cables are in the correct positions, and the 3 gaskets for the power port, rear USB port and side USB port are correctly positioned. 3. Secure the system board using the 4 M2.5 x 5-mm screws (labeled with silver triangles on the system board). 4. Reconnect the cables near the WLAN card and the modem connector to the system board. 5. Reconnect the fan cable to the system board. 6. Install the processor (see Installing the Processor). 278H 7. Install the processor thermal-cooling assembly (see Installing the Processor Thermal-Cooling 279H Assembly). 8. Install any smart cards or smart card blanks into the smart card slot. 9. Install the PC card reader (see Installing the PC Card Reader Cage). 280H 10. Install the speaker (see Installing the Speaker). 281H 11. Install any wireless communication cards (see WWAN, FCM & SIM Cards, Wireless Local Area 28H 283H Network (WLAN) Cards, Internal Card with Bluetooth® Wireless Technology). 284H 12. Install the palm rest (see Installing the Palm Rest). 285H 13. Install the memory module (see Memory). 286H 14. Install any media bay devices (see XBay Devices). 287H 15. Install the keyboard (see Keyboards). 28H 16. Install the hinge cover (see Installing the Hinge Cover). 289H 17. Install the HDD (see Hard Drive). 290H Page 100 of 106 Revision A01
-
 1
1 -
2
-
3
-
4
-
5
-
6
-
7
-
8
-
9
-
10
-
11
-
12
-
13
-
14
-
15
-
16
-
17
-
18
-
19
-
20
-
21
-
22
-
23
-
24
-
25
-
26
-
27
-
28
-
29
-
30
-
31
-
32
-
33
-
34
-
35
-
36
-
37
-
38
-
39
-
40
-
41
-
42
-
43
-
44
-
45
-
46
-
47
-
48
-
49
-
50
-
51
-
52
-
53
-
54
-
55
-
56
-
57
-
58
-
59
-
60
-
61
-
62
-
63
-
64
-
65
-
66
-
67
-
68
-
69
-
70
-
71
-
72
-
73
-
74
-
75
-
76
-
77
-
78
-
79
-
80
-
81
-
82
-
83
-
84
-
85
-
86
-
87
-
88
-
89
-
90
-
91
-
92
-
93
-
94
-
 95
95 -
 96
96 -
 97
97 -
 98
98 -
 99
99 -
 100
100 -
 101
101 -
 102
102 -
 103
103 -
 104
104 -
 105
105 -
106
 |
 |