Dell Latitude XFR D630 Service Manual - Page 22
Docking Door
 |
View all Dell Latitude XFR D630 manuals
Add to My Manuals
Save this manual to your list of manuals |
Page 22 highlights
DellTM XFR D630 Fully Rugged Notebook Service Manual 6.1.2 Installing the Comms Door 1. Align the Comms Door with the Comms Door mounting holes on the notebook. 2. Use the 2 screws to secure the Comms Door to the notebook. 6.2 Docking Door The Docking Door is located on the bottom of the notebook, and protects the docking connector. 6.2.1 Removing the Docking Door 1. Remove the 6 screws that secure the Docking Door to the notebook. Page 22 of 106 Revision A01
-
 1
1 -
2
-
3
-
4
-
5
-
6
-
7
-
8
-
9
-
10
-
11
-
12
-
13
-
14
-
15
-
16
-
 17
17 -
 18
18 -
 19
19 -
 20
20 -
 21
21 -
 22
22 -
 23
23 -
 24
24 -
 25
25 -
 26
26 -
 27
27 -
28
-
29
-
30
-
31
-
32
-
33
-
34
-
35
-
36
-
37
-
38
-
39
-
40
-
41
-
42
-
43
-
44
-
45
-
46
-
47
-
48
-
49
-
50
-
51
-
52
-
53
-
54
-
55
-
56
-
57
-
58
-
59
-
60
-
61
-
62
-
63
-
64
-
65
-
66
-
67
-
68
-
69
-
70
-
71
-
72
-
73
-
74
-
75
-
76
-
77
-
78
-
79
-
80
-
81
-
82
-
83
-
84
-
85
-
86
-
87
-
88
-
89
-
90
-
91
-
92
-
93
-
94
-
95
-
96
-
97
-
98
-
99
-
100
-
101
-
102
-
103
-
104
-
105
-
106
 |
 |
Dell
TM
XFR D630 Fully Rugged Notebook Service Manual
Page 22 of 106
Revision A01
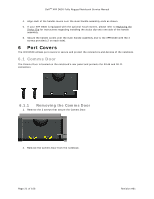
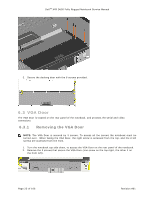
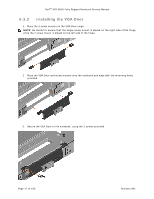
6.1.2
Installing the Comms Door
1.
Align the Comms Door with the Comms Door mounting holes on the notebook.
2.
Use the 2 screws to secure the Comms Door to the notebook.
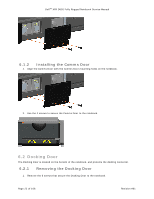
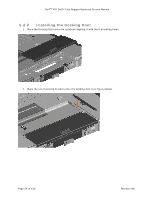
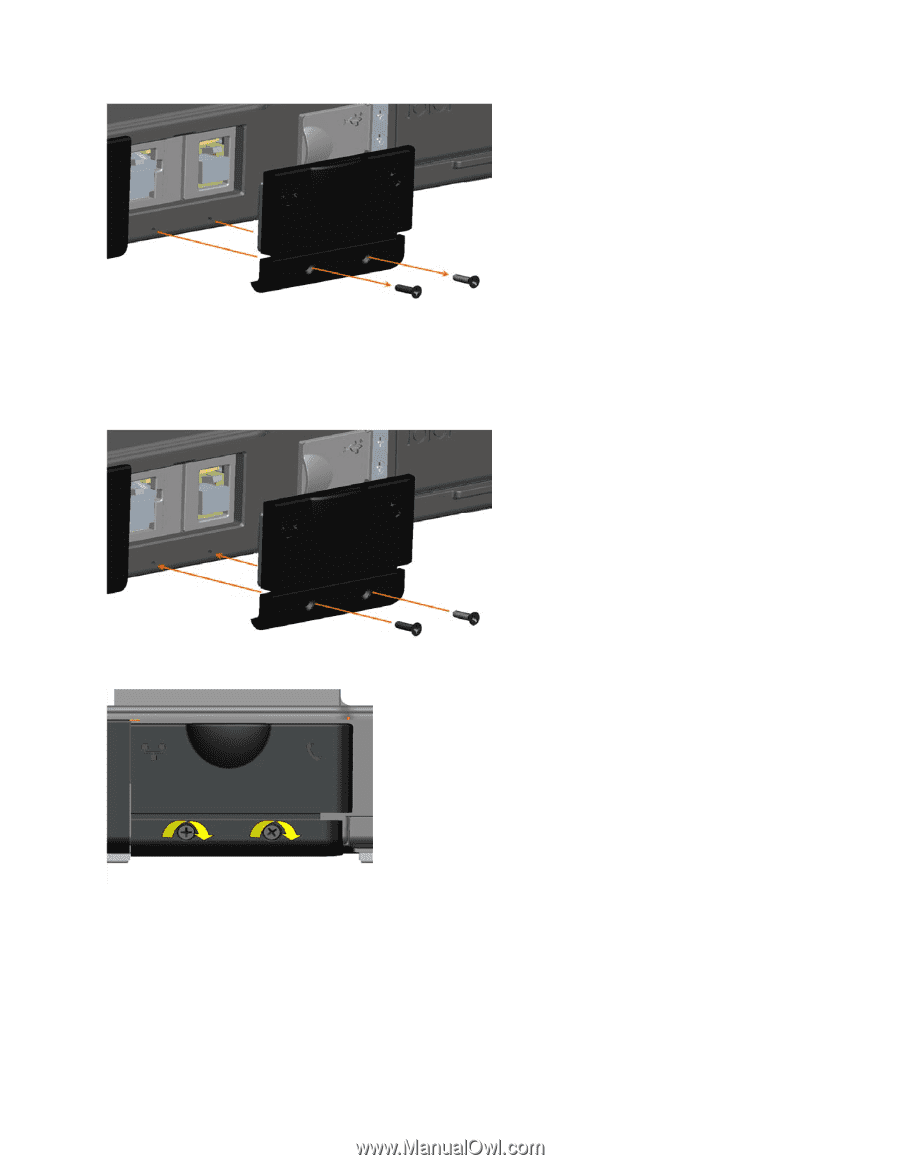
6.2
Docking Door
The Docking Door is located on the bottom of the notebook, and protects the docking connector.
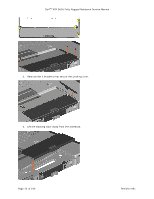
6.2.1
Removing the Docking Door
1.
Remove the 6 screws that secure the Docking Door to the notebook.