Dell Latitude XFR D630 Service Manual - Page 17
Stylus, Tether and Clip DirectVue Touch, Screen Display option
 |
View all Dell Latitude XFR D630 manuals
Add to My Manuals
Save this manual to your list of manuals |
Page 17 highlights
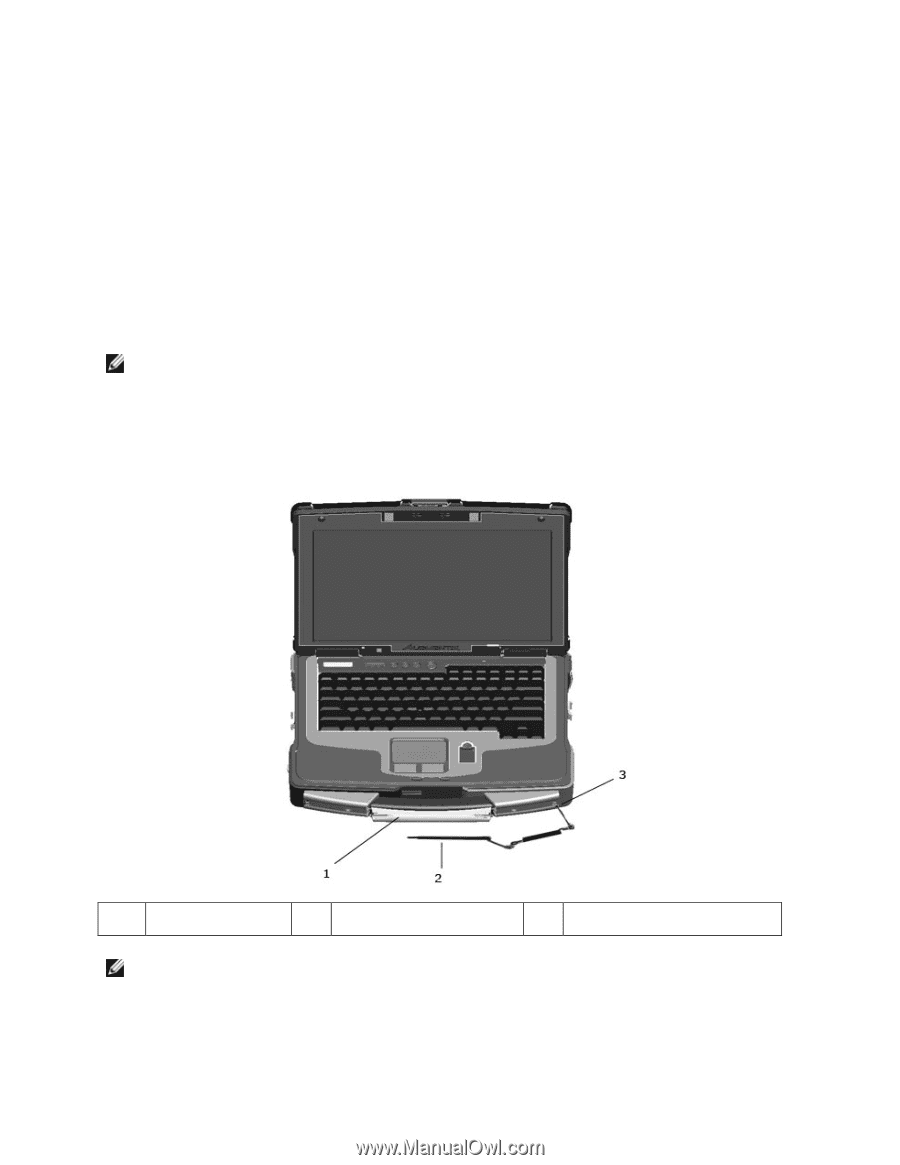
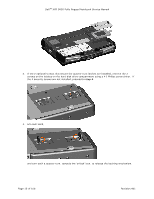
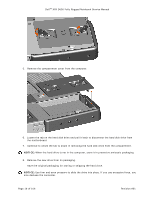
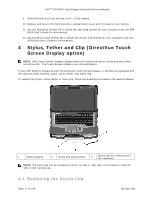
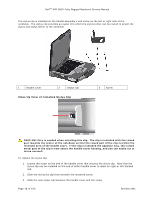
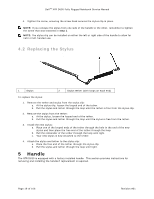
DellTM XFR D630 Fully Rugged Notebook Service Manual 9. Slide the hard drive into the bay until it is fully seated. 10. Replace and secure the hard disk drive compartment cover with the quarter-turn latches. 11. Use the Operating System CD to install the operating system for your computer (see the XFR D630 User's Guide for information). 12. Use the Drivers and Utilities CD to install the drivers and utilities for your computer (see the XFR D630 User's Guide for information). 4 Stylus, Tether and Clip (DirectVue Touch Screen Display option) NOTE: Only Touch Screen Display configurations will include the stylus, stylus housing, tether and stylus clip. The Touch Screen Display is an optional feature. If your XFR D630 is configured with the DirectVue Touch Screen Display, it will also be equipped with the optional stylus housing, stylus, stylus tether, and stylus clip. To replace the stylus, stylus tether or stylus clip, follow the directions provided in the sections below. 1 Stylus housing 2 Stylus and stylus tether 3 Stylus clip (for connection to the notebook) NOTE: The stylus clip can be installed on either the left or right side of the handle to allow for right or left-handed use. 4.1 Replacing the Stylus Clip Page 17 of 106 Revision A01
-
 1
1 -
2
-
3
-
4
-
5
-
6
-
7
-
8
-
9
-
10
-
11
-
 12
12 -
 13
13 -
 14
14 -
 15
15 -
 16
16 -
 17
17 -
 18
18 -
 19
19 -
 20
20 -
 21
21 -
 22
22 -
23
-
24
-
25
-
26
-
27
-
28
-
29
-
30
-
31
-
32
-
33
-
34
-
35
-
36
-
37
-
38
-
39
-
40
-
41
-
42
-
43
-
44
-
45
-
46
-
47
-
48
-
49
-
50
-
51
-
52
-
53
-
54
-
55
-
56
-
57
-
58
-
59
-
60
-
61
-
62
-
63
-
64
-
65
-
66
-
67
-
68
-
69
-
70
-
71
-
72
-
73
-
74
-
75
-
76
-
77
-
78
-
79
-
80
-
81
-
82
-
83
-
84
-
85
-
86
-
87
-
88
-
89
-
90
-
91
-
92
-
93
-
94
-
95
-
96
-
97
-
98
-
99
-
100
-
101
-
102
-
103
-
104
-
105
-
106
 |
 |