Dell Latitude XFR D630 Service Manual - Page 47
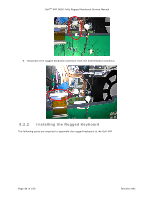
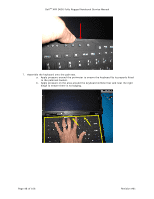
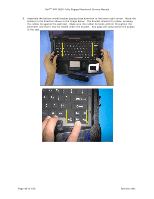
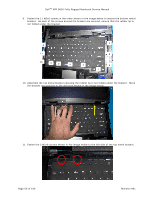
Assemble the keyboard stiffener bar into the slot above the power and audio buttons.
 |
View all Dell Latitude XFR D630 manuals
Add to My Manuals
Save this manual to your list of manuals |
Page 47 highlights
DellTM XFR D630 Fully Rugged Notebook Service Manual 5. Place connectors from the spliced cable and the backlight power cable in the recessed area of the thermal solution. Stack them and use a 2.5" piece of Kapton tape to hold them in place below the level of the palmrest. Connectors should not stack above this level. 6. Assemble the keyboard stiffener bar into the slot above the power and audio buttons. Do this before assembling the keyboard to the palmrest. Page 47 of 106 Revision A01
-
 1
1 -
2
-
3
-
4
-
5
-
6
-
7
-
8
-
9
-
10
-
11
-
12
-
13
-
14
-
15
-
16
-
17
-
18
-
19
-
20
-
21
-
22
-
23
-
24
-
25
-
26
-
27
-
28
-
29
-
30
-
31
-
32
-
33
-
34
-
35
-
36
-
37
-
38
-
39
-
40
-
41
-
 42
42 -
 43
43 -
 44
44 -
 45
45 -
 46
46 -
 47
47 -
 48
48 -
 49
49 -
 50
50 -
 51
51 -
 52
52 -
53
-
54
-
55
-
56
-
57
-
58
-
59
-
60
-
61
-
62
-
63
-
64
-
65
-
66
-
67
-
68
-
69
-
70
-
71
-
72
-
73
-
74
-
75
-
76
-
77
-
78
-
79
-
80
-
81
-
82
-
83
-
84
-
85
-
86
-
87
-
88
-
89
-
90
-
91
-
92
-
93
-
94
-
95
-
96
-
97
-
98
-
99
-
100
-
101
-
102
-
103
-
104
-
105
-
106
 |
 |
Dell
TM
XFR D630 Fully Rugged Notebook Service Manual
Page 47 of 106
Revision A01
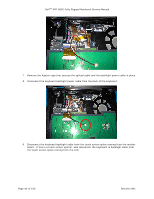
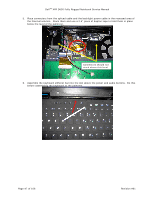
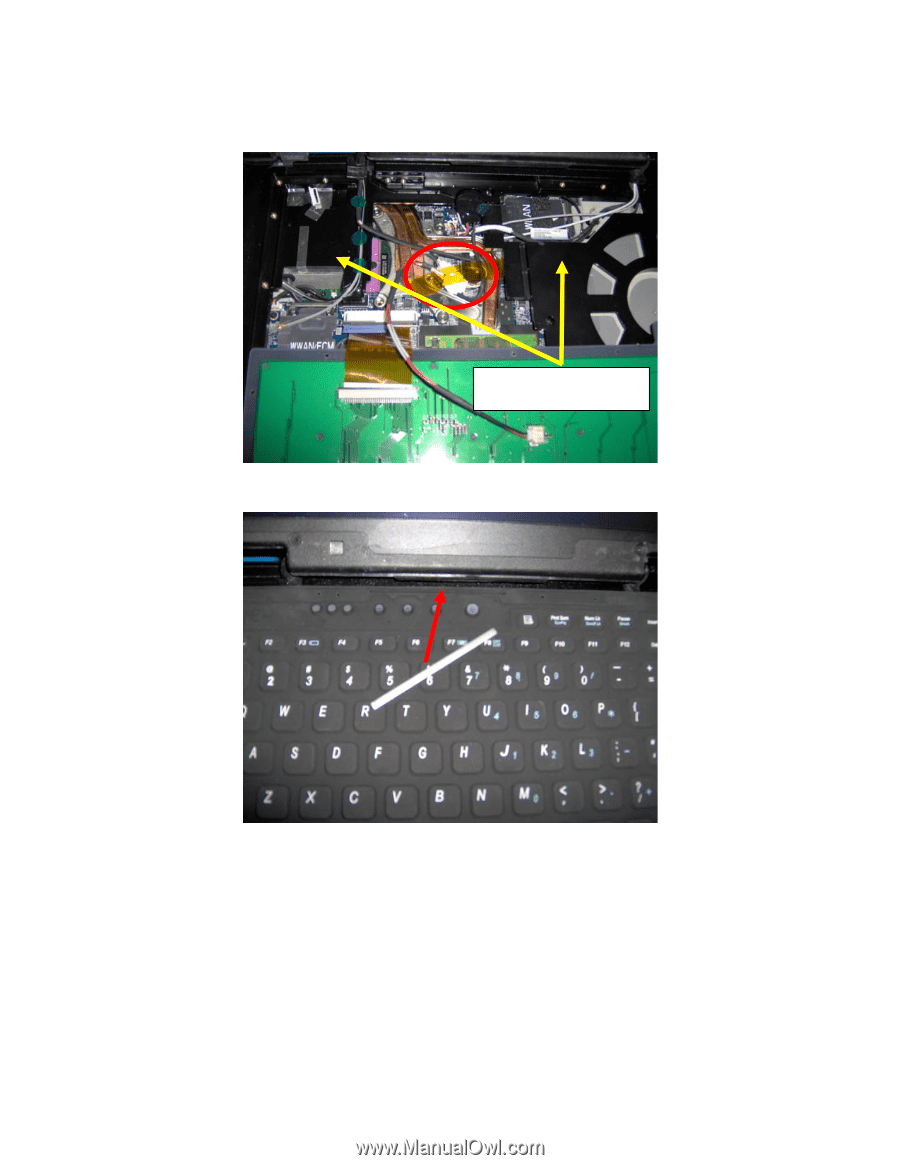
5.
Place connectors from the spliced cable and the backlight power cable in the recessed area of
the thermal solution.
Stack them and use a 2.5” piece of Kapton tape to hold them in place
below the level of the palmrest.
6.
Assemble the keyboard stiffener bar into the slot above the power and audio buttons.
Do this
before assembling the keyboard to the palmrest.
Connectors should not
stack above this level.