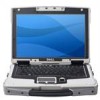
Dell Latitude XFR D630 Service Manual - Page 101
Flashing the BIOS
 |
View all Dell Latitude XFR D630 manuals
Add to My Manuals
Save this manual to your list of manuals |
Page 101 highlights
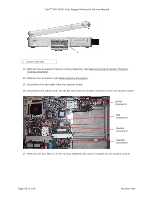
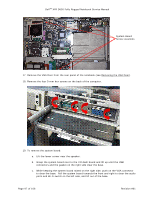
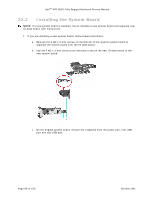
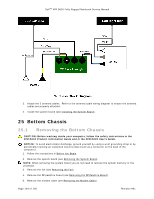
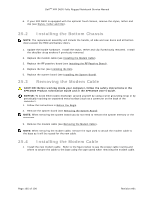
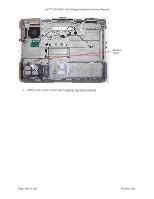
DellTM XFR D630 Fully Rugged Notebook Service Manual 18. Insert the battery into the battery bay (see Before Working Inside Your Computer). 291H 19. Connect the AC adapter to the computer and to an electrical outlet. NOTICE: Before turning on the computer, replace all screws and ensure that no stray screws remain inside the computer. Failure to do so may result in damage to the computer. 19. Turn on the computer. NOTE: After replacing the system board, use the CD that accompanied the replacement system board to enter the computer Service Tag into the BIOS. 20. Insert the CD that accompanied the replacement system board into the appropriate drive and flash the system BIOS (see Flashing the BIOS). Follow the instructions on the screen. 29H 23 Flashing the BIOS CAUTION: Contact Dell Customer Support before attempting to flash the BIOS. If a BIOS-update program CD is provided with the new system board, flash the BIOS from the CD. If you do not have a BIOS-update program CD, flash the BIOS from the hard drive. 23.1 Flashing the BIOS From a CD 1. Ensure that the AC adapter is plugged in and that the main battery is installed properly. NOTE: If you use a BIOS-update program CD to flash the BIOS, set up the computer to boot from a CD before inserting the CD. 2. Insert the BIOS-update program CD, and restart the computer. Follow the instructions that appear on the screen. The computer continues to boot and updates the new BIOS. When the flash update is complete, the computer will automatically reboot. 3. Press during POST to enter the system setup program. 4. Press and to reset the computer defaults. 5. Press , select Save changes and reboot, and press to save configuration changes. 6. Remove the flash BIOS-update program CD from the drive and restart the computer. 23.2 Flashing the BIOS From the Hard Drive 1. Ensure that the AC adapter is plugged in, the main battery is properly installed, and a network cable is attached. 2. Turn on the computer. Page 101 of 106 Revision A01
-
 1
1 -
2
-
3
-
4
-
5
-
6
-
7
-
8
-
9
-
10
-
11
-
12
-
13
-
14
-
15
-
16
-
17
-
18
-
19
-
20
-
21
-
22
-
23
-
24
-
25
-
26
-
27
-
28
-
29
-
30
-
31
-
32
-
33
-
34
-
35
-
36
-
37
-
38
-
39
-
40
-
41
-
42
-
43
-
44
-
45
-
46
-
47
-
48
-
49
-
50
-
51
-
52
-
53
-
54
-
55
-
56
-
57
-
58
-
59
-
60
-
61
-
62
-
63
-
64
-
65
-
66
-
67
-
68
-
69
-
70
-
71
-
72
-
73
-
74
-
75
-
76
-
77
-
78
-
79
-
80
-
81
-
82
-
83
-
84
-
85
-
86
-
87
-
88
-
89
-
90
-
91
-
92
-
93
-
94
-
95
-
 96
96 -
 97
97 -
 98
98 -
 99
99 -
 100
100 -
 101
101 -
 102
102 -
 103
103 -
 104
104 -
 105
105 -
 106
106
 |
 |