Dell Latitude XFR D630 Service Manual - Page 30
Installing the XBay Door
 |
View all Dell Latitude XFR D630 manuals
Add to My Manuals
Save this manual to your list of manuals |
Page 30 highlights
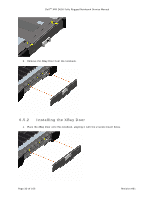
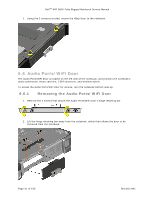
DellTM XFR D630 Fully Rugged Notebook Service Manual 2. Remove the XBay Door from the notebook. 6.5.2 Installing the XBay Door 1. Place the XBay Door onto the notebook, aligning it with the 2 screw mount holes. Page 30 of 106 Revision A01
-
 1
1 -
2
-
3
-
4
-
5
-
6
-
7
-
8
-
9
-
10
-
11
-
12
-
13
-
14
-
15
-
16
-
17
-
18
-
19
-
20
-
21
-
22
-
23
-
24
-
 25
25 -
 26
26 -
 27
27 -
 28
28 -
 29
29 -
 30
30 -
 31
31 -
 32
32 -
 33
33 -
 34
34 -
 35
35 -
36
-
37
-
38
-
39
-
40
-
41
-
42
-
43
-
44
-
45
-
46
-
47
-
48
-
49
-
50
-
51
-
52
-
53
-
54
-
55
-
56
-
57
-
58
-
59
-
60
-
61
-
62
-
63
-
64
-
65
-
66
-
67
-
68
-
69
-
70
-
71
-
72
-
73
-
74
-
75
-
76
-
77
-
78
-
79
-
80
-
81
-
82
-
83
-
84
-
85
-
86
-
87
-
88
-
89
-
90
-
91
-
92
-
93
-
94
-
95
-
96
-
97
-
98
-
99
-
100
-
101
-
102
-
103
-
104
-
105
-
106
 |
 |
Dell
TM
XFR D630 Fully Rugged Notebook Service Manual
Page 30 of 106
Revision A01
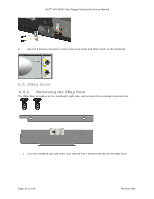
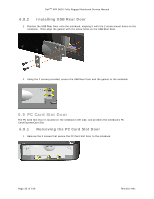
2.
Remove the XBay Door from the notebook.
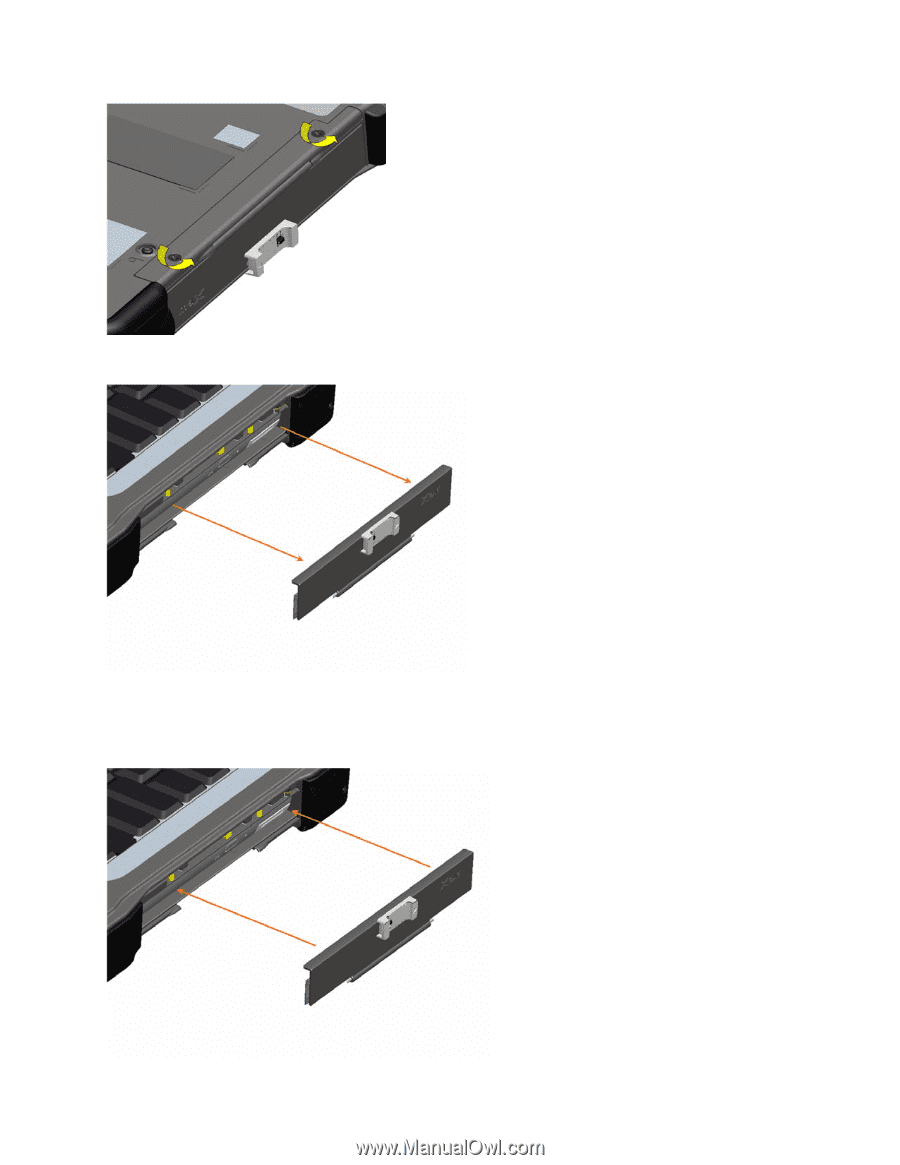
6.5.2
Installing the XBay Door
1.
Place the XBay Door onto the notebook, aligning it with the 2 screw mount holes.