Dell Latitude XFR D630 Service Manual - Page 79
Before Working Inside Your Computer
 |
View all Dell Latitude XFR D630 manuals
Add to My Manuals
Save this manual to your list of manuals |
Page 79 highlights
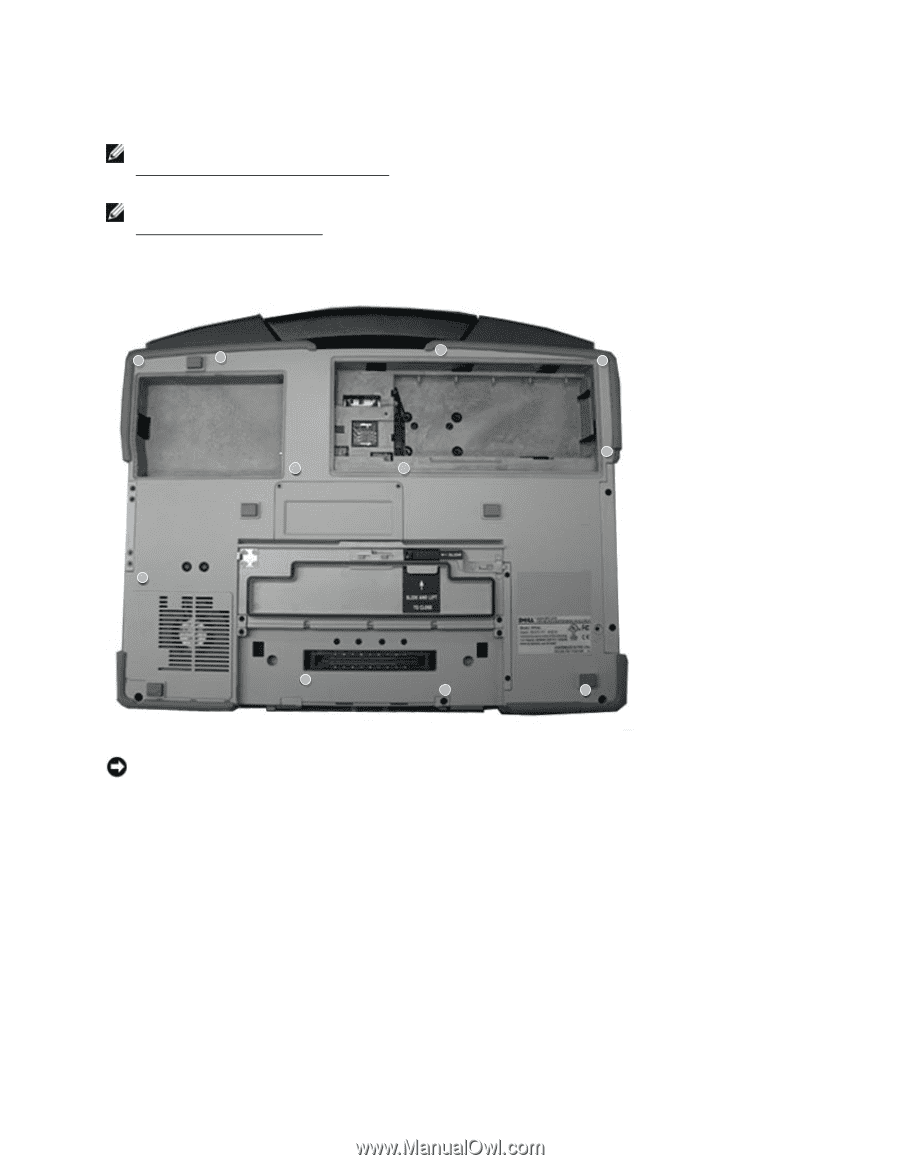
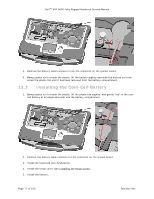
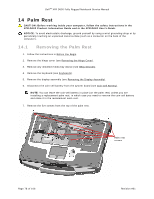
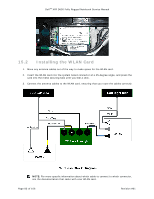
DellTM XFR D630 Fully Rugged Notebook Service Manual 8. Turn the computer upside-down. NOTE: Before proceeding, ensure that the main battery has been removed from the system (see Before Working Inside Your Computer). One of the palm rest screws is located in the battery 170H bay. NOTE: Open the Docking Door. Two of the palm rest screws are located beneath this door (see Removing the Docking Door.) 17H 9. Remove the 11 screws that secure the palm rest. Screws (11) NOTICE: Carefully separate the palm rest from the base to avoid damage to the palm rest. 10. Turn the computer top-side up, slightly raise the palm rest, and then disconnect the touch-pad cable connector from the system board. 11. Continue to raise the palm rest, and then disconnect the USB control cable from the system board. Remove the palm rest. Page 79 of 106 Revision A01
-
 1
1 -
2
-
3
-
4
-
5
-
6
-
7
-
8
-
9
-
10
-
11
-
12
-
13
-
14
-
15
-
16
-
17
-
18
-
19
-
20
-
21
-
22
-
23
-
24
-
25
-
26
-
27
-
28
-
29
-
30
-
31
-
32
-
33
-
34
-
35
-
36
-
37
-
38
-
39
-
40
-
41
-
42
-
43
-
44
-
45
-
46
-
47
-
48
-
49
-
50
-
51
-
52
-
53
-
54
-
55
-
56
-
57
-
58
-
59
-
60
-
61
-
62
-
63
-
64
-
65
-
66
-
67
-
68
-
69
-
70
-
71
-
72
-
73
-
 74
74 -
 75
75 -
 76
76 -
 77
77 -
 78
78 -
 79
79 -
 80
80 -
 81
81 -
 82
82 -
 83
83 -
 84
84 -
85
-
86
-
87
-
88
-
89
-
90
-
91
-
92
-
93
-
94
-
95
-
96
-
97
-
98
-
99
-
100
-
101
-
102
-
103
-
104
-
105
-
106
 |
 |