Dell P703w User Guide - Page 52
Scanning Using the Computer
 |
View all Dell P703w manuals
Add to My Manuals
Save this manual to your list of manuals |
Page 52 highlights
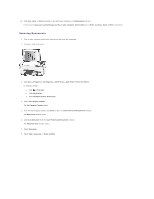
4. Press the Scan button . 5. Press the left or right Arrow button to scroll to Photo or Document. 6. Press the down Arrow button to scroll to Scan To. 7. Press the left or right Arrow button to scroll to Memory Card. 8. Press the Start button . The document is scanned and saved to the destination File. Scan to a Computer connected via Wi-Fi Scanning to PC-WiFi option is automatically enabled when the wireless connection is established between your printer and the computer. 1. Turn on your printer and the computer. 2. Establish a wireless connection between your printer and the computer. For more information, see Configuring Wireless. 3. Load your original photo or document. 4. Press the Scan button . 5. Press the left or right Arrow button to scroll to Photo or Document. 6. Press the down Arrow button to scroll to Scan To. 7. Press the left or right Arrow button to scroll to P C-WiFi. 8. Press the Start button . The document is scanned and saved based on the Dell Imaging Toolbox scan picture settings. Scanning Using the Computer
-
 1
1 -
2
-
3
-
4
-
5
-
6
-
7
-
8
-
9
-
10
-
11
-
12
-
13
-
14
-
15
-
16
-
17
-
18
-
19
-
20
-
21
-
22
-
23
-
24
-
25
-
26
-
27
-
28
-
29
-
30
-
31
-
32
-
33
-
34
-
35
-
36
-
37
-
38
-
39
-
40
-
41
-
42
-
43
-
44
-
45
-
46
-
 47
47 -
 48
48 -
 49
49 -
 50
50 -
 51
51 -
 52
52 -
 53
53 -
 54
54 -
 55
55 -
 56
56 -
 57
57 -
58
-
59
-
60
-
61
-
62
-
63
-
64
-
65
-
66
-
67
-
68
-
69
-
70
-
71
-
72
-
73
-
74
-
75
-
76
-
77
-
78
-
79
-
80
-
81
-
82
-
83
-
84
-
85
-
86
-
87
-
88
-
89
-
90
 |
 |
