Dell Studio Hybrid D140G Studio Hybrid Service Manual - Page 10
Removing the Blu-ray Decode Acceleration Card, Installing the Blu-ray Decode Acceleration Card,
 |
View all Dell Studio Hybrid D140G manuals
Add to My Manuals
Save this manual to your list of manuals |
Page 10 highlights
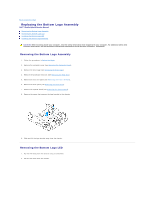
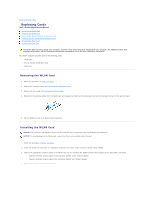
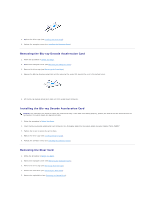
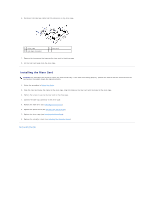
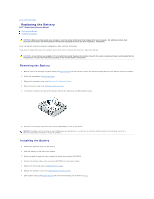
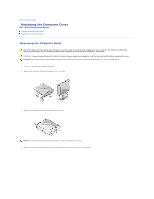
5. Replace the drive cage (see Installing the Drive Cage). 6. Replace the computer cover (see Installing the Computer Cover). Removing the Blu-ray Decode Acceleration Card 1. Follow the procedure in Before You Begin. 2. Remove the computer cover (see Removing the Computer Cover). 3. Remove the drive cage (see Removing the Drive Cage). 4. Release the Blu-ray decode acceleration card by removing the screw that secures the card to the system board. 5. Lift the Blu-ray decode acceleration card out of its system board connector. Installing the Blu-ray Decode Acceleration Card NOTICE: The connectors are keyed to ensure the card fits correctly. If the card is not fitting properly, position the card so that the connectors on the card and on the system board are aligned correctly. 1. Follow the procedure in Before You Begin. 2. Insert the Blu-ray decode acceleration card connector at a 45-degree angle into the system board connector labeled "MINI_CARD1." 3. Tighten the screw to fasten the card in place. 4. Replace the drive cage (see Installing the Drive Cage). 5. Replace the computer cover (see Installing the Computer Cover). Removing the Riser Card 1. Follow the procedure in Before You Begin. 2. Remove the computer cover (see Removing the Computer Cover). 3. Remove the drive cage (see Removing the Drive Cage). 4. Remove the hard drive (see Removing the Hard Drive). 5. Remove the optical drive (see Removing the Optical Drive).
-
 1
1 -
2
-
3
-
4
-
 5
5 -
 6
6 -
 7
7 -
 8
8 -
 9
9 -
 10
10 -
 11
11 -
 12
12 -
 13
13 -
 14
14 -
 15
15 -
16
-
17
-
18
-
19
-
20
-
21
-
22
-
23
-
24
-
25
-
26
-
27
-
28
-
29
-
30
-
31
-
32
-
33
-
34
-
35
-
36
-
37
-
38
-
39
-
40
-
41
-
42
 |
 |
