Dell Studio Hybrid D140G Studio Hybrid Service Manual - Page 18
Removing the Optical Drive, Installing the Optical Drive
 |
View all Dell Studio Hybrid D140G manuals
Add to My Manuals
Save this manual to your list of manuals |
Page 18 highlights
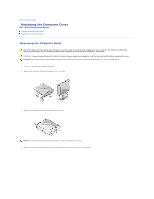
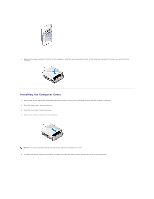
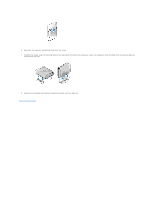
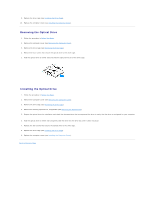
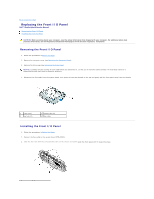
9. Replace the drive cage (see Installing the Drive Cage). 10. Replace the computer cover (see Installing the Computer Cover). Removing the Optical Drive 1. Follow the procedure in Before You Begin. 2. Remove the computer cover (see Removing the Computer Cover). 3. Remove the drive cage (see Removing the Drive Cage). 4. Remove the four screws that secure the optical drive to the drive cage. 5. Hold the optical drive on either side and slide the optical drive out of the drive cage. Installing the Optical Drive 1. Follow the procedure in Before You Begin. 2. Remove the computer cover (see Removing the Computer Cover). 3. Remove the drive cage (see Removing the Drive Cage). 4. Remove the existing optical drive, if applicable (see Removing the Optical Drive). 5. Prepare the optical drive for installation and check the documentation that accompanied the drive to verify that the drive is configured for your computer. 6. Hold the optical drive on either side and gently slide the drive into the drive bay until it clicks into place. 7. Replace the four screws that secure the optical drive to the drive cage. 8. Replace the drive cage (see Installing the Drive Cage). 9. Replace the computer cover (see Installing the Computer Cover). Back to Contents Page
-
 1
1 -
2
-
3
-
4
-
5
-
6
-
7
-
8
-
9
-
10
-
11
-
12
-
 13
13 -
 14
14 -
 15
15 -
 16
16 -
 17
17 -
 18
18 -
 19
19 -
 20
20 -
 21
21 -
 22
22 -
 23
23 -
24
-
25
-
26
-
27
-
28
-
29
-
30
-
31
-
32
-
33
-
34
-
35
-
36
-
37
-
38
-
39
-
40
-
41
-
42
 |
 |
