Dell Studio Hybrid D140G Studio Hybrid Service Manual - Page 15
Installing the Computer Cover
 |
View all Dell Studio Hybrid D140G manuals
Add to My Manuals
Save this manual to your list of manuals |
Page 15 highlights
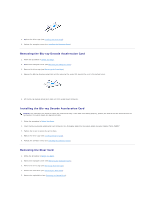
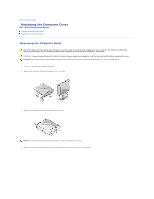
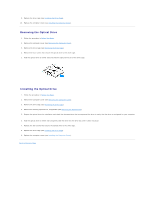
5. Remove the screw located at the back of the computer. Slide the cover towards the back of the computer and pivot the cover up, away from the computer. Installing the Computer Cover 1. Ensure that all the cables are connected and that no tools or extra parts (including screws) are left inside the computer. 2. Pivot the cover down and into position. 3. Push the cover until it clicks into place. 4. Replace the screw at the back of the computer. NOTICE: To avoid scratches during this procedure, place the computer on a mat. 5. To insert the sleeve, place the computer vertically and push the sleeve gently towards the front of your computer.
-
 1
1 -
2
-
3
-
4
-
5
-
6
-
7
-
8
-
9
-
 10
10 -
 11
11 -
 12
12 -
 13
13 -
 14
14 -
 15
15 -
 16
16 -
 17
17 -
 18
18 -
 19
19 -
 20
20 -
21
-
22
-
23
-
24
-
25
-
26
-
27
-
28
-
29
-
30
-
31
-
32
-
33
-
34
-
35
-
36
-
37
-
38
-
39
-
40
-
41
-
42
 |
 |

5.
Remove the screw located at the back of the computer. Slide the cover towards the back of the computer and pivot the cover up, away from the
computer.
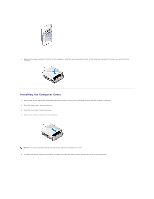
Installing the Computer Cover
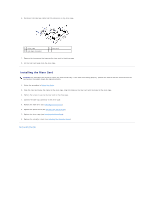
1.
Ensure that all the cables are connected and that no tools or extra parts (including screws) are left inside the computer.
2.
Pivot the cover down and into position.
3.
Push the cover until it clicks into place.
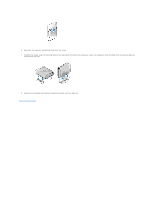
4.
Replace the screw at the back of the computer.
5.
To insert the sleeve, place the computer vertically and push the sleeve gently towards the front of your computer.
NOTICE:
To avoid scratches during this procedure, place the computer on a mat.