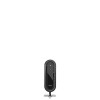
Dell Studio Hybrid D140G Studio Hybrid Service Manual - Page 4
Installing the Drive Cage, Installing the Computer Cover, Back to Contents
 |
View all Dell Studio Hybrid D140G manuals
Add to My Manuals
Save this manual to your list of manuals |
Page 4 highlights
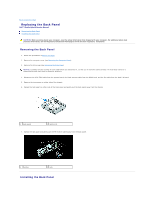
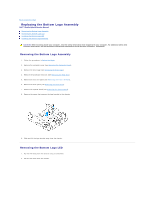
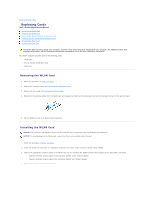
1. Connect the RF receiver cable to the back panel. NOTICE: Ensure that you remove all cables out of the way before replacing the panel. 2. Spread the side tabs slightly to attach the back panel to the chassis. 3. Ensure that the tabs and the latches are positioned on the frame. 4. Connect the fan cable to the connector SYS_FAN1 on the system board, the black antenna cable to the WLAN card, and the flex-cable to the back I/O board. 5. Replace the drive cage (see Installing the Drive Cage). 6. Replace the computer cover (see Installing the Computer Cover). Back to Contents Page
-
 1
1 -
 2
2 -
 3
3 -
 4
4 -
 5
5 -
 6
6 -
 7
7 -
 8
8 -
 9
9 -
 10
10 -
11
-
12
-
13
-
14
-
15
-
16
-
17
-
18
-
19
-
20
-
21
-
22
-
23
-
24
-
25
-
26
-
27
-
28
-
29
-
30
-
31
-
32
-
33
-
34
-
35
-
36
-
37
-
38
-
39
-
40
-
41
-
42
 |
 |

1.
Connect the RF receiver cable to the back panel.
2.
Spread the side tabs slightly to attach the back panel to the chassis.
3.
Ensure that the tabs and the latches are positioned on the frame.
4.
Connect the fan cable to the connector SYS_FAN1 on the system board, the black antenna cable to the WLAN card, and the flex-cable to the back I/O
board.
5.
Replace the drive cage (see
Installing the Drive Cage
).
6.
Replace the computer cover (see
Installing the Computer Cover
).
Back to Contents Page
NOTICE:
Ensure that you remove all cables out of the way before replacing the panel.