Epson 2450 Scanner Basics - Page 21
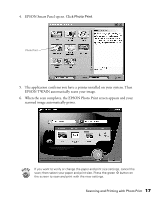
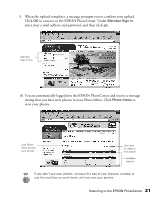
When the scan completes, the EPSON Photo Print screen appears and your
 |
UPC - 010343837836
View all Epson 2450 manuals
Add to My Manuals
Save this manual to your list of manuals |
Page 21 highlights
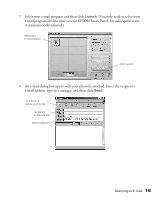
4. EPSON Smart Panel opens. Click Photo Print. Photo Print 5. The application confirms you have a printer installed on your system. Then EPSON TWAIN automatically scans your image. 6. When the scan completes, the EPSON Photo Print screen appears and your scanned image automatically prints. If you want to verify or change the paper and print size settings, cancel the scan; then select your paper and print size. Press the green x button on the screen to scan and print with the new settings. Scanning and Printing with Photo Print 17
-
 1
1 -
2
-
3
-
4
-
5
-
6
-
7
-
8
-
9
-
10
-
11
-
12
-
13
-
14
-
15
-
 16
16 -
 17
17 -
 18
18 -
 19
19 -
 20
20 -
 21
21 -
 22
22 -
 23
23 -
 24
24 -
 25
25 -
 26
26 -
27
-
28
-
29
-
30
-
31
-
32
-
33
-
34
-
35
-
36
-
37
-
38
-
39
-
40
-
41
-
42
-
43
-
44
-
45
-
46
-
47
-
48
-
49
-
50
-
51
-
52
-
53
-
54
-
55
-
56
-
57
-
58
 |
 |

Scanning and Printing with Photo Print
17
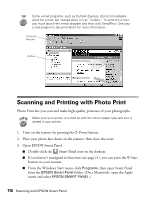
4.
EPSON Smart Panel opens. Click
Photo Print
.
5.
The application confirms you have a printer installed on your system. Then
EPSON TWAIN automatically scans your image.
6.
When the scan completes, the EPSON Photo Print screen appears and your
scanned image automatically prints.
If you want to verify or change the paper and print size settings, cancel the
scan; then select your paper and print size. Press the green
x
button on
the screen to scan and print with the new settings.
Photo Print