Epson 2450 Scanner Basics - Page 3
Contents - photo windows 7
 |
UPC - 010343837836
View all Epson 2450 manuals
Add to My Manuals
Save this manual to your list of manuals |
Page 3 highlights
Contents Introduction Placing Your Document Placing Standard Documents Placing Transparencies and Film Using the Transparency Unit Using Film Holders Scanning with EPSON Smart Panel Smart Panel Basics Reprogramming the Start Button Scanning to E-mail Scanning and Printing with Photo Print Scanning to the EPSON PhotoCenter Sharing Your Photos Scanning a Photo to a File Advanced Scanning Scanning from an Application Selecting the Scanner Source (Windows only) Scanning Your Image Using EPSON TWAIN Using SilverFast SE Installing the SilverFast SE Plugin Recommended Settings 1 3 3 4 4 6 9 10 11 13 16 18 23 24 27 28 28 29 30 32 33 34 iii
-
 1
1 -
 2
2 -
 3
3 -
 4
4 -
 5
5 -
 6
6 -
 7
7 -
 8
8 -
 9
9 -
10
-
11
-
12
-
13
-
14
-
15
-
16
-
17
-
18
-
19
-
20
-
21
-
22
-
23
-
24
-
25
-
26
-
27
-
28
-
29
-
30
-
31
-
32
-
33
-
34
-
35
-
36
-
37
-
38
-
39
-
40
-
41
-
42
-
43
-
44
-
45
-
46
-
47
-
48
-
49
-
50
-
51
-
52
-
53
-
54
-
55
-
56
-
57
-
58
 |
 |

iii
Contents
Introduction
1
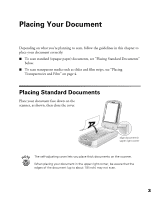
Placing Your Document
3
Placing Standard Documents
3
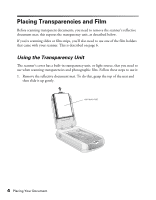
Placing Transparencies and Film
4
Using the Transparency Unit
4
Using Film Holders
6
Scanning with EPSON Smart Panel
9
Smart Panel Basics
10
Reprogramming the Start Button
11
Scanning to E-mail
13
Scanning and Printing with Photo Print
16
Scanning to the EPSON PhotoCenter
18
Sharing Your Photos
23
Scanning a Photo to a File
24
Advanced Scanning
27
Scanning from an Application
28
Selecting the Scanner Source (Windows only)
28
Scanning Your Image
29
Using EPSON TWAIN
30
Using SilverFast SE
32
Installing the SilverFast SE Plugin
33
Recommended Settings
34